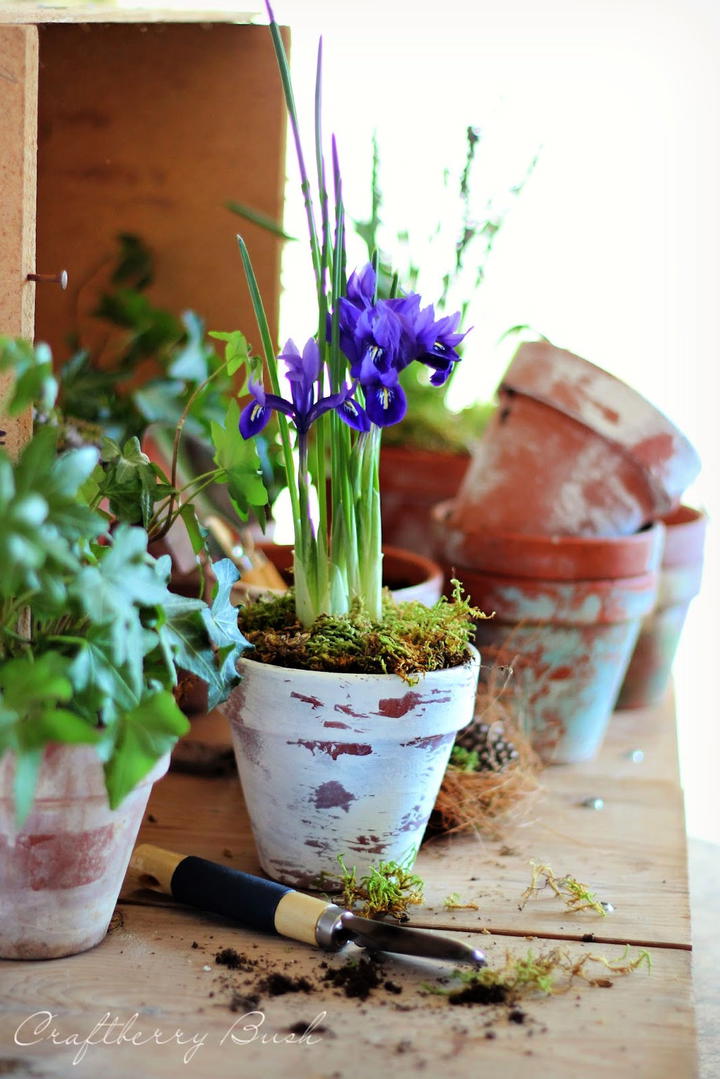
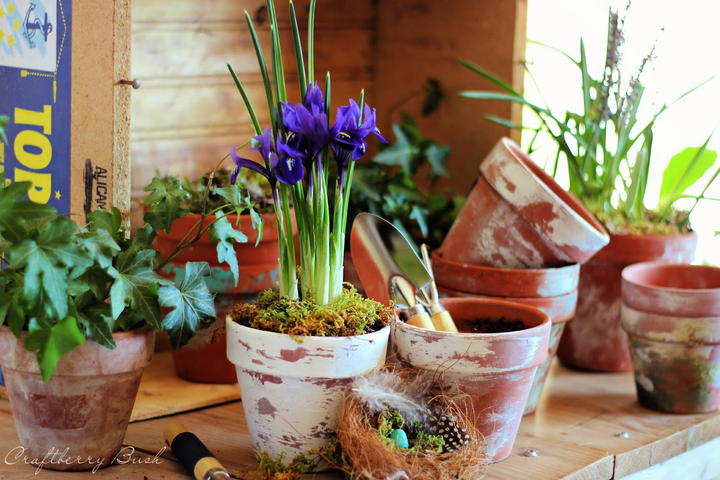
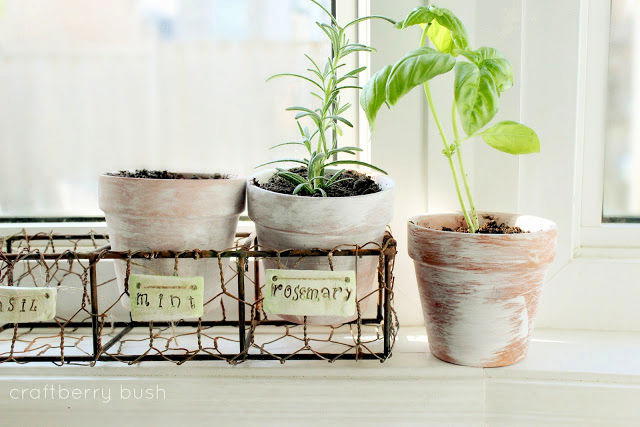
As someone who loves adding a bit of rustic charm to my home decor, I’ve found that nothing quite beats the look of old, chippy terracotta pots filled with vibrant blooms. They bring a sense of nostalgia and warmth that feels both timeless and inviting. I’ve tried several methods to achieve that perfectly imperfect, aged look for my terracotta pots, and today I want to share some of my favorite techniques with you. These steps will guide you to transform your pots, giving them that beautiful chippy texture that looks like they’ve been weathered naturally over the years.
Why Age Terracotta Pots?
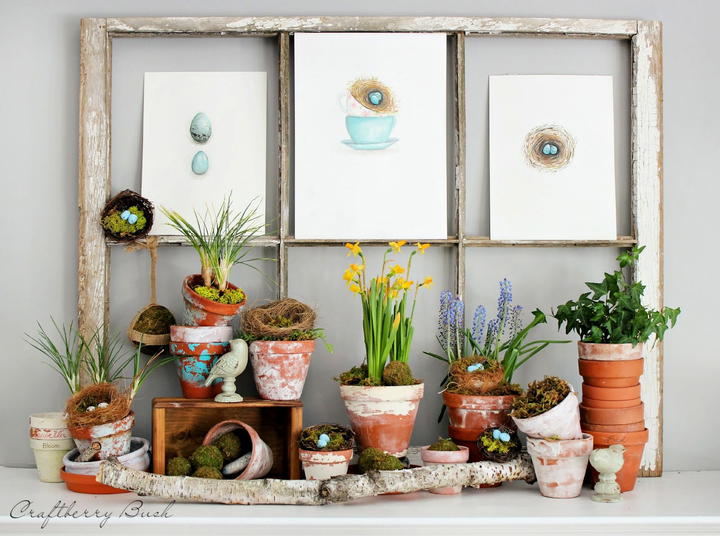
Before diving into the process, let me tell you why I love this craft so much. Aging terracotta pots gives them a vintage look that can instantly add character to any space. Whether you’re sprucing up your garden, creating a charming centerpiece, or adding a bit of interest to your indoor plant collection, these chippy pots make a perfect addition. Plus, it’s a fun and easy DIY project that doesn’t require a lot of materials or time.
Materials You’ll Need
When I first started aging terracotta pots, I experimented with different materials to find what worked best. Here’s what I’ve settled on after a few rounds of trial and error:
- Terracotta Pots: Choose pots in various sizes for added visual interest.
- Chalk Paint or Acrylic Paint: I recommend starting with white, but feel free to experiment with different colors.
- Paintbrushes: A combination of flat and round brushes works best for different painting techniques.
- Paper Towels or Cloth Rags: These will help in wiping off excess paint.
- Water: For diluting paint and cleaning brushes.
- Sandpaper (optional): For distressing the pot after painting.
Each material plays a crucial role in achieving the aged, chippy look. For example, chalk paint is ideal because it dries with a matte finish that gives the pot a more authentic, weathered appearance. And using a combination of brushes allows for different paint application techniques, which I’ll explain in detail below.
Step-by-Step Methods to Make Terra Cotta Pots Chippy
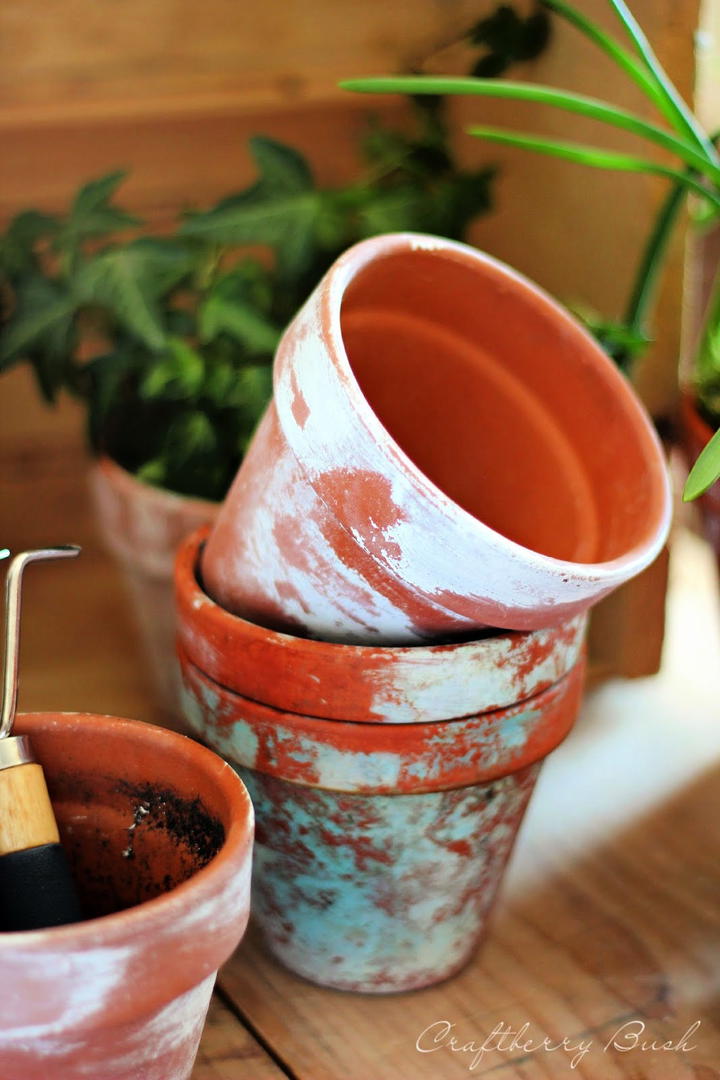
Now, let’s get into the actual process of aging terracotta pots. I’ve tried several methods over the years, and here are three of my favorites. Each method offers a slightly different finish, so feel free to experiment and see which one suits your style best.
Method 1: The Dry Brush Technique for a Subtle Chippy Look
This method is perfect for those who want a more understated chippy effect, where the natural terracotta color still peeks through in places.
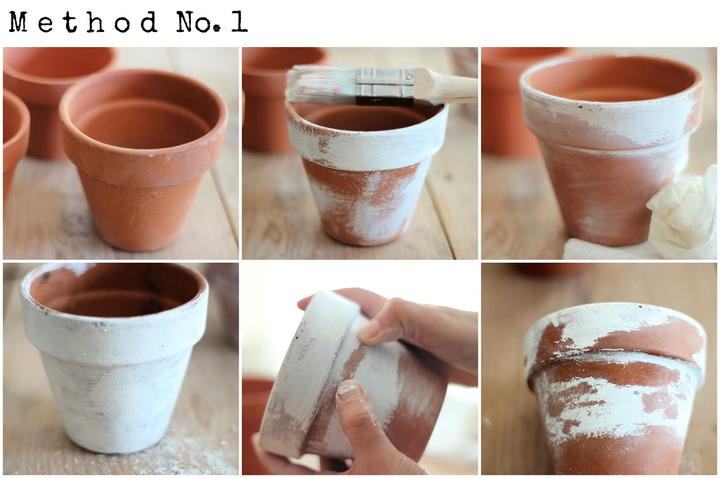
- Apply the First Coat of Paint: Start by painting a thick layer of paint towards the top of the pot. Use a dry brush technique to spread the paint downwards, creating a faded effect as you go. Don’t worry about full coverage; the uneven look is what we’re going for.
- Remove Some Paint: While the paint is still wet, take a moist paper towel and gently rub off some of the paint. This will create that beautiful, worn-out look. Allow the pot to dry completely.
- Apply Another Layer: Repeat the process by adding another thick layer of paint. This second layer will add depth to the chippy effect.
- Rub Off the Paint: Before the second layer of paint completely dries (it should feel tacky to the touch), use your fingers to rub off some of the paint. The paint will come off in a way that leaves behind a chippy, textured look. You can use a wet paper towel to gently wipe off more paint if you want to refine the look.

I love this technique because it gives the pots a naturally aged appearance without looking overly distressed. It’s great for achieving a farmhouse or cottage-style vibe.
Method 2: The Whitewash Technique for a Light, Weathered Look
If you prefer a lighter, more washed-out appearance, the whitewash technique might be your go-to. This method is great for adding a subtle, worn look to terracotta pots.
- Mix the Paint: Dilute white paint with water to create a thin, watery consistency. The paint should be runny enough to spread easily but still retain some opacity.
- Apply the Paint: Using a large brush, paint the entire pot with the diluted mixture. Work quickly because the paint will start drying fast.
- Spread with Your Hand: While the paint is still wet, use the palm of your hand to spread the paint around. This method creates a natural, uneven distribution of paint that mimics the effect of sun and rain over time.
- Repeat if Necessary: You can add more layers for a more pronounced effect. Each layer adds more texture and depth to the pot’s appearance.
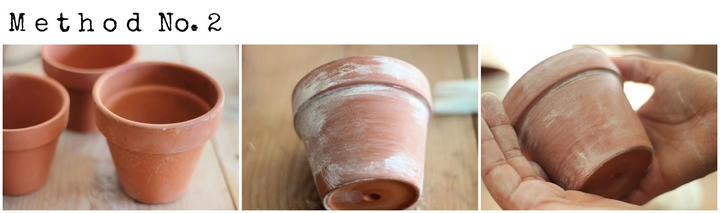
I often use this method when I want my pots to have a more sun-bleached, coastal look. It’s also a quick and easy way to update old terracotta pots without fully covering their natural beauty.
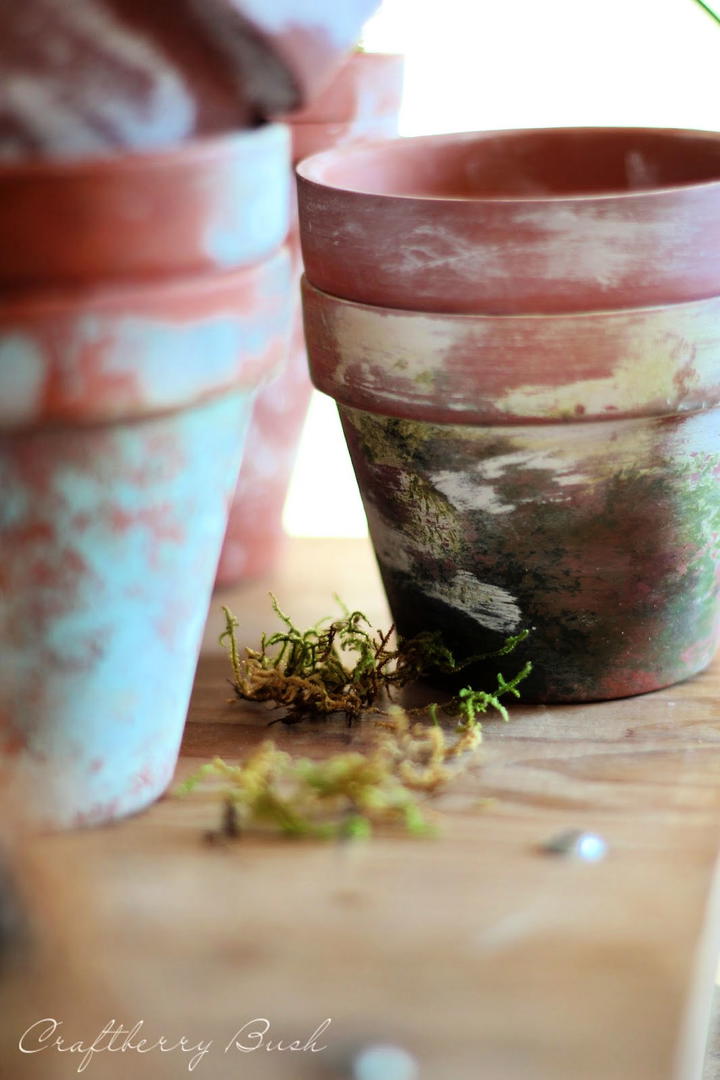
Method 3: The Mossy Green Stipple Technique for a Rustic, Aged Look
This technique is my favorite when I want to create a more rustic, antique look. It adds a bit of faux moss to the pot, giving it a realistic, aged appearance.
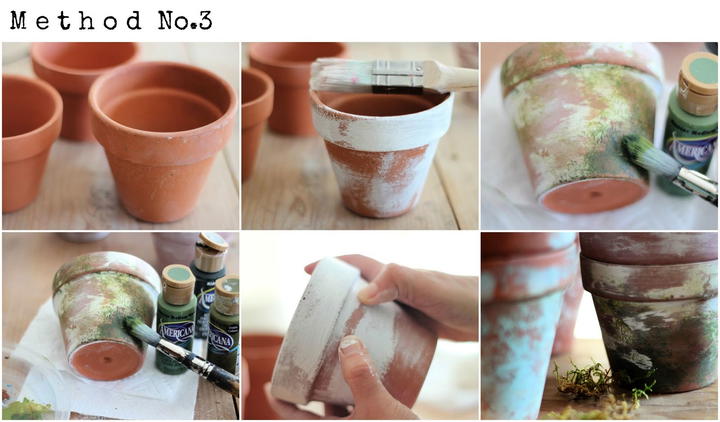
- Base Coat: Start by painting a thick layer of white or light-colored paint on the top part of the pot. Let it dry completely.
- Create the Moss Effect: Using a small, stiff brush, stipple various shades of green paint over the pot. The stippling technique involves dabbing the brush onto the surface, which creates a speckled, textured look.
- Blend the Colors: While the paint is still wet, use your fingers or a cloth to blend the greens. This step mimics the uneven way moss would naturally grow on a pot.
- Repeat the Process: Repeat the stippling and blending process as needed until you achieve the desired mossy, aged look. You can also rub off some of the paint while it’s still tacky for a more worn effect.
This method gives a unique, aged look that’s perfect for garden pots. It adds a bit of greenery without needing real moss, which can be difficult to maintain indoors.
Final Thoughts on Aging Terracotta Pots
Creating chippy, aged terracotta pots is one of those DIY projects that brings so much satisfaction. Not only do these pots look fantastic indoors and out, but they also tell a story—one that you get to create. You can customize each pot with your choice of colors, textures, and levels of distressing, making every piece truly unique.
Whether you’re a seasoned DIY enthusiast or a beginner looking to try something new, these techniques are easy to follow and fun to experiment with. I hope you find joy in crafting your chippy terracotta pots as much as I do. If you have any other techniques or tips you’d like to share, feel free to leave a comment!
Remember, the key to achieving that perfectly imperfect look is to embrace the process and enjoy the journey.
Related posts:
 How to Make a Boutonniere (10 DIY Boutonniere Ideas)
 How to Make a Teepee (20 DIY Teepee Tent Ideas for Kids)
 Easy Origami Flower
 20 Homemade DIY Clown Costume Ideas
 How to Make Cupcake Bath Bombs (10 DIY Recipes)
 15 Easy DIY Key Holder Ideas Anyone Can Make
 32 Free Printable First Day of School Signs For All Grades
 20 Easy DIY Bracelet Holder Ideas (Make Bracelet Display)
 How to Make Candles (25 Easy DIY Candles for Beginners)
 How to Make Polymer Clay Earrings (15 DIY Clay Earrings)
 30 Easy DIY Calendar Ideas to Personalize Your Year!
 DIY Spring Flowers