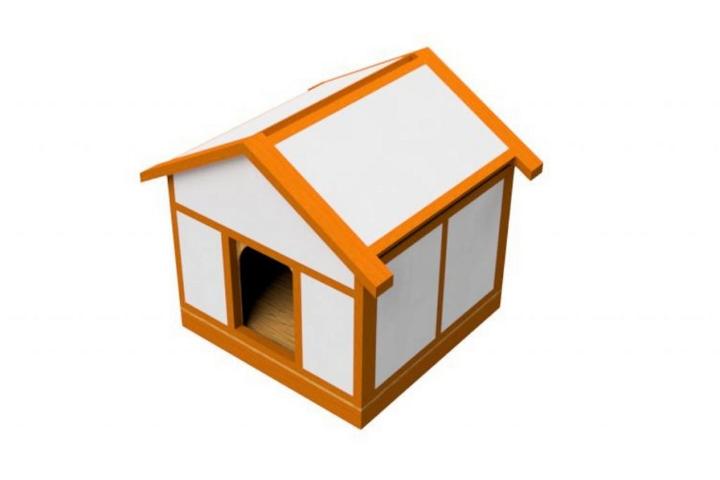
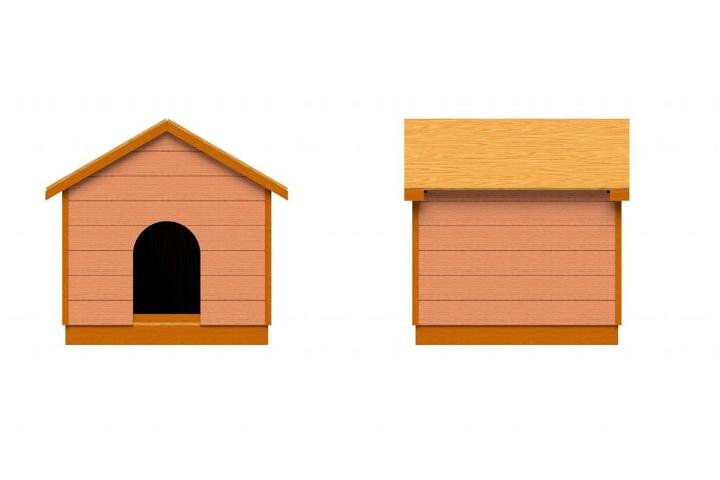
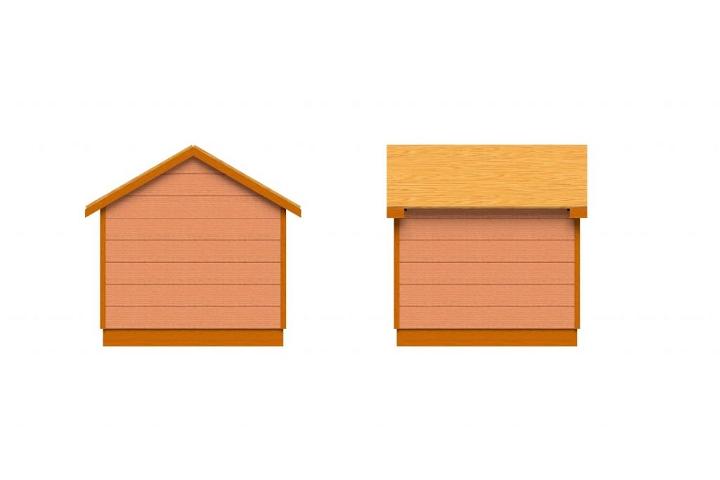
If you’re wondering how challenging it would be to build a dog house for your faithful companion, you’ve come to the right place. In this step-by-step guide, I’m going to walk you through the process.
The title promises a dog house for the winter and summer, and that’s just what these easy dog house plans provide. Of course, insulation is the key to making it warm and weatherproof all year round, but whether you need it or not depends on your location.
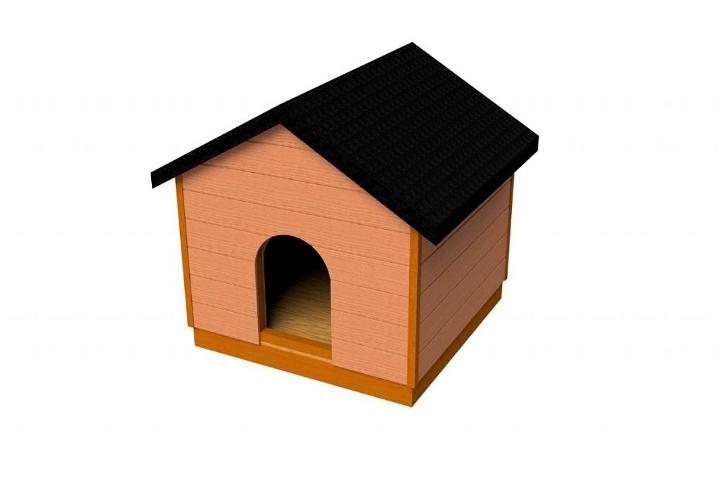
If it’s warm enough for your pooch in the winter and the summer, all you’ve got to do is skip out on the steps relating to cladding and insulation.
What you’ll need
Materials
My choice for framing wood would be between cedar, pine, or fir. If you’re on a tight budget you’ll probably want to stick to softwood too. However if you’re looking to build something that will stand the test of time you might want to consider hardwood.
When working with dimensional lumber the dimensions are ½” less than the nominal sizing would lead you to believe i.e. for 2×4” dimensional lumber it actually measures 1 ½ x 3 ½”.
In these plans I’ve taken this into account, so you don’t need to worry. It’s just something I thought I’d point out in case you find yourself thinking that the measurements don’t stack up.
Framing Lumber
- 2×4 pressure treated lumber – Total: 25’ 1 ½” or 4 off 8’ lengths.
- 2×2 pressure treated lumber – Total: 59’ 2 ½” or 8 off 8’ lengths.
Plywood Sheeting
½” pressure treated plywood – Total area: 3261 in2 or 1 off 3’x3’ board and 1 off 5’x3’ board.
If you’re planning on insulating your dog house you’ll also need:
5/16” pressure treated plywood – Total area: 4778 in2 or 3 off 5’x3’ boards.
Cladding & Insulation
4 ½” Tongue and groove – Total area: 92’ 4” or 12 off 8’ lengths.
If you’re planning on insulating your dog house you’ll also need:
1 ½” thick foam insulation board – Total area: 4085 in2 or 3 off 2’x8’ boards.
Fasteners
- A box of 3” deck screws
- A box of 2” deck screws
- A box of ¾” deck screws
- A pack of 1” long brads that are compatible with your brad nailer
Roofing
2640 in2 felt paper and asphalt shingles.
Tools
- A Power Saw – Circular Saw, Table Saw or Miter Saw
- Jigsaw
- Drill & Drill Bits
- Impact Driver and Driver Bits
- Brad Nailer
- Corner Clamps
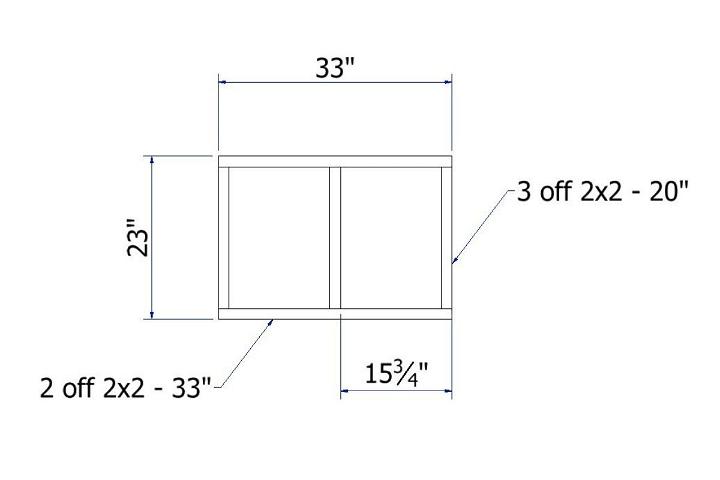
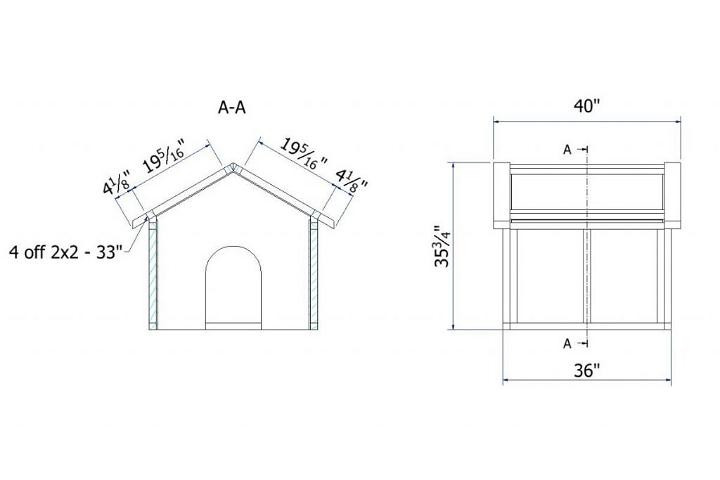
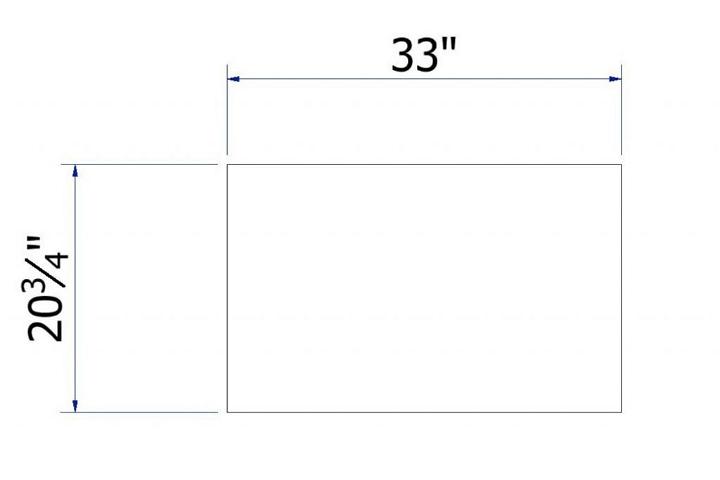
Step 1: Constructing the Base


For your dog house to be sturdy and robust, it needs a solid base. Cut sections of timber, five pieces in total, out of 2×4 planks of wood. Two pieces need to be 36” in length, and three pieces need to be 33” in size.
When it comes to cutting timber for framing you have a number of options when it comes to tools. For me the quickest and most accurate way to make repeatable cuts is on a table saw.
Use three-inch deck screws to screw these lengths together to create a solid base frame. To ensure you build a square frame, it’s best to utilize a set of corner clamps.
Splitting can be an issue when driving screws into timber, but you can reduce the risk of this happening by drilling pilot holes. They need to be 1/8” in width.
Once you’ve assembled the frame of the base, you can screw a plywood sheet to it. Two-inch deck screws work best. Make sure your plywood sheet is pressure-treated as this reduces the risk of rot, dampness, and warping.
Step 2: Making the Side Frames
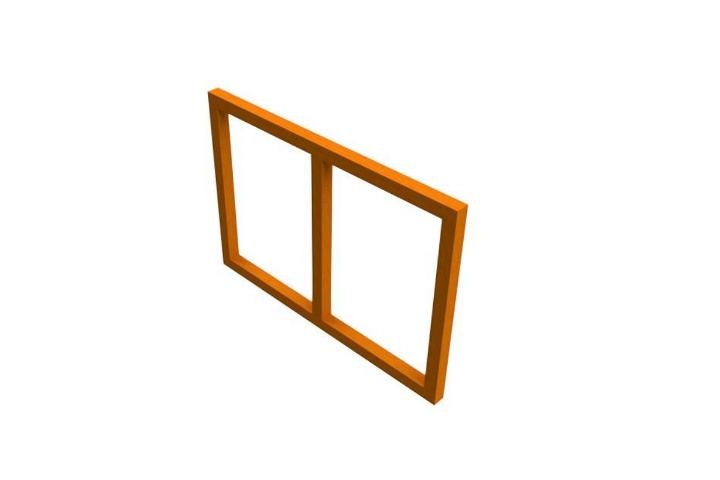

With the base complete, you can move on to making the two side frames. For this, you need to cut six lengths of wood from 2×2 timber. Cut six lengths that are twenty inches long and four that are thirty-three inches long.
Refer to the drawing above and screw the side frames together. You can use the side clamps again here to ensure the construction is square. The difference this time, however, is that you only need to use two-inch deck screws.
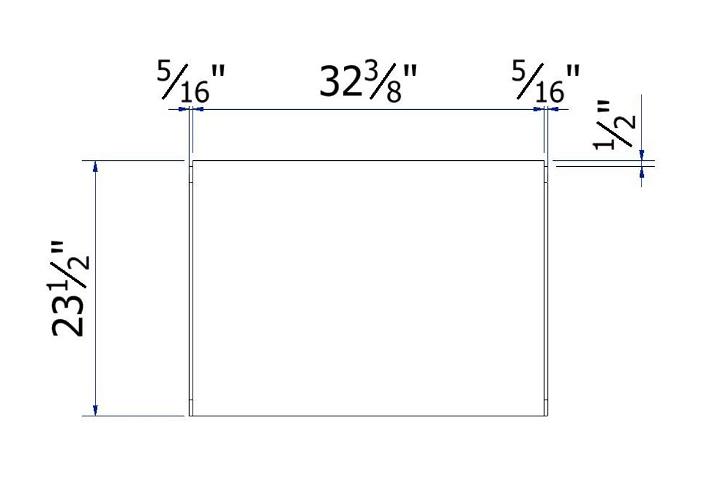
The next step is for those of you who want to make your dog’s house as warm as possible. Of course, you can omit this step if you decide to forgo the insulation.
5/16 inch plywood board is the best material for insulating your dog’s house. You’ll be using it to clad the internal walls inside the frame.
You need two pieces, measuring 32 3/8” x 23 1/2”. Fasten these pieces to the side of each side frame. As you can see from the drawing above, the plywood needs to be flush on both sides of the frame. Whereas at the top, it must be half an inch proud and flush along the bottom edge.
Fasten all this in place with the help of three-quarter-inch deck screws.
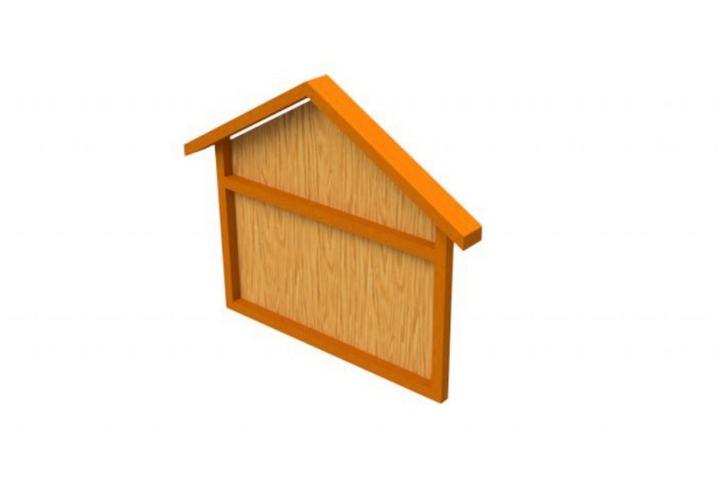
Step 3: Assembling the Frame for the Front
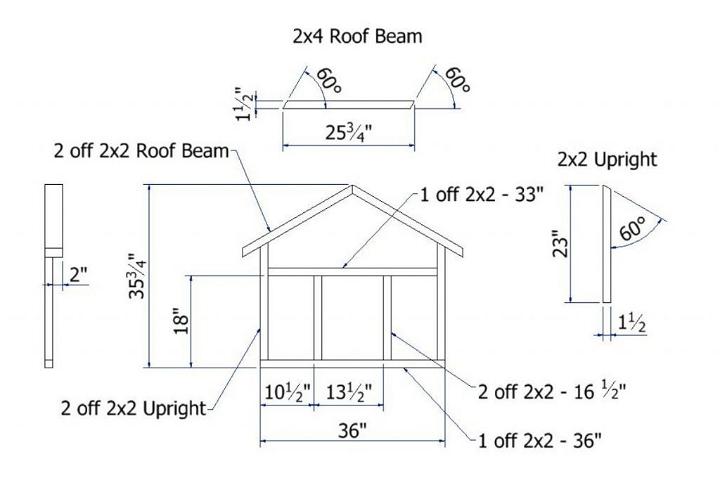
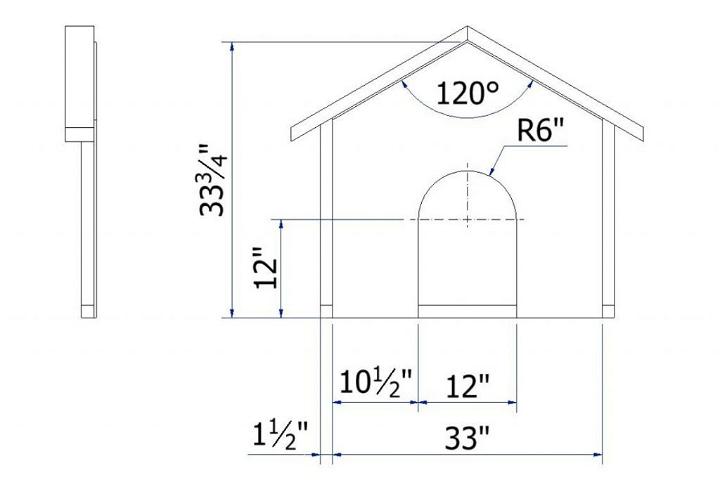
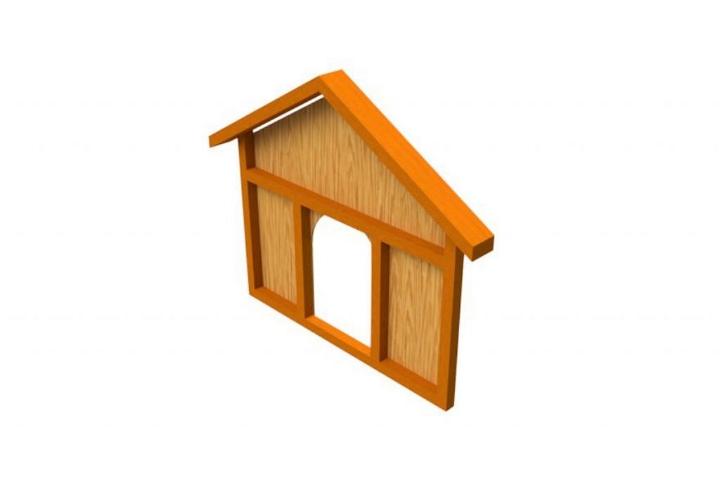
The frame for the front of the dog house needs to include an opening for the door. Start by cutting all the pieces of wood you require to assemble the frame.
For the main frame, you’ll use 2×2 timber. Two pieces must be 16 1/4” long. You’ll also need one piece that’s thirty inches long and one piece that’s thirty-six inches long.
For the roof part of the frame, you need two uprights and roof beams. The roof beams must be cut from 2×4 timber. You need two sections, both 25 3/4 inches long. Into each of these pieces, cut a sixty-degree angle in matching directions. Check the drawing above if you’re unsure what to do.
The uprights that support the roof must be cut from 2×2 sections of wood. They need to be twenty-three inches long. Only one end of the uprights needs to have a sixty-degree angle cut into it.
With all the sections of the frame cut to the correct length, you can assemble them using the illustration above for reference. Use two-inch deck screws.
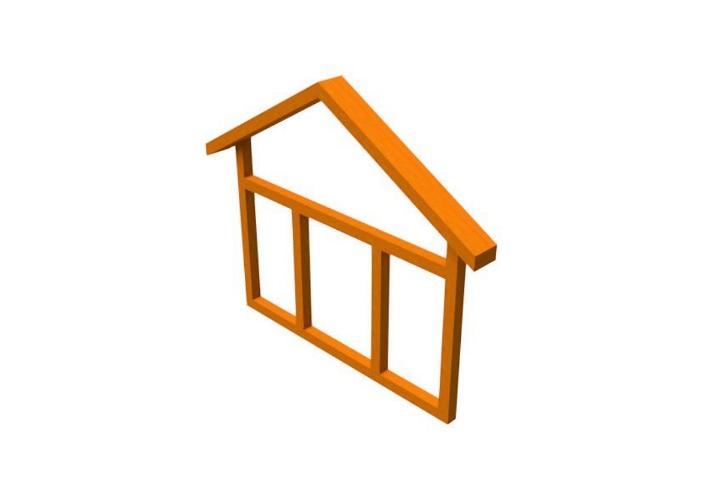
The final part of step number three is for those of you who are insulating your dog’s house.
Cut a section of 5/16 inch plywood board, remembering to cut a section out for the door. To make this job as easy as possible you’ll want to use a jigsaw, they are by far the easiest way to make curved cuts. Again, check the illustration above for the correct dimensions.
The plywood must be fixed on the inside of the frame. Before you fix it using three-quarter-inch deck screws, check that it’s flush with the uprights on the inside and the frame’s bottom.
Step 4: Building the Frame for the Back
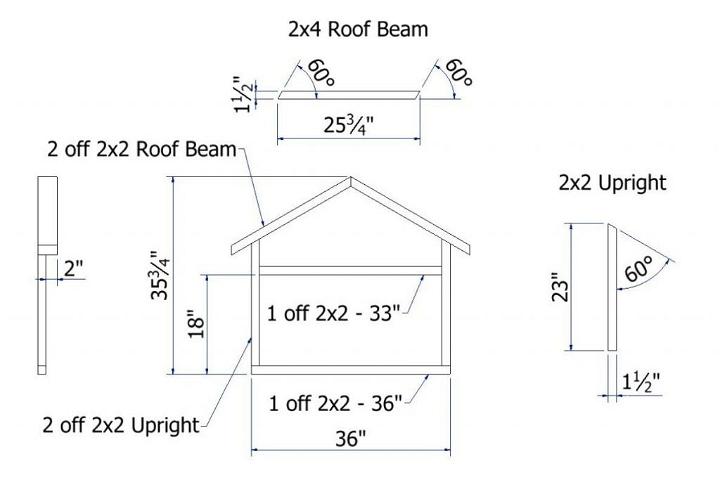

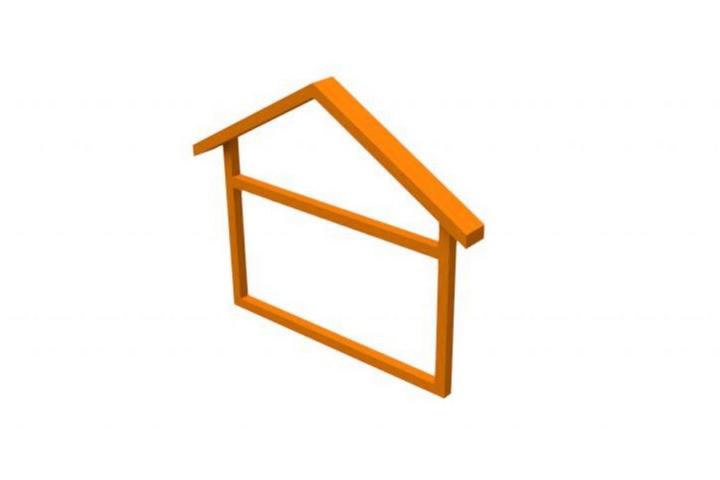

The rear of the dog house is much simpler as there is no need to make allowances for a door.
The dimensions and quantities are the same as the front frame, apart from the vertical members around the door. These members are not needed.
Step 5: Assembling all the Pieces
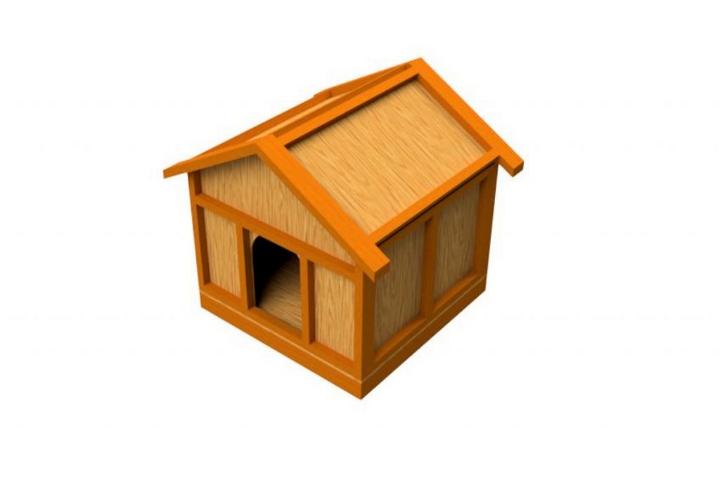
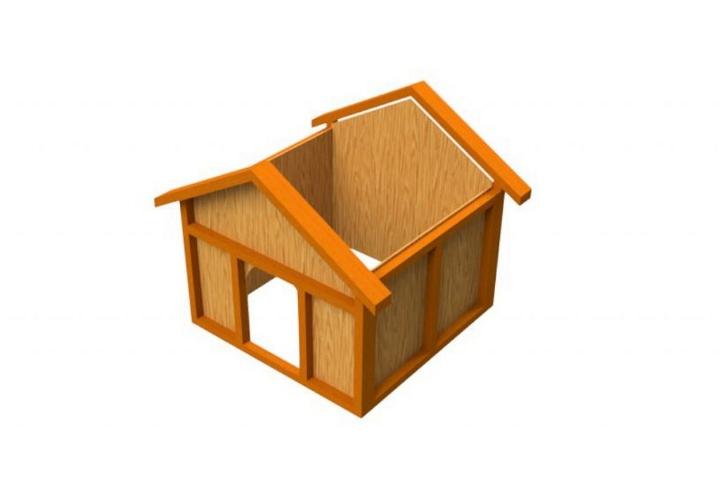
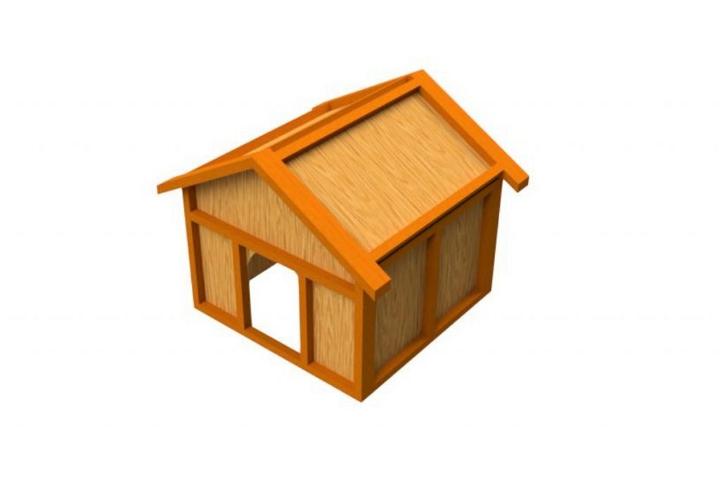
With all the separate components cut and assembled, you can move onto the most exciting stage: assembling all the pieces of your dog house.
The front, rear, and side frames must be fixed together before attaching the house’s structure to the base. However, this step is not quite so important if you’ve chosen not to insulate your dog’s house.
The reason for fixing all the frames together first is that it allows you to access the house’s internal structure. Then, inside the roof, you must attach a plywood board that’s 5/16 inches thick.
Use two-inch deck screws to fix the side, rear, and front frames together. You then need to cut four cross members from 2×2 sections of wood. These cross members must be thirty-three inches long. Secure them in place using two-inch deck screws, referring to the drawing above for the positioning.
Cut two more pieces of plywood board measuring thirty-three inches by twenty and three-quarter inches. These pieces of board must be secured onto the inside of the cross members with three-quarter-inch deck screws.
Now the sides and the roof are complete, you can fix this structure to the base of the dog house. Before securing with three-inch deck screws, check that everything lines up.
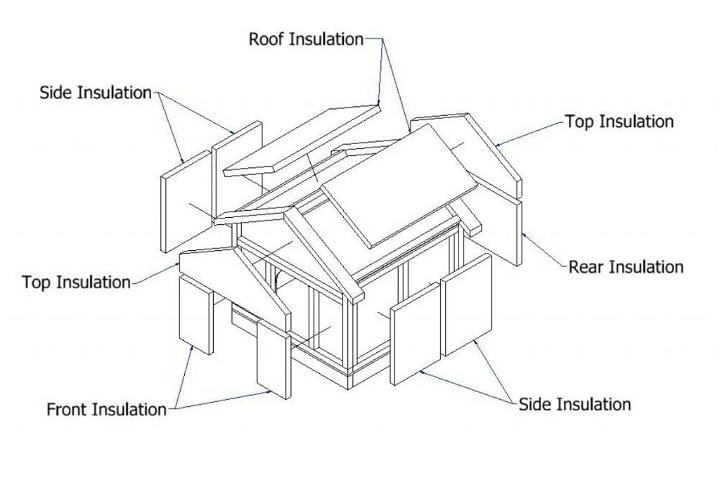
Step 6: Fit the Insulation and the Roof Boards
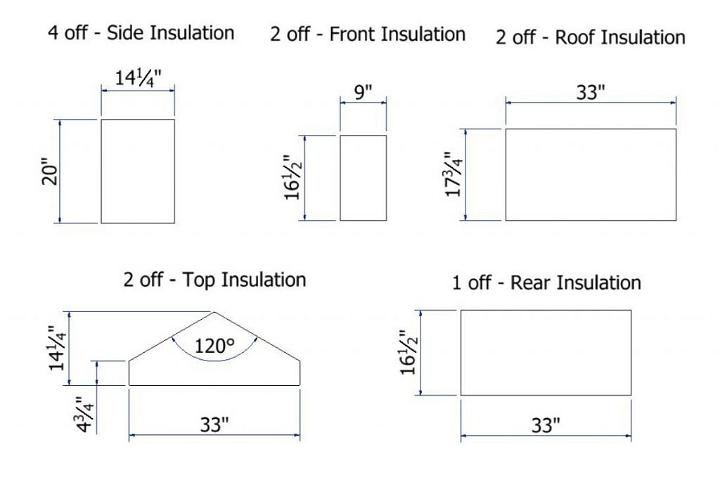
You can use a range of different materials for your dog house insulation. Which one you pick will depend on how much insulation you want to add and how much money you want to spend.
I’ve chosen to use insulation board because it’s easy and swift to apply. However, you could swap this out for something else, such as fiberglass, wool, or other insulating material.
Cut some different length pieces, as follows:
- Four pieces for the side
- Two pieces for the front
- Two pieces for the roof
- Two pieces for the top
- One piece for the rear
Refer to the diagram above when you fit the pieces together. They should fit well and remain in place. Should any of the pieces feel loose or wobbly, simply secure them in place with the help of some double-sided sticky tape.
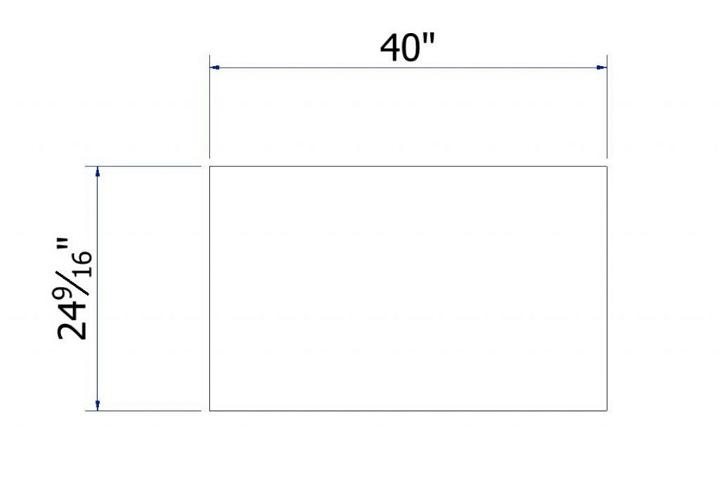
Finally, for this step, cut two sections of plywood board that are half an inch thick. The dimension of this piece must be forty inches by twenty-four and nine sixteenth inches. These boards will form the roof ridge. Use three quarter inch deck screw to make them secure.
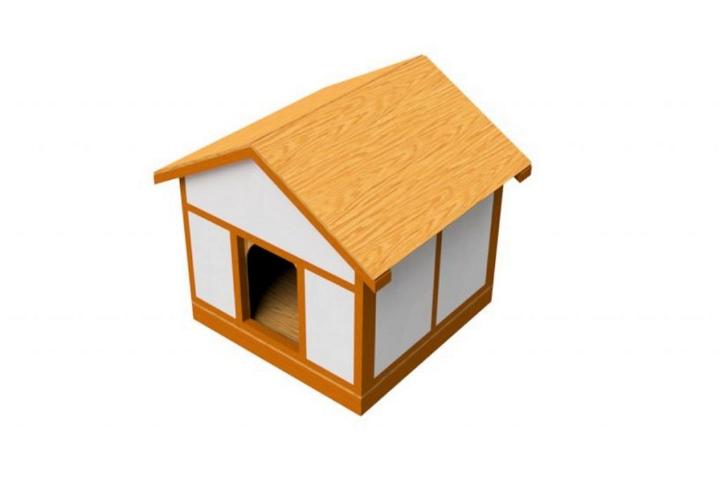
Step 7: Finishing Your Project – Add the Trim, Cladding, and Roofing
That’s the construction side of your dog house project complete.
Now all that’s left to be done is to clad the external walls. You can use a siding board or tongue and groove. I chose to use tongue and groove that’s four and a half inches. If you prefer, any other size will do just as well.
You’ll find plenty of information available online with regards to trimming the dog house or have a try at making it unique with decorating ideas of your own.
Finally, it’s the finishing touch to the roof that needs to be completed. The choice of roofing material is vast. Asphalt shingles and roofing felt are just a couple of your options. I chose to go with felt because it was easy and speedy to apply.
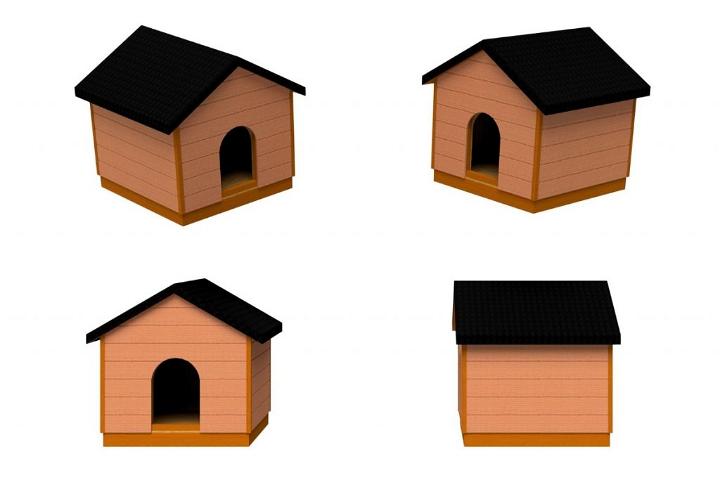
Conclusion
I hope this guide was helpful and you feel confident to try building a dog house of your own.
Send me some pictures when you’ve finished as I’d love to see how much your furry friend enjoys their new home.