Creating handmade soap is one of those delightful DIY projects that feels incredibly satisfying. Not only do you end up with a beautiful and fragrant product, but the process itself is soothing and creative. I’ve always loved the idea of crafting personalized gifts, and homemade soap bars are perfect for this. They’re easy to make, look gorgeous, and are always a hit with friends and family. Let me share with you my experience in making these charming soaps, and hopefully, you’ll feel inspired to try them yourself!

Why Make Your Own Soap?
Making your own soap bars is a fantastic way to express creativity and add a personal touch to your gifts. Store-bought soaps often contain harsh chemicals and synthetic fragrances, but with DIY soap-making, you have full control over the ingredients. You can choose natural scents, colors, and even add meaningful charms or decorative items to make each soap unique. Plus, it’s a fun and rewarding activity, perfect for a cozy afternoon at home or a crafting session with kids.
Materials You’ll Need
Before diving into the soap-making process, it’s essential to gather all the necessary materials. Here’s what you’ll need and why each item is important:
- Pure Glycerin Soap: This is the base for your soap. Glycerin is a transparent soap that melts easily and is excellent for embedding charms and colors.
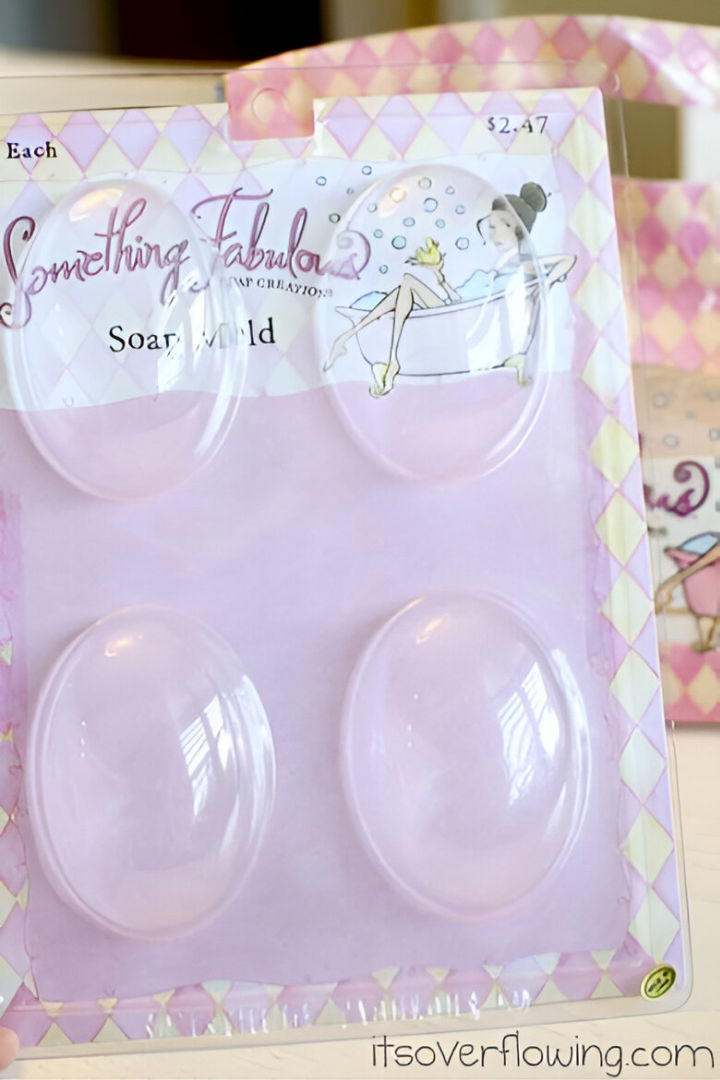
- Soap Mold: You can choose from a variety of molds, from classic rectangles to fun shapes. The mold gives your soap its final shape and structure.
- Aroma Scent: Essential oils or fragrance oils will give your soap a lovely smell. Pick a scent that resonates with you or the person you’re gifting it to.
- Food Coloring: This is used to add color to your soap. Gel-based food coloring works best as it blends well without creating too much mess.
- Charm or Decorative Item: Adding a charm or small decorative item to your soap can make it special. Think of something that reflects the personality or interests of the person receiving it.
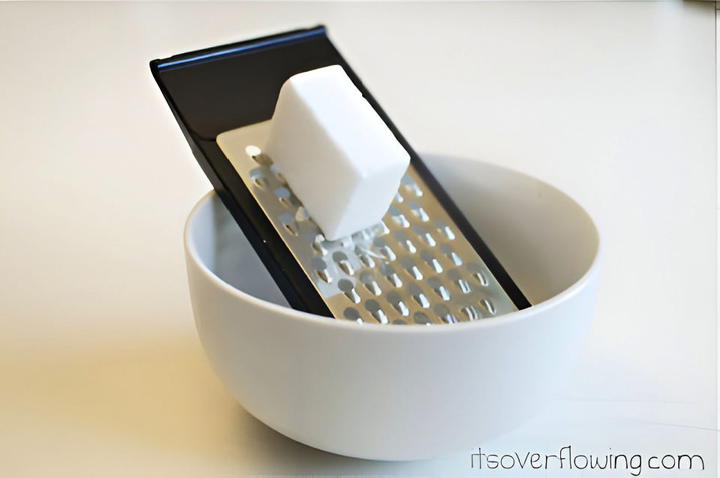
- Microwave-Safe Bowl and Cheese Grater: These are used for melting and preparing your soap. The grater helps in making the soap melt more evenly.
- Nail Set and Hammer: These tools are for embedding the charm securely into the soap.
I found most of these materials at a local craft store like Hobby Lobby, and with their frequent discounts, it was quite a deal. Now, let’s get started!
Step by Step Instructions
Learn how to make soap at home with our DIY soap-making – step-by-step guide. Perfect for beginners, with easy instructions below.
Step 1: Grate the Glycerin Soap
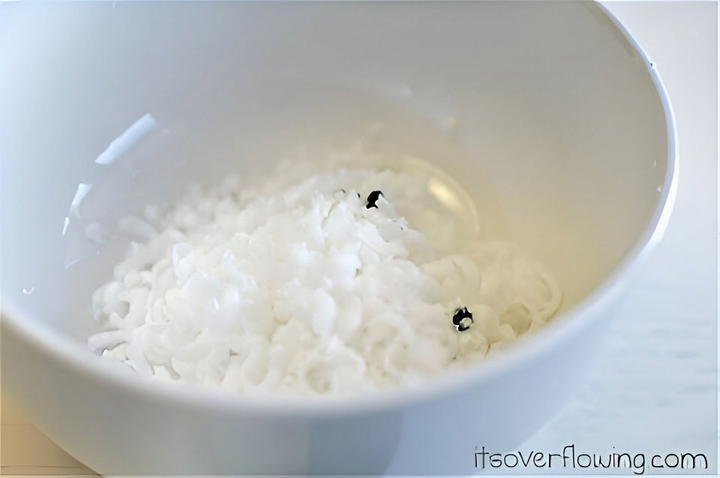
I always start by grabbing a microwave-safe bowl and a cheese grater. Don’t worry about the cleanup; soap is incredibly easy to clean off a grater—much easier than cheese! Grate two bars of glycerin soap directly into the bowl. When you get to the end of each bar, just toss the remaining pieces into the bowl; they’ll melt just as easily.
Pro Tip:
Using a grater helps the soap melt evenly and more quickly. It also makes the process a bit more fun as it reminds me of grating cheese for a homemade pizza!
Step 2: Add Color to Your Soap
Choosing the right color can be a creative process. For my soaps, I love experimenting with different combinations. You can mix two drops of blue with one drop of green for a serene, ocean-like color, or try something vibrant like one yellow and one orange. I usually opt for gel food coloring as it’s less messy and blends better with the soap base.


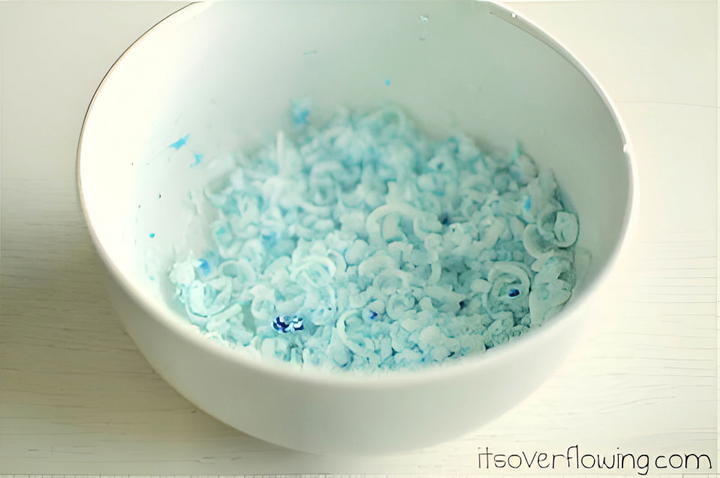
Use a butter knife to blend the color into the soap. At this point, it doesn’t have to be perfectly mixed; just make sure the color is distributed reasonably well.
Pro Tip:
Start with less coloring and add more if needed. Remember, it’s easier to make a color darker than to lighten it!
Step 3: Infuse Your Soap with Fragrance
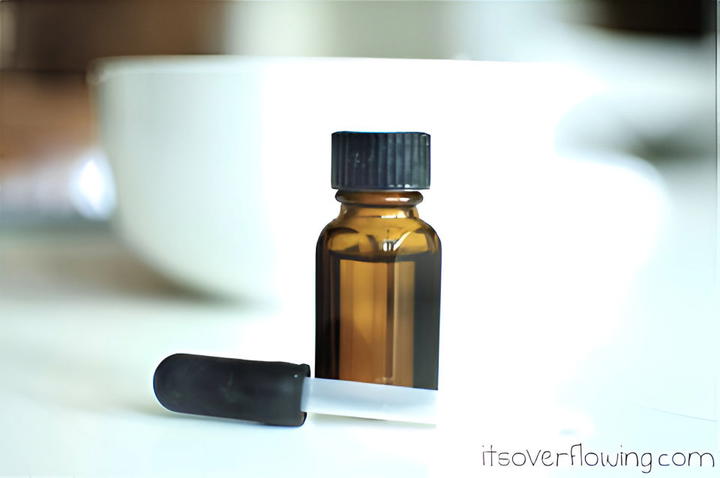
Now comes my favorite part—adding the aroma! A good scent can turn a simple bar of soap into an aromatic experience. For this batch, I chose Vanilla Pomegranate, which has a warm yet refreshing fragrance. I used a half-dropper of the fragrance oil and mixed it evenly with the soap mixture. Trust me, having this scent in every room is a game-changer!
Pro Tip:
Mix your fragrance thoroughly to ensure the scent is well distributed. If you’re unsure which fragrance to choose, go with something universally loved like lavender or citrus.
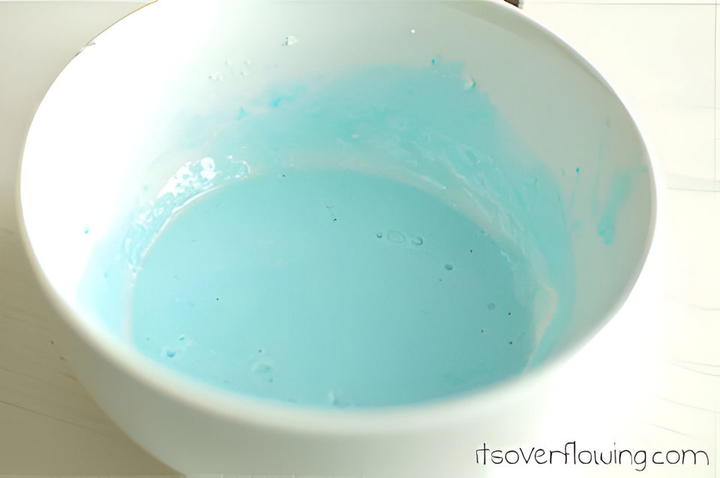
Step 4: Melt the Soap Mixture
Once the soap is grated, colored, and scented, it’s time to melt it. I usually microwave it for about 24 seconds, but this can vary depending on your microwave’s power. Keep an eye on it—it’s ready when it’s fully liquefied but not boiling.
Pro Tip:
If your soap hasn’t melted completely after the first round, give it a quick stir and microwave for another 10 seconds. You want it melted, not overheated.
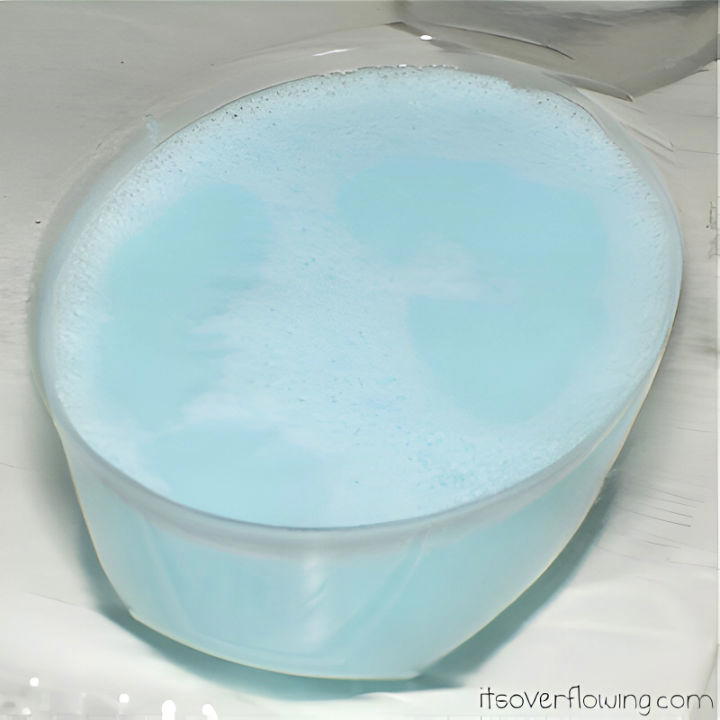
Step 5: Pour the Soap into the Mold
Immediately after melting, pour the liquid soap into your chosen mold. Be quick but careful, as the soap can start to set quite fast. Once poured, it’s time to exercise some patience and wait about 20 minutes. The soap is ready to be removed when it’s no longer hot to the touch and is lukewarm.
Pro Tip:
Lightly tap the mold on the counter after pouring to release any air bubbles. This will ensure a smooth finish for your soap bars.
Step 6: Embed a Charm for a Personal Touch
This is where you can get truly creative! Once the soap has set a little but is still pliable, press your chosen charm into the top of the soap. Hold it in place and use a nail set and hammer to gently press it deeper, ensuring it stays embedded. I like using items like small feathers or even holiday-themed charms for a seasonal touch.
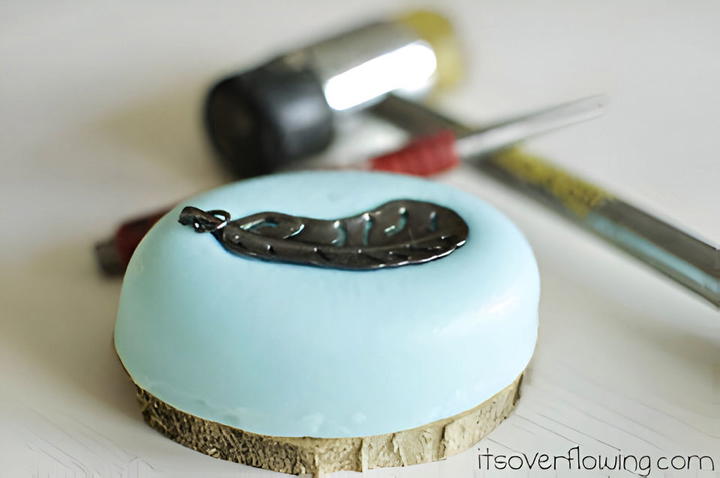
Pro Tip:
Choose charms that are waterproof and won’t degrade when in contact with water. Metal charms or small plastic items work best.
Step 7: Let the Soap Fully Set
The soap now needs to dry completely. Depending on the humidity and room temperature, this can take anywhere from a few hours to a full day. Once fully set, the soap should easily pop out of the mold.

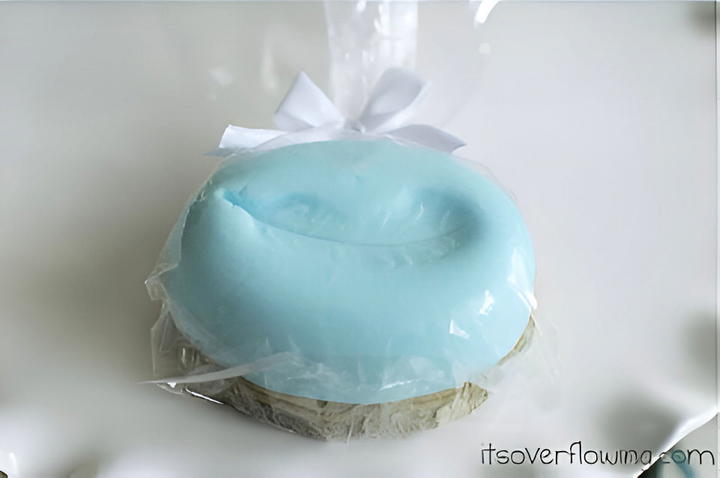
Step 8: Wrap and Gift Your Soap
Now for the finishing touches! Once your soap is fully dry and set, package it in a simple sack with a decorative bow. For an added touch, I like to place my soap on a rustic wooden coaster. If you have any extra tree trimmings lying around, cut a thin slice, sand it smooth, and let it dry for 24-36 hours before using. It makes for a charming presentation!
Final Thoughts
I hope you enjoy making your own beautiful DIY soap bars as much as I do. It’s a fun project that allows for endless creativity and personalization. Not only do you get to create something useful and beautiful, but it’s also a wonderful way to spend time with loved ones or relax on your own. So, gather your materials, let your imagination run wild, and create something truly unique. Happy soap-making!
Related posts:
 How to Install a Garbage Disposal – Step by Step Guide
 DIY Window Shades (Complete Step by Step Tutorial)
 How to Do Laundry: Guide to Washing, Drying, and Care
 Homemade Febreze (15 Easy DIY Febreze Recipes)
 Easy Recipe for Cleaning Mattress, Sofa, and Sofa Cushions
 How to Remove Rust from Metal (Learn Effective Ways)
 How to Clean a House (Cleaning Tips and Tricks)
 How to Hang a Tapestry – Easy Ways with Expert Tips
 What is a French Drain: Insight, Installation, and Benefits
 How to Fold a Fitted Sheet Like a Pro