Building a DIY raised garden bed can transform your gardening experience by improving soil conditions, extending the growing season, and easing the strain on your back and knees. These garden beds offer a smart solution to many common gardening hurdles. Not only do they provide a controlled environment for your plants, but they also add a structured beauty to your outdoor space. Our guide comes packed with 50 easy DIY raised garden bed plans that cater to different sizes, budgets, and skill levels, ensuring that everyone can find a plan that best suits their gardening needs.
The step-by-step instructions on how to build raised garden beds are crafted to be clear and actionable, making it simple for gardeners to achieve success. From selecting the perfect location to choosing the right materials and executing the building process, our guide covers everything you need to know.
Plus, with added tips for success, you’ll be well-equipped to build a thriving garden that can yield lush vegetables, fragrant herbs, or vibrant flowers. Let’s delve into the DIY raised garden bed plans and get your garden growing with confidence and ease.
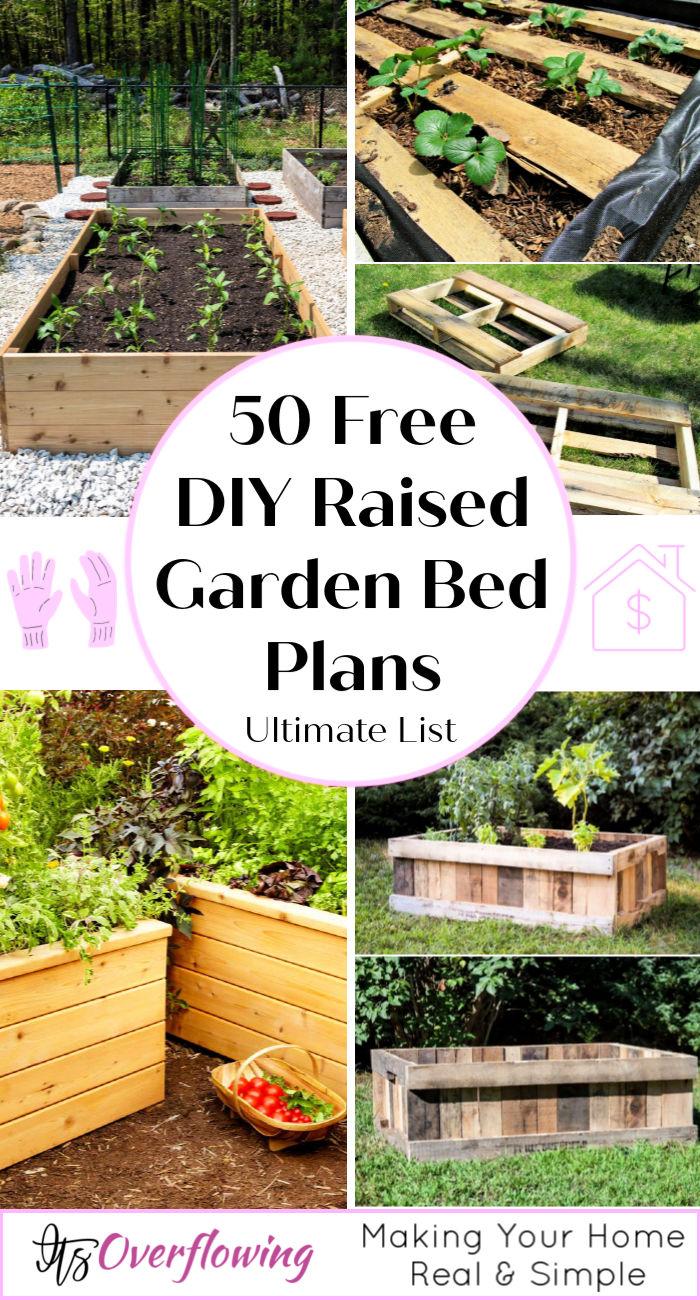
Why Choose DIY Raised Garden Beds?
Discover the benefits of DIY raised garden beds and learn why they are a popular choice for gardening enthusiasts.
- Ease of Access: Raised garden beds bring your garden up to a more comfortable level, making it easier to plant, tend, and harvest without the strain of bending over. It’s a back-saver, especially for those with mobility issues.
- Soil Control: With a raised bed, you’re in charge of the soil. You can build the perfect blend for your plants, which is particularly useful if the native soil is poor or compacted.
- Better Drainage: Elevated soil drains more efficiently. This prevents excess water from pooling, which can lead to root rot or fungal diseases in your plants.
- Extended Growing Season: The soil in raised beds warms up more quickly in the spring, giving you a head start on the growing season. It also stays warm longer into the fall, extending your garden’s productivity.
- Pest Deterrent: A raised bed can help deter some pests, such as slugs and snails. With additional barriers like hardware cloth, you can also prevent burrowing critters from reaching your precious plants.
- Weed Management: By filling your beds with chosen soil, you minimize the influx of weeds. Plus, any unwanted growth is usually easier to pull out from the loose soil of a raised bed.
- Aesthetic Appeal: Raised beds can add structure and beauty to your garden. They’re customizable and can be designed to fit any aesthetic, from rustic to modern.
- Optimal Space Utilization: You can fit more plants into a smaller area because the beds can be built upwards rather than outwards. This makes raised beds perfect for urban gardens or small backyards.
Choosing to DIY your raised garden beds integrates practicality with customization, leading to a fulfilling gardening experience that caters to your specific needs and tastes.
Types of DIY Raised Garden Beds
Creating a raised garden bed can add structure, beauty, and efficiency to your gardening efforts. With the variety of DIY options available, you can find the perfect type to suit your space, aesthetic, and gardening needs. Here, we’ll explore the different types of DIY raised garden beds to help you make an informed decision.
Standard Wooden Raised Beds
Highlights:
- Material: Usually made from cedar, redwood, or pine due to their durability and resistance to rot.
- Accessibility: Great for reducing strain on your back and knees.
- Aesthetic: Can be painted or stained to match your garden’s style.
Why Choose This: If you’re looking for a classic, versatile option that fits well into most garden spaces, standard wooden raised beds are a reliable choice. They are relatively easy to construct and can be adapted to various sizes and heights.
Elevated Raised Beds
Highlights:
- Material: Constructed from wood or metal, often with legs made of sturdy materials.
- Accessibility: Ideal for those with mobility issues or limited bending capability.
- Features: Some designs include built-in storage or shelving underneath.
Why Choose This: Elevated raised beds are perfect for small spaces like balconies or patios. They also make gardening accessible to everyone, minimizing the need to bend down or kneel.
Garden Boxes with Trellises
Highlights:
- Function: Allows for vertical gardening, perfect for climbing plants like tomatoes, peas, or cucumbers.
- Design: Can be added to existing raised beds or built as an integral part of the bed.
- Space-Saving: Excellent for maximizing yield in small spaces.
Why Choose This: If you’re interested in growing vining plants or simply want to add another dimension to your garden, incorporating a trellis can enhance your garden’s productivity and appearance.
Raised Garden Beds on Wheels
Highlights:
- Mobility: Easy to move around to catch sunlight or to rearrange your outdoor space.
- Material: Typically made from lighter woods or durable plastics.
- Convenience: Simplifies tasks like rotating crops or moving sensitive plants indoors during colder months.
Why Choose This: For gardeners who require flexibility and mobility, raised garden beds on wheels offer the ultimate convenience. They’re particularly useful for renters or those who like to frequently change their garden layout.
Tiered Raised Beds
Highlights:
- Design: Beds are arranged in steps or tiers, allowing for efficient use of vertical space.
- Aesthetic Appeal: Adds a visually striking element to your garden.
- Plant Diversity: Ideal for grouping plants with different watering or sunlight needs.
Why Choose This: Tiered raised beds not only optimize your gardening space but also create an attractive focal point in your garden. They’re a smart choice for gardeners looking to diversify their plant selections.
Keyhole Gardens
Highlights:
- Design: Features a central composting basket and a keyhole-shaped path for easy access.
- Sustainability: Promotes efficient watering and nutrient recycling.
- Climate Resilient: Works well in arid climates by conserving moisture and enriching the soil.
Why Choose This: Keyhole gardens are an innovative option for those interested in permaculture and sustainable gardening practices. They’re particularly suited to challenging environments and can help produce robust plants with minimal water and fertilizer.
When choosing the type of DIY raised garden bed that’s right for you, consider your space, the plants you wish to grow, and your personal gardening needs. Whether you opt for a classic wooden bed, a space-saving elevated option, or an clever keyhole garden, the right choice can significantly enhance your gardening experience and yield.
How to Build a DIY Raised Garden Bed
Making your own DIY raised garden bed is a rewarding project that can enhance your gardening experience, increase your crop yield, and beautify your outdoor space. Whether you’re a seasoned gardener or a green-thumb-in-training, this step-by-step guide will help you build a raised garden bed that suits your needs.
Choosing Your Location and Materials
Location: The first step is selecting the right location for your raised garden bed. Look for a spot that receives at least eight hours of sunlight a day. Avoid areas that are too shady or prone to water logging.
Materials: You’ll need untreated cedar wood, hardware cloth, plastic sheeting, exterior screws, raised bed soil, a tape measure, a drill, and a saw (circular or miter). Cedar wood is preferred for its durability and resistance to rot, but you can choose other materials that suit your budget and aesthetic preferences.
Building Your Raised Garden Bed
Now, learn how to build your own raised garden bed with our step-by-step guide below.
Step 1: Measure Your Space
Determine the size of your garden bed based on the available space. A common size for a single bed is 4 feet by 8 feet, which allows for easy access from all sides without stepping into the bed.
Step 2: Cut Your Wood
Based on your measurements, cut the cedar planks to size. For a 4×8 foot bed, you’ll need four 4-foot lengths and four 8-foot lengths for the sides, plus additional pieces for the corners if you’re not using corner brackets.
Step 3: Assemble the Frame
Lay out the planks to form the frame of your raised bed on a flat surface. Using the drill and exterior screws, attach the planks at each corner to form a rectangular frame. If you’re using corner brackets, place them at each corner for added stability.
Step 4: Prepare the Site
Clear the selected area of any weeds or grass. Lay down hardware cloth to prevent burrowing pests from entering your garden bed. If placing your bed on concrete or another hard surface, skip this step.
Step 5: Position the Frame
Place your assembled frame in the chosen location. If you’re working on uneven ground, you may need to level the area beneath the frame by removing or adding soil.
Step 6: Add Soil and Compost
Fill your garden bed with a mix of topsoil, compost, and potting soil. A good ratio to start with is 60% topsoil, 30% compost, and 10% potting soil. This mix will provide a nutrient-rich environment for your plants to thrive.
Step 7: Plant Your Garden
Now that your raised bed is ready, it’s time to plant. Consider the spacing requirements for the plants you’ve chosen. A mix of root vegetables, leafy greens, and herbs is a great way to start. Remember to water your plants regularly, especially during dry periods.
Tips for Success
- Drainage: Ensure your garden bed has good drainage to prevent waterlogging. You can do this by adding a layer of gravel at the bottom of the bed before adding soil.
- Pest Control: Consider installing a barrier around your raised bed to keep out slugs, snails, and other garden pests. A simple fence made from chicken wire can be effective.
- Maintenance: Regularly check your plants for signs of disease or pests. Remove weeds that may compete with your plants for nutrients and water.
Building a DIY raised garden bed is a simple yet fulfilling project that can significantly improve your gardening experience. By following these steps and tips, you’ll be well on your way to the fruits (and vegetables) of your labor. Happy gardening!
FAQs on DIY Raised Garden Beds
Discover frequently asked questions (FAQs) about DIY raised garden beds. Get expert tips and insights to build your own thriving garden oasis.
What is a DIY Raised Garden Bed?
A DIY raised garden bed is a garden bed that is built above the natural terrain of your yard, allowing you to build a dedicated and controlled environment for your plants. It’s a popular choice for gardeners looking to improve drainage, soil quality, and ease of access to their plants.
Why Should I Choose a Raised Garden Bed?
Raised garden beds offer several benefits, including:
- Better soil control, allowing you to build the perfect mix for your plants
- Improved drainage, which is essential for healthy plant growth
- Easier access to your plants, reducing the need for bending and stooping
- Extended growing season due to warmer soil
- Pest and weed management is simplified
- Aesthetic appeal, adding structure to your garden
What Materials Do I Need to Build a Raised Garden Bed?
To build a basic raised garden bed, you will need:
- Untreated cedar wood or any rot-resistant lumber
- Hardware cloth (for pest prevention)
- Plastic sheeting (optional, for additional weed and pest barrier)
- Exterior screws
- Raised bed soil mix
- Tools: tape measure, drill, saw (circular or miter)
How Do I Choose the Right Location for My Raised Garden Bed?
When choosing a location for your raised garden bed, consider the following:
- Sunlight: Most vegetables and fruits require at least 6-8 hours of direct sunlight per day.
- Drainage: Avoid low spots where water tends to collect.
- Accessibility: Make sure you can easily access your garden for planting, watering, and harvesting.
Can I Place a Raised Bed on Concrete?
Yes, you can place a raised garden bed on concrete or any hard surface. If doing so, ensure you have adequate drainage in your bed design, such as drainage holes or a layer of gravel at the bottom, to prevent waterlogging.
What Plants Grow Best in Raised Garden Beds?
Almost any vegetable, fruit, or herb can thrive in a raised bed, but some the best candidates include:
- Root vegetables (carrots, beets, potatoes)
- Leafy greens (lettuce, kale, spinach)
- Alliums (onions, garlic)
- Nightshades (tomatoes, peppers, eggplants)
- Herbs (basil, thyme, cilantro)
How Deep Should My Raised Garden Bed Be?
A depth of 12-18 inches is ideal for most plants, allowing ample room for roots to grow. However, some deep-rooted vegetables like tomatoes and carrots may benefit from even deeper beds.
How Do I Maintain My Raised Garden Bed?
Maintaining your raised garden bed involves:
- Regular watering, ensuring the soil stays moist but not waterlogged
- Adding mulch to help retain soil moisture and suppress weeds
- Periodically adding compost to replenish nutrients in the soil
- Checking for pests and diseases and taking appropriate measures to combat them
Can I Use Treated Wood for My Raised Garden Bed?
It’s best to avoid using treated wood, as the chemicals used in the treating process can leach into the soil and potentially into your plants. Instead, opt for untreated, rot-resistant woods like cedar or redwood.
Understanding and addressing these frequently asked questions can help you successfully plan, build, and maintain your DIY raised garden bed, leading to a fruitful and enjoyable gardening experience.
50 Easy DIY Raised Garden Bed Plans
Discover 50 simple DIY raised garden bed plans to elevate your gardening game. Build your own beautiful and productive garden with these easy-to-follow guides.
1. How to Make a Raised Garden Bed
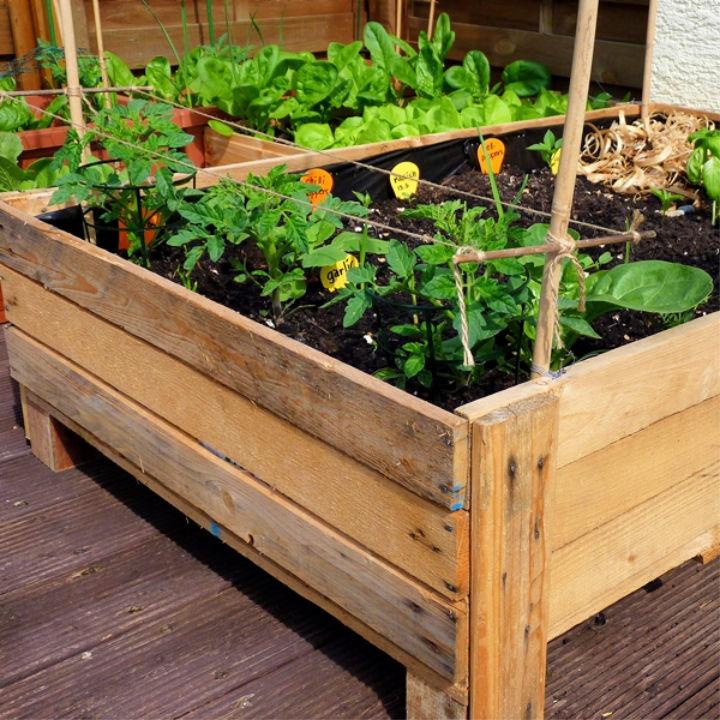
Transform your terrace into a lush vegetable oasis with Foxy Folksy‘s guide on building a DIY planter box from upcycled pallets. Ideal for those with limited space, this cost-effective method enhances your gardening experience by offering ease of mobility and reduced maintenance. Our step-by-step tutorial walks you through dismantling pallets, constructing your box, and preparing it for a thriving vegetable garden.
Embrace container gardening and cultivate your own herbs and veggies right on your balcony. Get ready to enjoy the fruits of your labor with this straightforward and rewarding project.
2. Homemade Raised Garden Bed
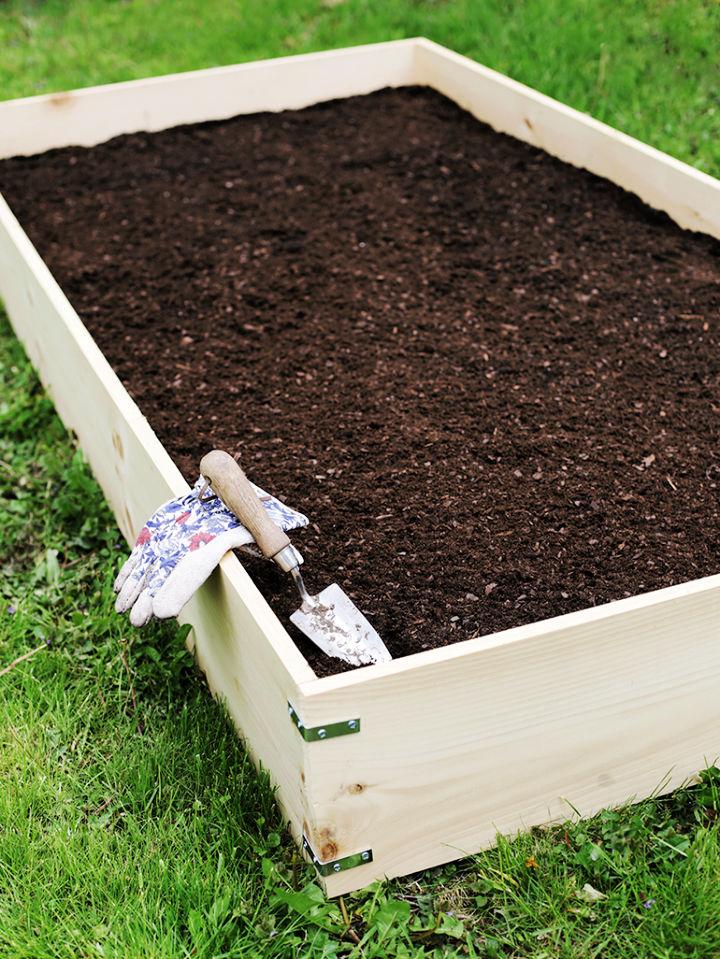
Ready to cultivate your gardening skills? The Merrythought presents a simple and engaging guide to building your own raised garden bed. Perfect for aspiring gardeners, this tutorial outlines the steps to construct a basic frame for your veggies to flourish in. You’ll learn how to cut and assemble untreated wood, secure it with corner braces, and prepare the bed with nutrient-rich soil. Plus, get tips on transitioning indoor seedlings and planting a variety of herbs and vegetables. Start your gardening adventure with confidence and watch your green thumb bring vibrant life to your backyard.
3. Raised Garden Beds for Vegetable Garden
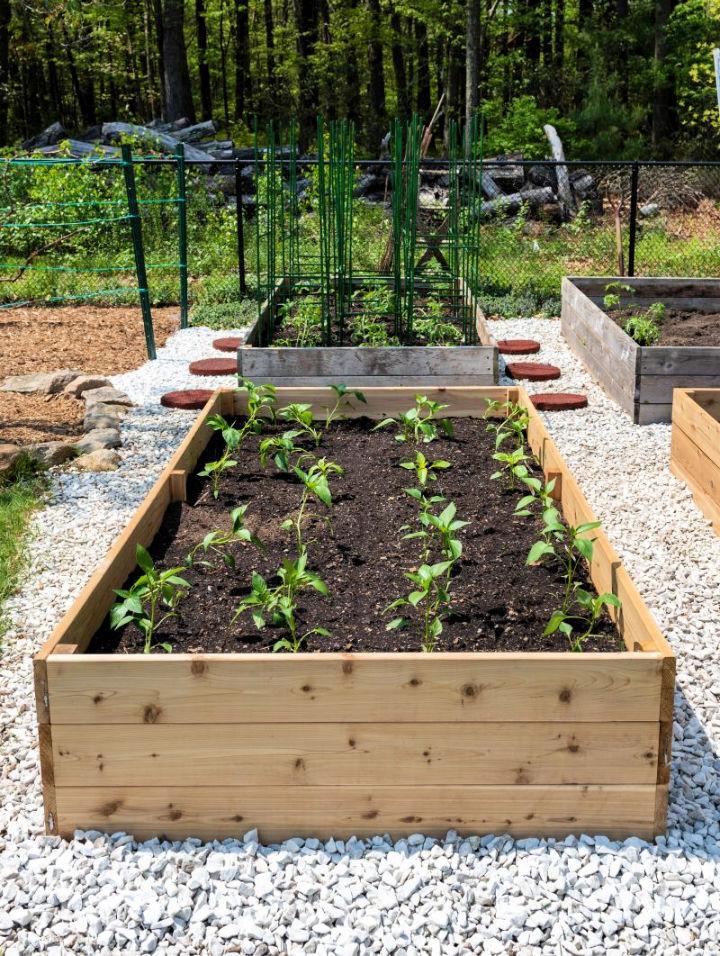
Elevate your gardening game with a DIY raised garden bed that brings ease and elegance to your backyard. The Navage Patch offers a step-by-step guide to constructing your own raised garden bed with minimal hassle. In just five straightforward steps, you can transform cedar boards into a sturdy, elevated bed ideal for growing vegetables, herbs, or flowers. No more strenuous bending or kneeling—enjoy the convenience of gardening at a comfortable height. This instructive tutorial is packed with practical tips to ensure your gardening efforts are as rewarding as they are beautiful. Get ready to build a raised bed that’s not only kind to your back but also a charming addition to your outdoor space.
4. How to Build a Raised Garden Bed
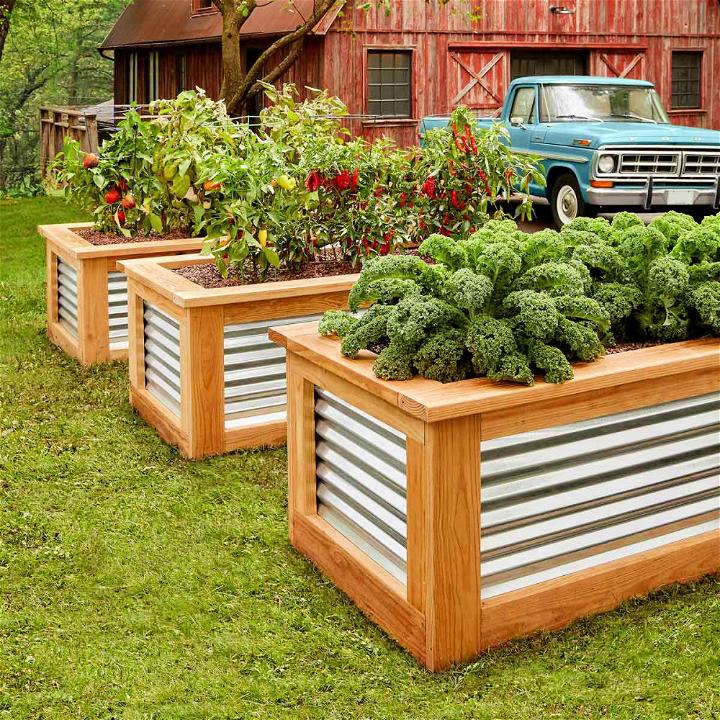
Elevate your gardening game with a DIY raised garden bed that combines functionality with a touch of elegance for your yard. Family Handyman provides an in-depth guide on constructing your own raised garden boxes, which are not only aesthetically pleasing but also make tending to your plants easier on your body. Perfect for boosting productivity in compact spaces, these garden beds also help in managing weeds and deterring pests.
With a detailed list of materials and tools, along with step-by-step instructions, you’ll be equipped to build a thriving garden space that’s both convenient and charming. Get ready to transform your outdoor area and enjoy the benefits of raised bed gardening.
5. Making a Raised Garden Bed With Trellis
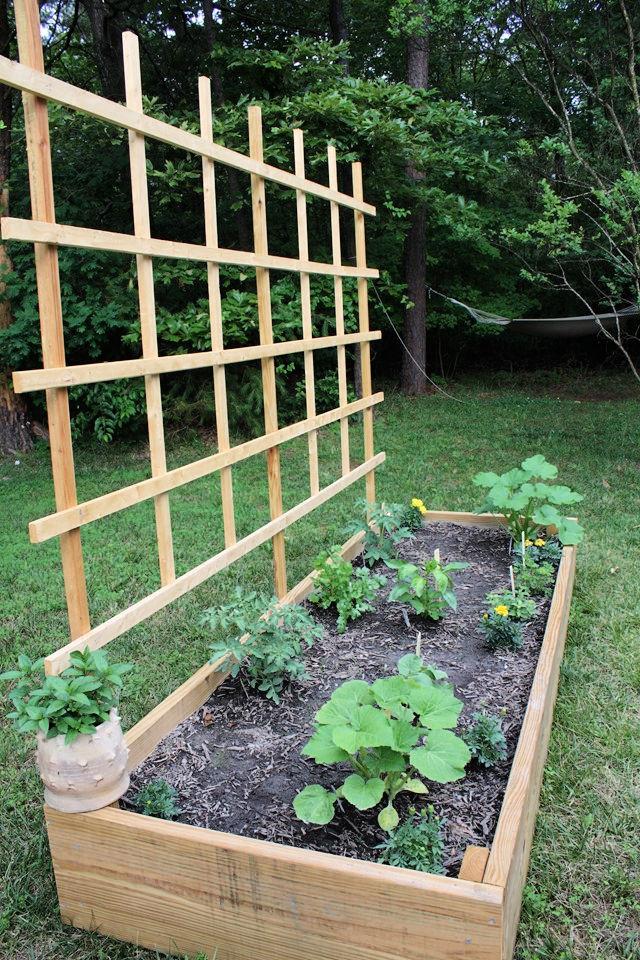
Interested in growing your own vegetables but unsure where to start? Emily A. Clark shares her journey of building a raised-bed garden with the help of a user-friendly online course from Lowe’s and Craftsy. With clear instructions and a handy shopping list, Emily transformed her gardening aspirations into reality. Discover how she, with family support, constructed a functional garden and a DIY trellis for under $200.
Perfect for home gardeners seeking inspiration, her story is a testament to what can be achieved with a little guidance and teamwork. Explore Emily’s experience and get motivated to cultivate your own little green space. Visit Emily A. Clark for the full scoop on building a delightful garden that’s easy on the wallet and a joy for the family.
6. DIY Raised Garden Bed
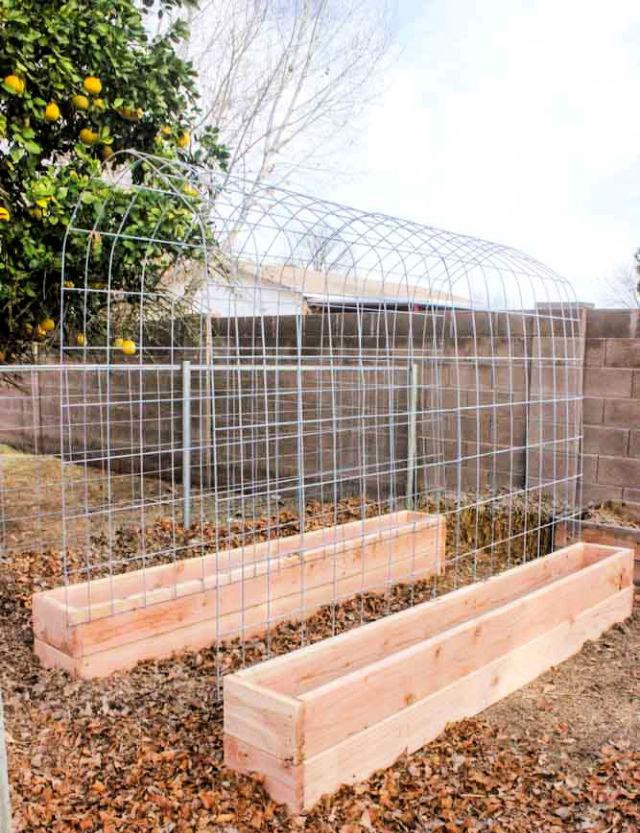
Crafting a trellis and raised garden box combo is an engaging and practical project for any gardening enthusiast. With DaNelle Wolford‘s straightforward tutorial on Weed ’em & Reap, you can transform your garden space with ease. This guide walks you through each step, from gathering materials to the final assembly. Learn how to combat persistent weeds like bermuda grass and build an elevated space for your plants to thrive.
The result is not only functional but also aesthetically pleasing, adding charm to your outdoor area. Follow these instructions for a rewarding DIY gardening project that enhances your green thumb capabilities.
7. Building a Raised Garden
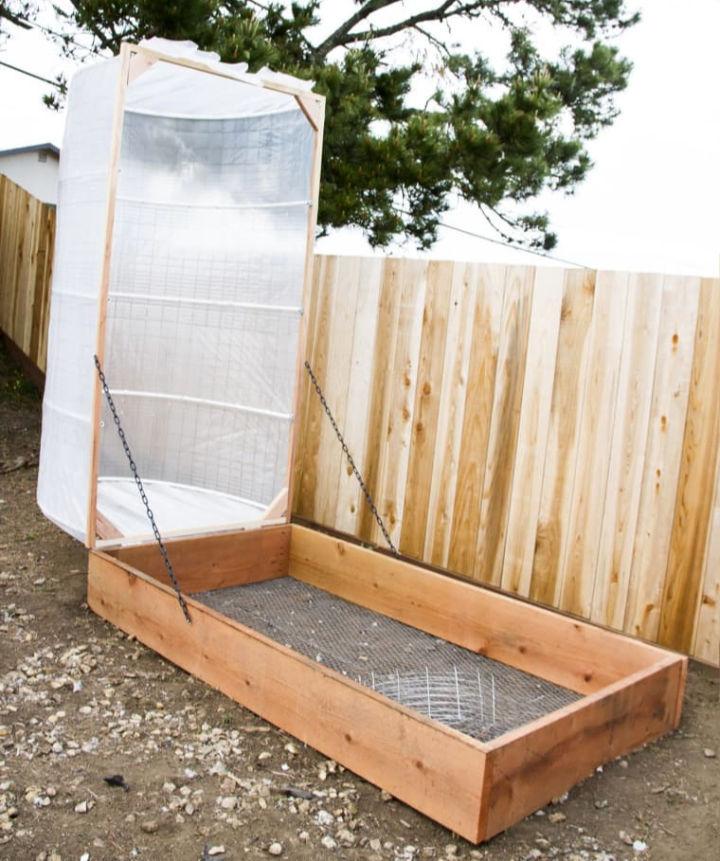
Transform your garden into a thriving haven with Stephanie Strickland’s DIY Covered Greenhouse Garden guide on Apartment Therapy. Stephanie shares her journey of building a garden that combats chilly fog and harsh winds, ensuring a bountiful harvest. This step-by-step tutorial empowers you to build a removable covered greenhouse that increases warmth, wards off pests, and extends the growing season.
Ideal for those facing similar climate challenges, her approach is practical, yielding impressive results and the joy of home-grown produce. Engage with her insights and tips to elevate your gardening game, even in less-than-ideal weather conditions.
8. Raised Garden Bed Building Plan
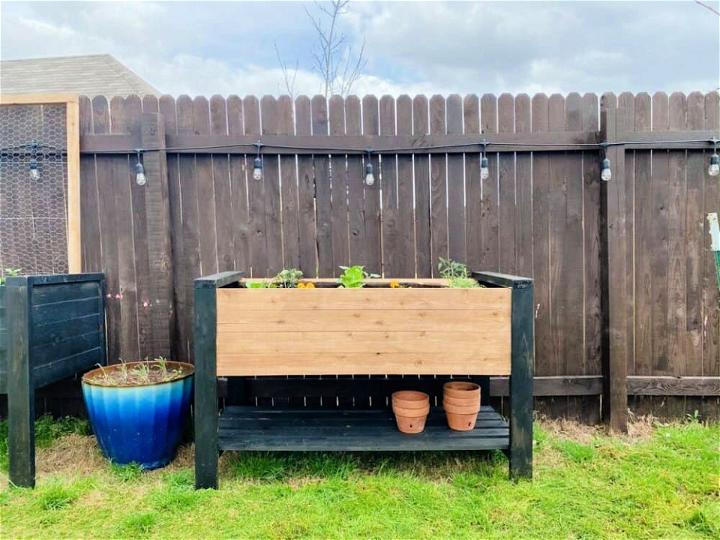
Discover how to build a DIY raised garden bed with Love & Renovations‘ comprehensive guide. Ideal for small yards or challenging terrains, this tutorial provides step-by-step instructions for crafting a raised garden bed on legs, using durable cedar wood and avoiding the need for bending over. Learn how to select materials, cut wood to size, and assemble your garden bed with or without a Kreg Jig.
The guide also covers adding support, lining with chicken wire and landscape fabric, and offers tips for planting a variety of vegetables and herbs. Get ready to enhance your gardening experience with this functional and movable raised garden bed.
9. Make Your Own Raised Garden Bed
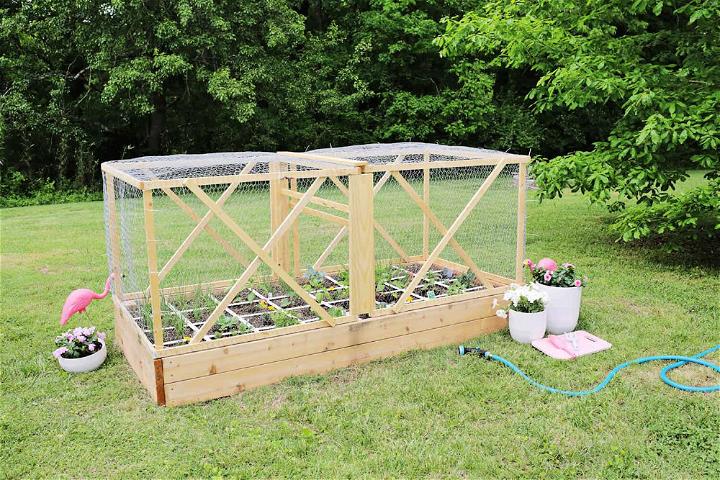
Ready to cultivate your green thumb with a DIY raised garden bed? A Beautiful Mess offers a simple, step-by-step guide to building your own sustainable garden space. In just four easy steps, learn how to cut wood, construct a sturdy frame, line the bed, and prepare it for planting. With practical tips on choosing materials like cedar for durability and ensuring proper watering with helpful tools, you’ll be on your way to harvesting fresh produce right from your backyard.
Perfect for enhancing your outdoor area and engaging with nature, this guide makes gardening accessible and enjoyable. Get ready to fill your table with home-grown goodness!
10. Building a Raised Garden Bed
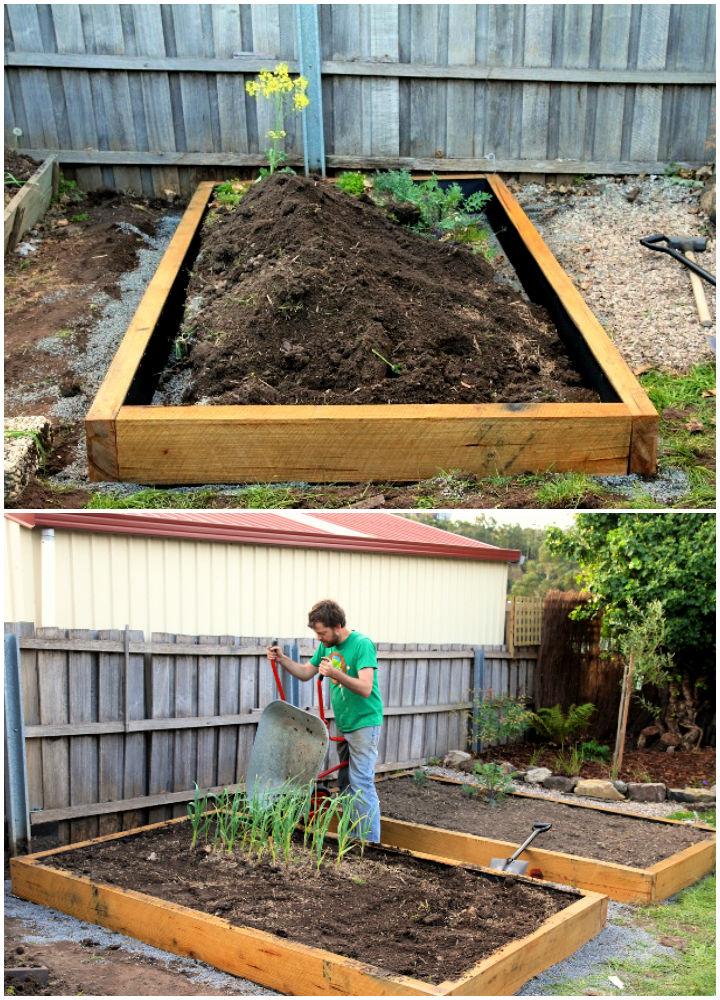
Spring has sprung in Tasmania, and it’s time to rejuvenate your garden space! Saltbush Avenue shares a detailed and inspiring journey of rebuilding raised garden beds, perfect for those looking to enhance their own veggie patches. Discover the step-by-step process, from planning and material selection to the actual construction of sturdy and attractive beds.
Learn how to make your garden both functional and beautiful, with practical tips on soil management and planting strategies. Whether you’re tackling a similar project or just seeking garden inspiration, Saltbush Avenue’s guide is an invaluable resource for building a flourishing outdoor sanctuary.
11. DIY Elevated Raised Garden Bed
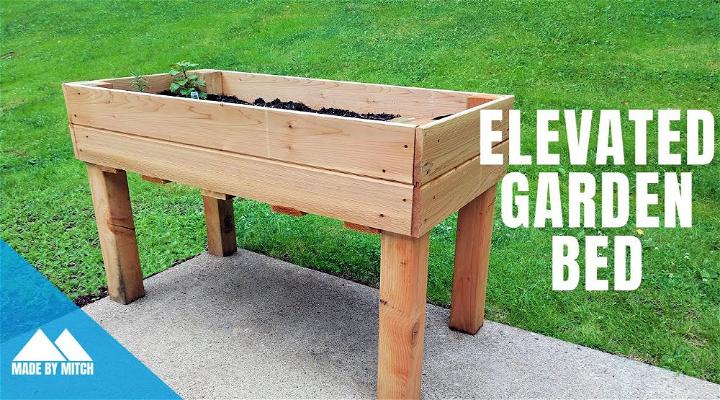
Elevate your garden game with a DIY Elevated Garden Bed, perfect for those with limited space. Expertly crafted by Mitch, this project uses 1×6 cedar boards and Douglas fir posts, chosen for their durability and resistance to water and rot. The process involves cutting boards to length, cleaning up the cedar, and assembling the structure with precision.
The bed features a sturdy base supported by steel fencing and landscape fabric, ensuring it holds the soil well. Ideal for growing lettuce, kale, herbs, or flowers, this garden bed is a versatile addition to any outdoor space. Follow this step-by-step guide to build your own lush, elevated garden, and enjoy the satisfaction of homegrown produce or vibrant blooms right in your backyard.
12. How to Make a Raised Wood Pallet Garden Bed
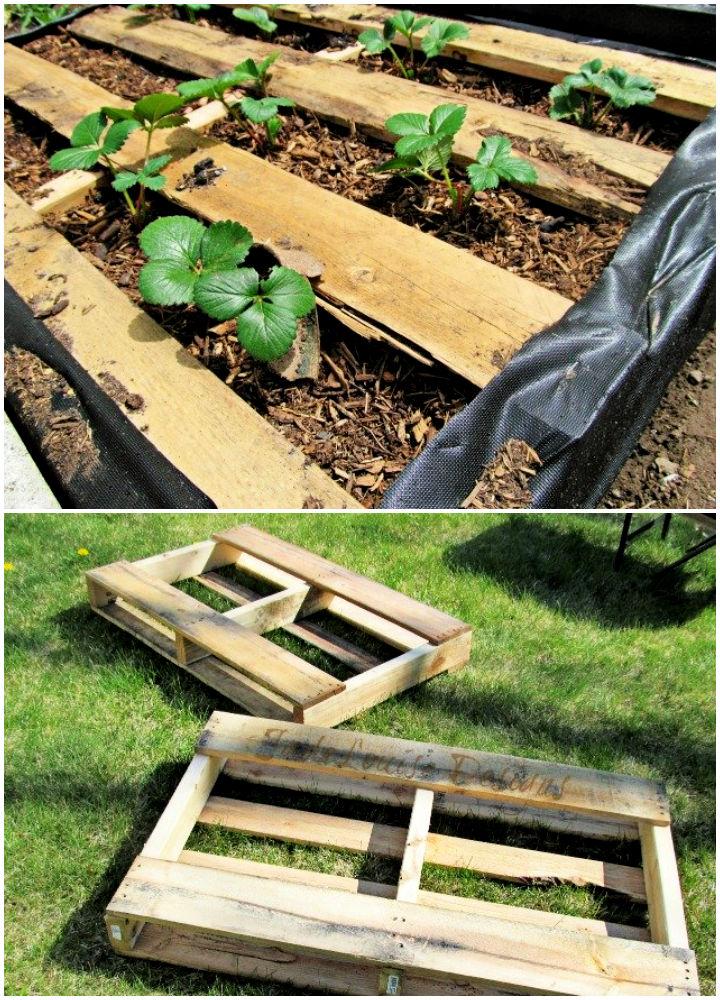
Looking to enhance your garden with a simple and efficient DIY project? Busy Making Memories presents a step-by-step guide to building a raised wood pallet garden bed. This easy-to-follow tutorial equips you with all the necessary details to transform wooden pallets into a flourishing garden space. Ideal for those aiming to minimize weeding and maximize enjoyment, this project is perfect for growing shallow-rooted plants like strawberries, peas, and herbs.
Set up your pallet garden bed, fill it with soil, and get ready for a bountiful harvest with minimal maintenance. Get your gardening gloves ready and let’s dig into this sustainable gardening practice!
13. Tiered Raised Garden Bed Plans
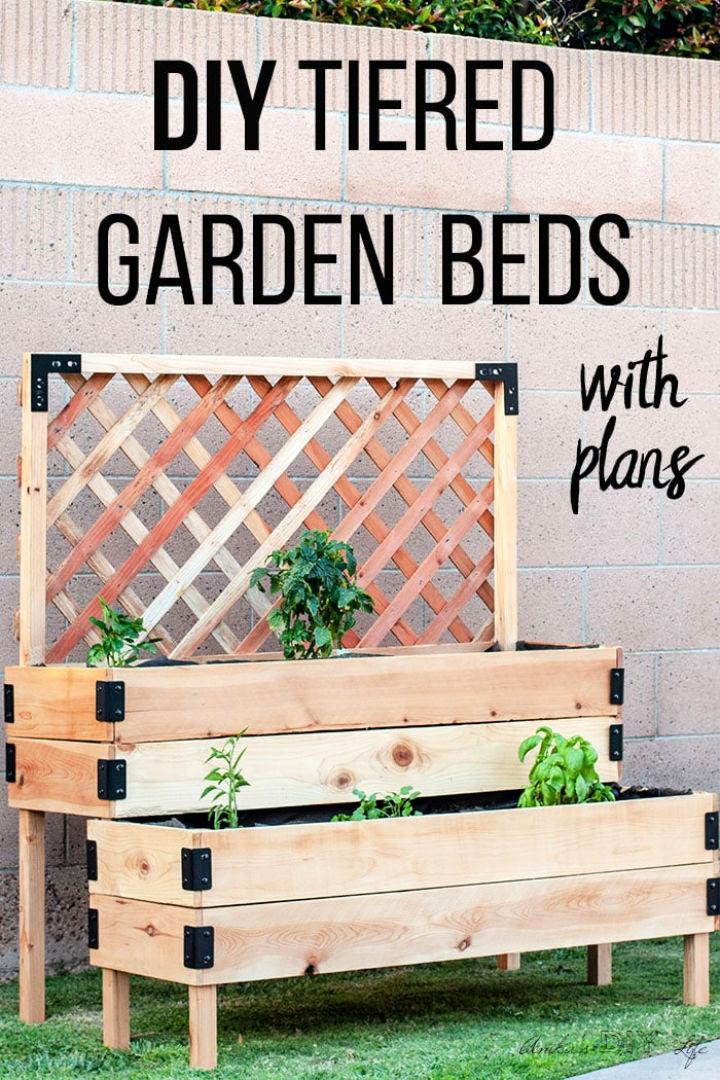
Ready to add a charming and functional touch to your patio or deck? Anika’s DIY Life offers a comprehensive guide on building a DIY tiered raised garden bed, perfect for growing a vibrant selection of flowers, herbs, or vegetables. With detailed step-by-step instructions and printable build plans, you’ll learn how to construct this garden feature using cedar fences and 2x4s. Ideal for those with limited space, this project not only serves as a practical solution for your gardening needs but also enhances the aesthetics of your outdoor living area. Grab your tools, and let’s transform your green space into a flourishing oasis!
14. Handmade Raised Bed Garden
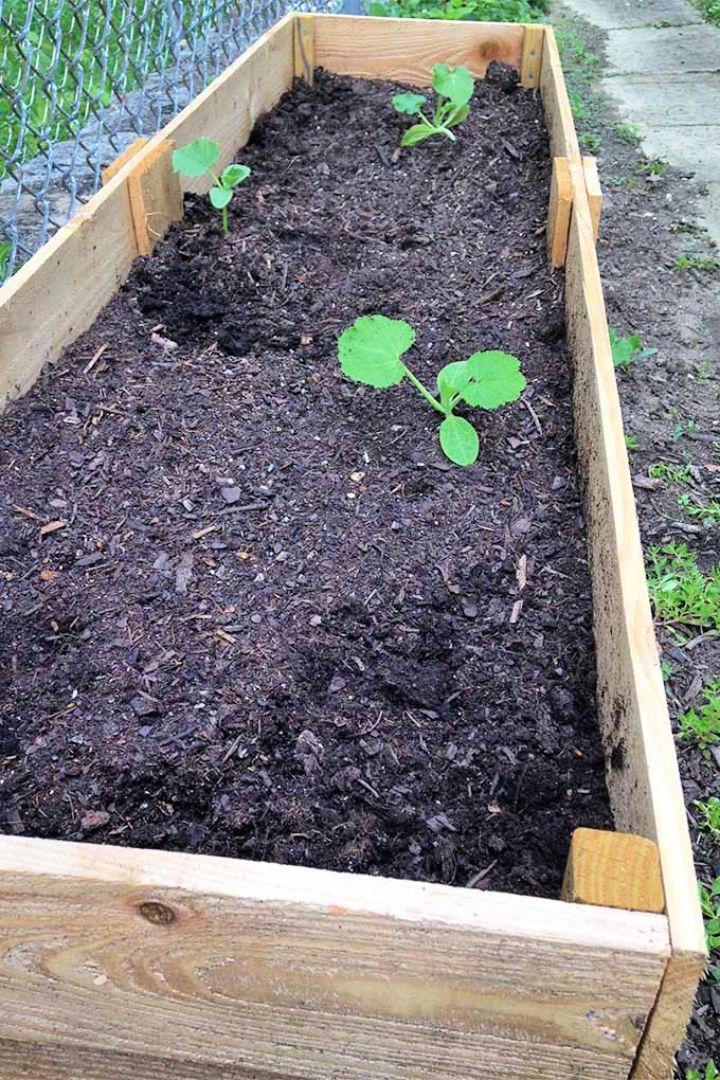
Discover how to construct your own DIY raised garden beds with Gardener’s Path‘s comprehensive guide. Building raised beds doesn’t require a hefty investment in store-bought options—instead, build your own with affordable materials like cedar fence posts and pressure-treated lumber. The step-by-step instructions are easy to follow and help you cut, assemble, and fill your beds with soil, ensuring they’re ready for planting.
Ideal for root vegetables and adaptable for climbers with the addition of trellis, these beds are a smart choice for gardeners seeking to enhance their growing space while maintaining soil health. With a little effort and some basic tools, you can elevate your garden’s potential both functionally and aesthetically.
15. Build a Raised Garden With Pavers
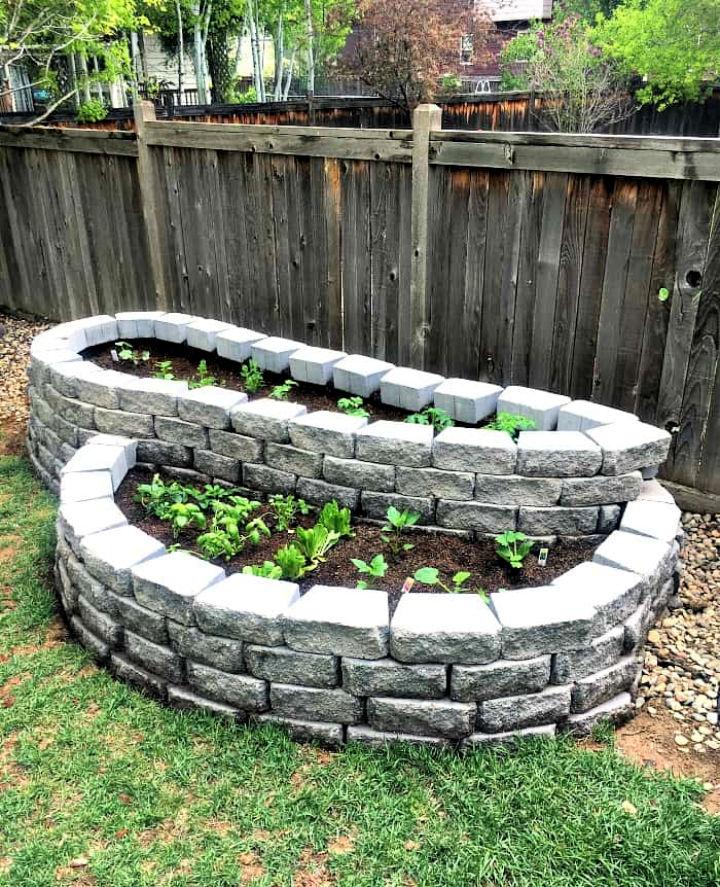
Looking to enhance your backyard with a functional and aesthetic feature? Inspiration For Moms provides a comprehensive guide on building a raised garden with pavers. This step-by-step tutorial simplifies the process, detailing everything from the initial design to the final touches of soil and plants. It’s an engaging project that not only promises a space to grow fresh produce but also adds an appealing architectural element to your outdoor area.
With clear instructions and a list of necessary supplies, you’ll be equipped to build a lovely tiered garden that can house a variety of plants, ensuring your yard is both productive and visually pleasing.
16. Easy Raised Garden Bed Ideas
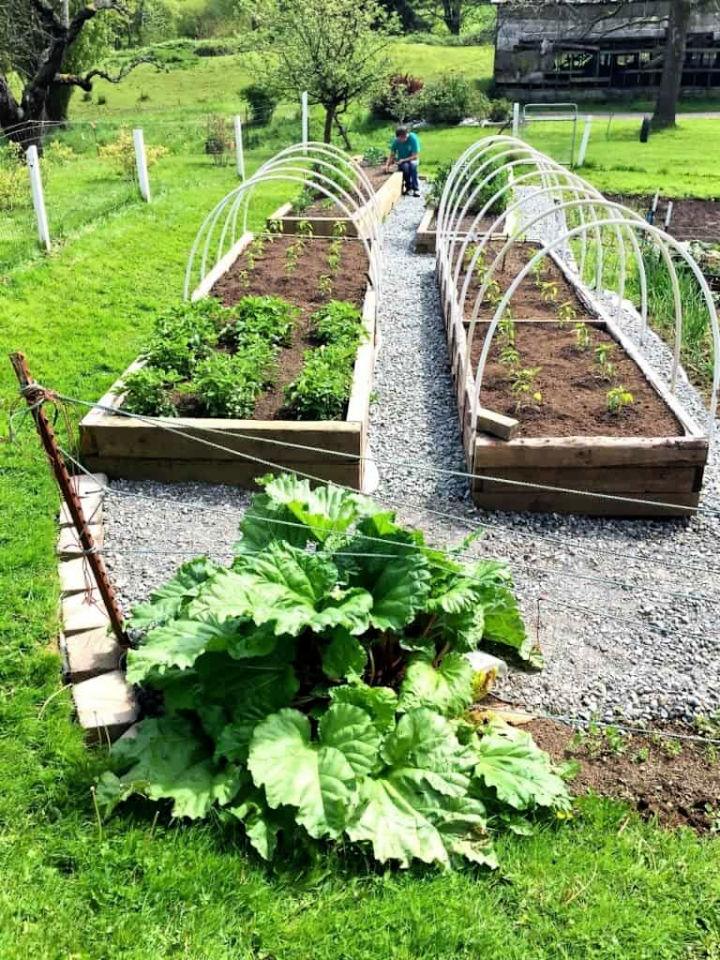
Ready to add a touch of perennial charm to your garden with rhubarb? Homemade Food Junkie offers insightful tips on cultivating this versatile vegetable, ensuring a bountiful harvest for years to come. Learn how to give rhubarb the perfect start, avoid common pitfalls, and enjoy a plethora of sweet and savory dishes from your garden’s bounty. With proper care, your rhubarb will flourish, providing delightful flavors each spring. Emphasizing the importance of patience and space, Homemade Food Junkie guides you through the joys of growing your own rhubarb successfully.
17. DIY Raised Garden Bed Using Cedar Boards
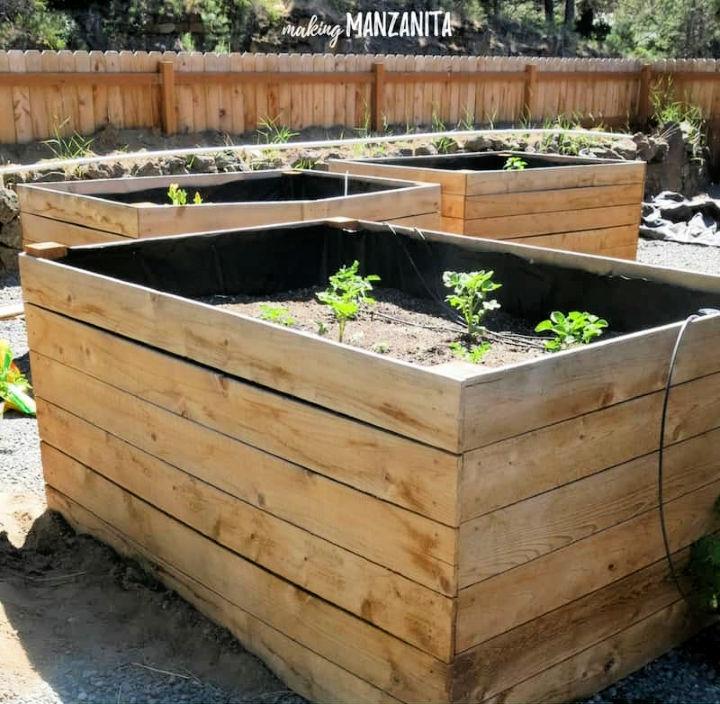
Ready to cultivate a lush garden in your own backyard? Making Manzanita offers a practical guide on building DIY cedar raised garden beds that are both cost-effective and straightforward to build. Cedar, being naturally rot-resistant, makes an excellent material choice for your outdoor gardening projects. The step-by-step instructions ensure you prepare the ground properly, set posts with concrete, and add a protective liner to extend the life of your beds.
Finish by attaching cedar boards and filling the beds with soil, and you’re set to plant a variety of herbs, vegetables, and fruits. Dive into gardening with confidence and enjoy the bounty of homegrown produce right at your doorstep.
18. Concrete Blocks Raised Garden Bed
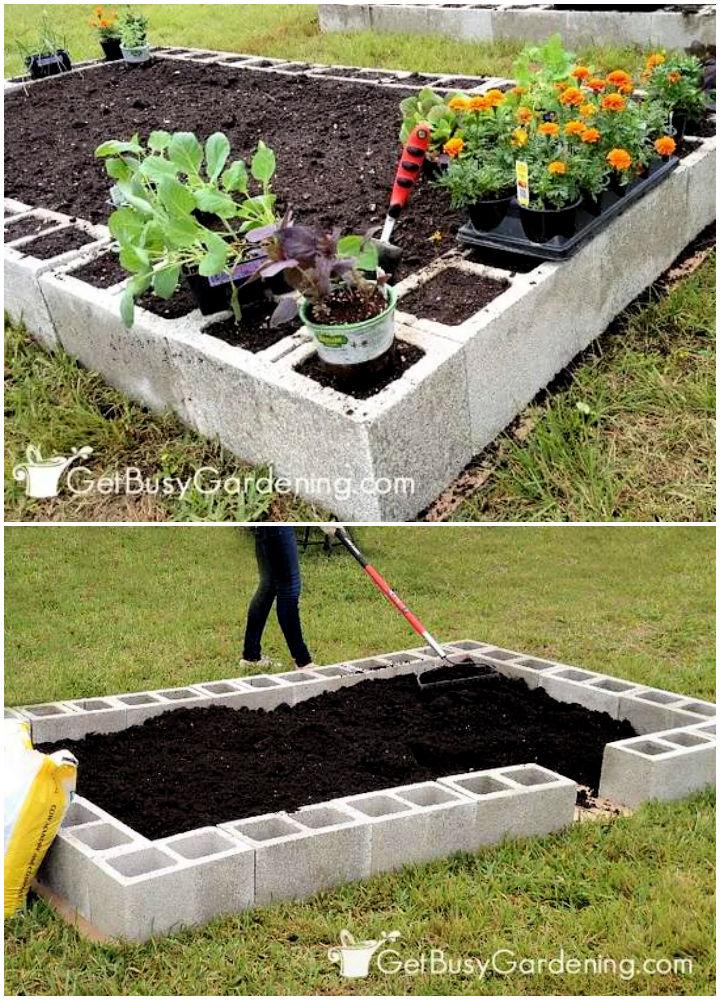
Making a raised garden bed with concrete blocks is a cost-effective and simple way to enhance your gardening space. Get Busy Gardening‘s guide provides a step-by-step approach to constructing a sturdy and functional raised bed right over your lawn or soil. By using concrete blocks, you not only save money but also have the flexibility to design a bed that fits your space perfectly. With tips on the best soil to use and how to position the blocks for optimal plant growth, this guide is ideal for those seeking a practical and engaging weekend project. Remember to fill the beds with high-quality soil and consider planting beneficial flowers in the block holes for a flourishing garden.
You may have seen a lot of cinder block planters circulating the web. We’ve found these DIY cinder block planter ideas to decorate your garden creatively and cheaply.
19. How to Make a Garden Box
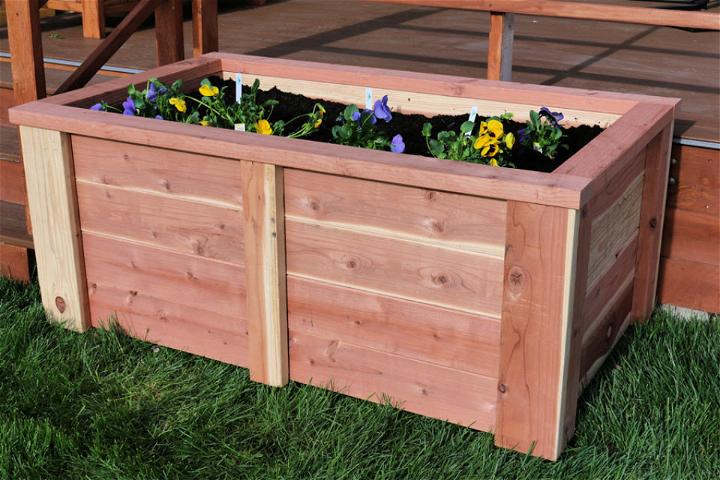
Discover how to construct a raised garden bed with ease, following a guide from Kreg Tool. This DIY project uses 2×4 and 2×6 boards to build a garden bed that stands approximately 2 feet tall, allowing you to tend to your plants without the strain of kneeling. Ideal for sprucing up your yard, the guide provides step-by-step instructions, from material gathering to soil filling. With clear, engaging directions, you’ll learn how to measure, cut, and assemble your garden bed, ensuring a rewarding and productive gardening experience. Perfect for growing flowers, herbs, or vegetables, this weekend project is a valuable addition to any outdoor space.
20. DIY Raised Garden Bed With Corrugated Metal
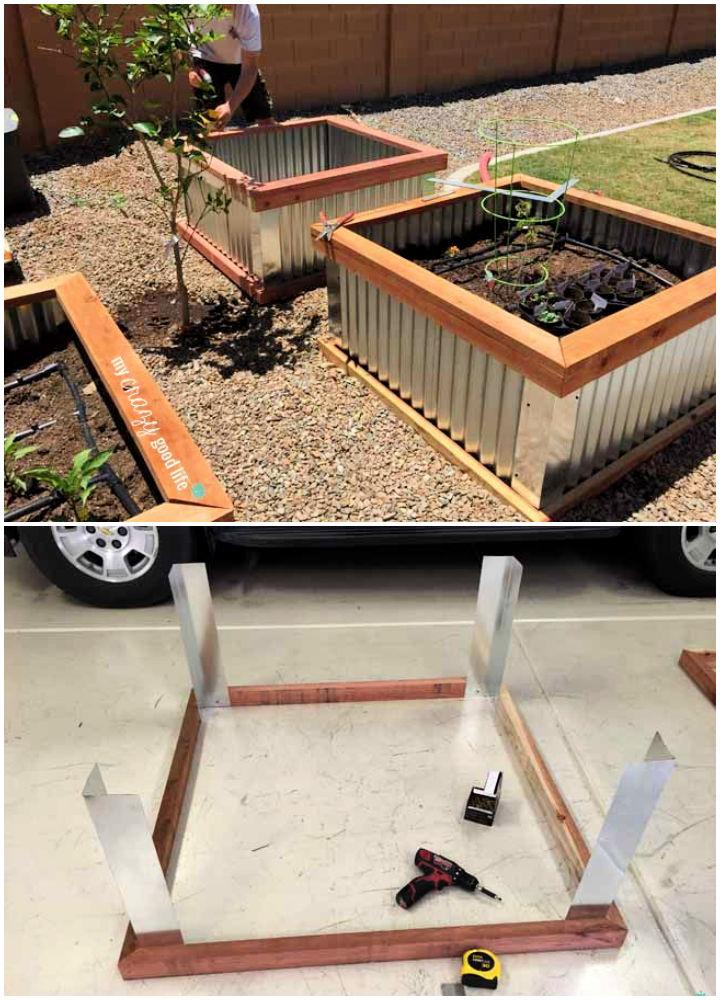
Ready to add a touch of green to your outdoor space? My Crazy Good Life offers a comprehensive guide to constructing your own DIY raised garden beds. These elevated planters are an ideal solution for growing vegetables like zucchini, tomatoes, and peppers, right in your backyard. With step-by-step instructions and a list of necessary materials, you’ll find building your garden box is a rewarding project. Plus, tips on filling and maintaining your garden bed ensure a bountiful harvest. Dive into this engaging resource and turn your gardening aspirations into reality with ease and confidence.
21. Best Wooden Raised Bed Plan
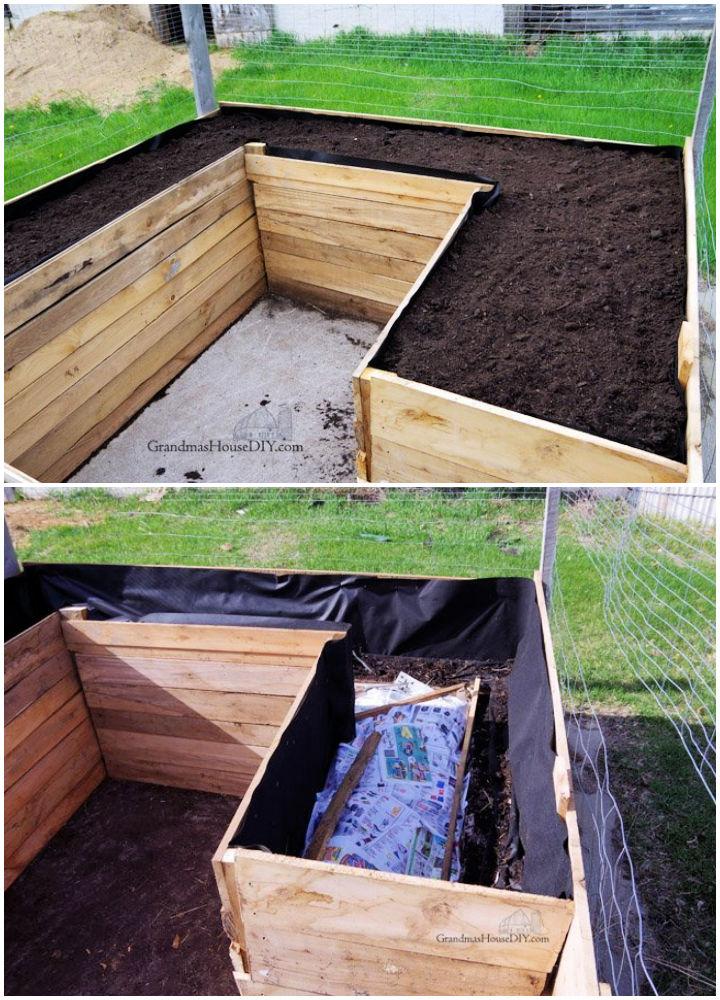
Transform your garden with the innovative approach detailed on Grandmas House DIY, where Tarahlynn shares her experience building tall raised beds using leftover oak and barn wood. Her insightful project not only recycles quality materials but also combats the challenges of previous hay planting mistakes. Discover practical tips on constructing durable garden beds and learn how to fill them with the right soil for a flourishing garden. Engage in a narrative that guides you through a rewarding journey of building raised beds that promise a future of bountiful summers and homegrown delights.
22. Raised Garden Bed With Built-in Privacy Wall
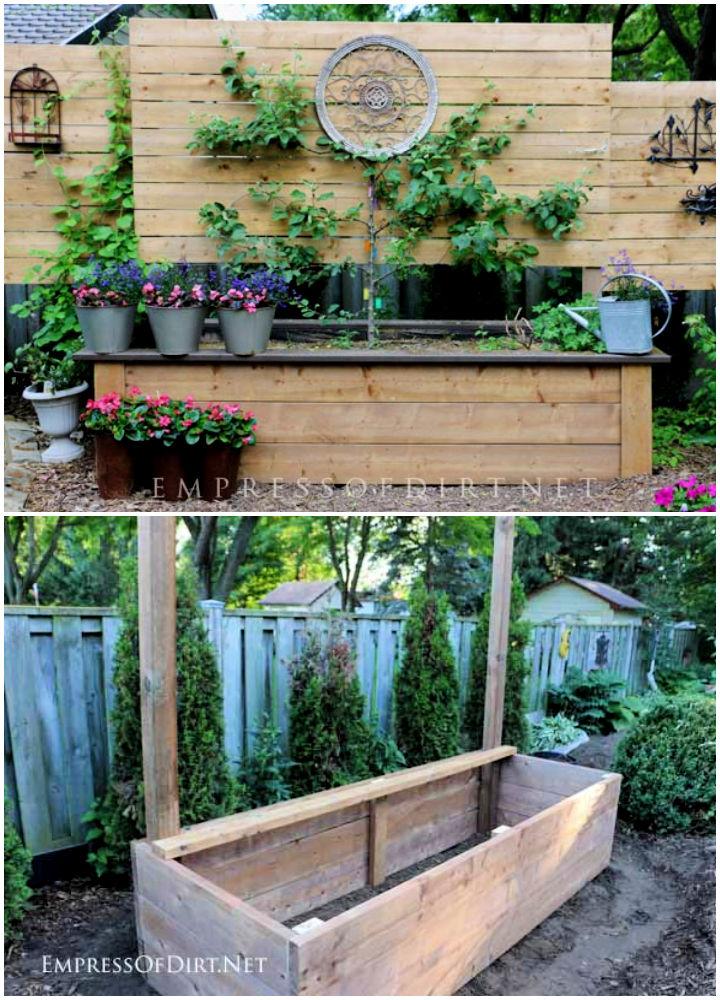
Build your own secluded garden retreat with Empress of Dirt‘s DIY Raised Garden Bed with Privacy Fence guide. This project merges the utility of a raised bed with the charm of a privacy fence, perfect for gardeners seeking a peaceful nook. Using standard lumber sizes, the guide provides step-by-step instructions, making assembly straightforward. Ideal for those wanting to enhance their backyard’s privacy and grow their plants in a defined space, this DIY endeavor is both practical and satisfying to complete.
With detailed plans and material lists included, you can easily tailor this project to fit your space and personal taste. Get ready to transform your outdoor area into a cozy sanctuary for relaxation and gardening.
23. DIY Backyard Raised Garden Bed for Beginners
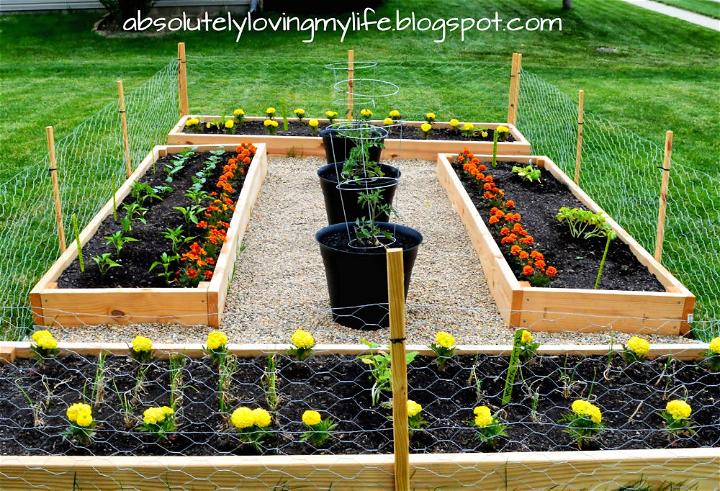
Starting your own backyard garden can be a rewarding venture, and with the right guidance, it’s an achievable one too. Our step-by-step tutorial on building DIY raised garden beds is tailored for those new to gardening, ensuring an attractive and productive space in your backyard. We walk you through selecting supplies, building garden boxes, and planting your first crops. You’ll learn how to protect your garden from pests and optimize soil health, all while keeping the process simple and manageable. With patience and care, you’ll be on your way to enjoying fresh vegetables right from your own garden. Dive into our guide and let your gardening journey begin. Absolutely Loving My Life
24. Build a Raised Garden Boxes
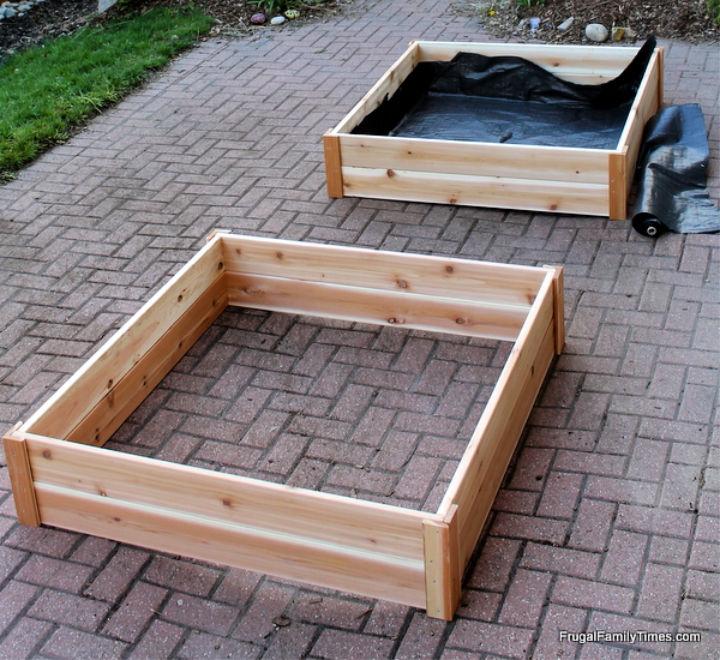
Discover how to construct your own raised garden boxes with the helpful tutorial from This DIY Life. Ideal for growing vegetables in limited or unconventional spaces, such as a driveway, these DIY garden beds are a cost-effective and simple project. Using cedar for durability and avoiding chemicals, this guide provides a materials list, step-by-step instructions, and tips for assembling sturdy, attractive garden boxes. With clear instructions and practical advice, you’ll be ready to build a flourishing vegetable garden in no time, even if space is at a premium. Get ready to enhance your home’s curb appeal and enjoy homegrown produce with this engaging and instructive guide.
25. DIY Raised Garden Beds on a Budget
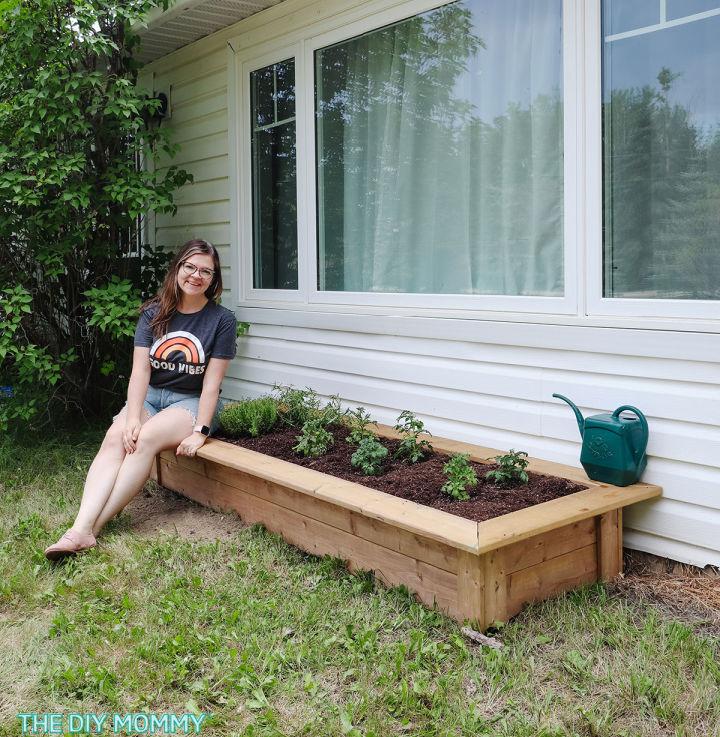
Making a raised garden bed can transform your outdoor space into a lush haven for homegrown vegetables and flowers. The DIY Mommy guides you through constructing budget-friendly raised garden beds using only three tools. Emphasizing affordability and simplicity, this tutorial ensures a successful gardening project even if you’re new to woodworking. With clear, step-by-step instructions and practical tips on choosing materials and filling the beds, you’ll be ready to cultivate your green thumb and enjoy the fruits of your labor in a beautiful, raised garden bed.
26. Budget-Friendly Raised Garden Greenhouses
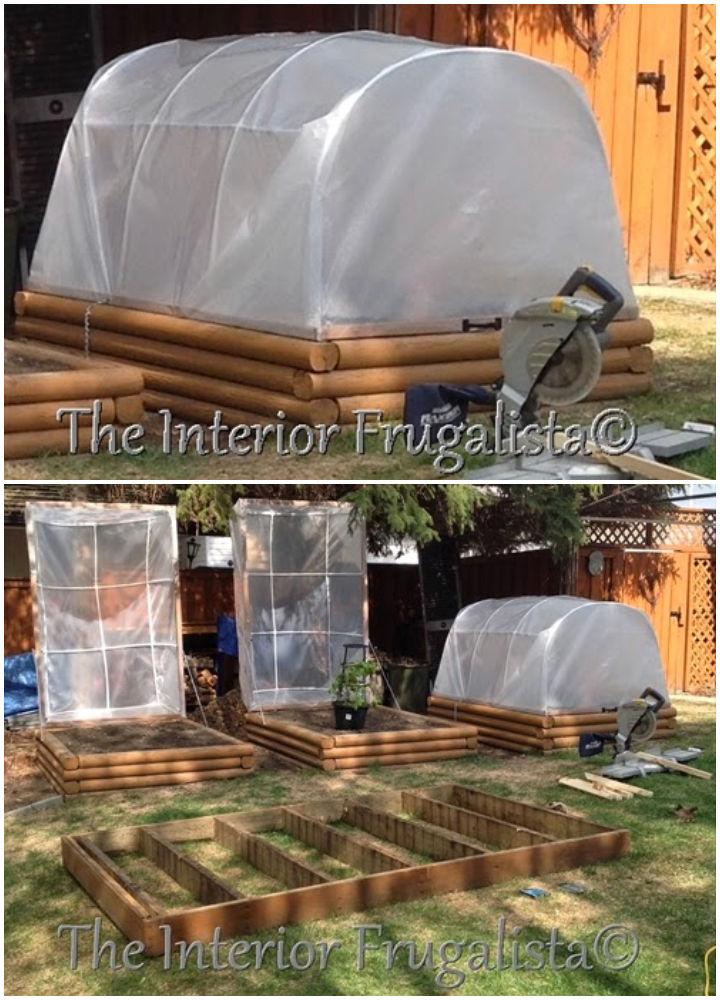
Transform your raised garden beds into efficient greenhouses with Marie-Interior Frugalista‘s budget-friendly DIY guide. In regions with shorter growing seasons, like plant hardiness zone 3, these mini-greenhouses can be a game-changer, allowing you to kickstart your vegetable planting early despite unpredictable weather. The tutorial provides a detailed supply list and step-by-step instructions for constructing a sturdy base and frame, securing the poly covering, and ensuring proper installation on your raised beds.
Handy tips, like how to handle water pooling and winter storage, make this guide invaluable for gardeners aiming to extend their growing season without breaking the bank. Get inspired and elevate your gardening experience with these practical DIY raised garden greenhouses.
27. Build a Raised Vegetable Bed
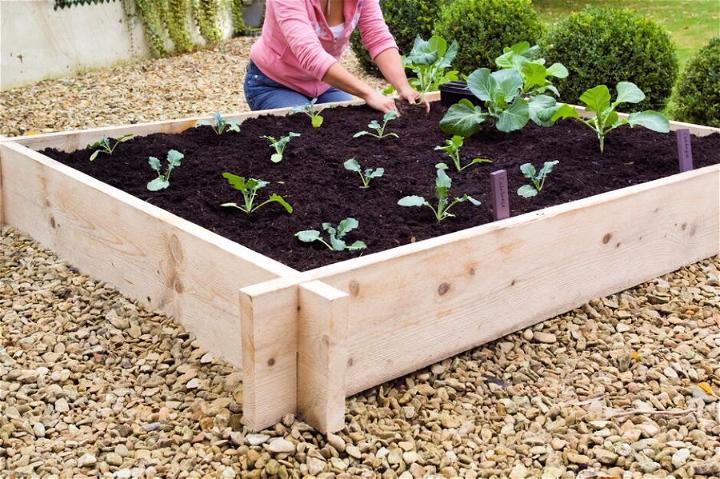
Ready to grow your own vegetables at home? Building a raised bed is a great way to start. BBC Gardeners’ World Magazine guides you through a simple three-step process to build a sturdy raised bed using scaffolding planks. With no digging required and better soil conditions, your gardening maintenance becomes a breeze.
Learn how to measure, cut, and assemble your raised bed, then fill it with soil and organic matter to kick off your early-spring planting. This instructive approach is perfect for anyone looking to enhance their garden with a functional and attractive vegetable plot.
28. Simple DIY Raised Garden Bed
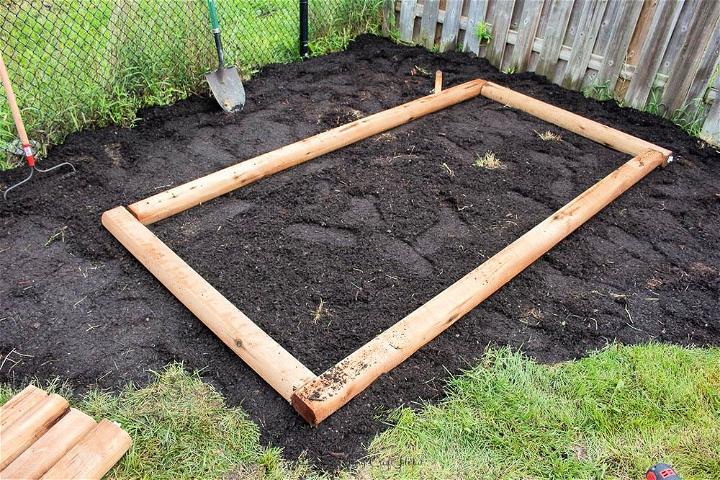
Building a DIY raised garden bed is a rewarding way to cultivate your own vegetables and flowers, even with limited space. Sustain My Craft Habit provides an easy-to-follow guide that walks you through the process step by step. From selecting the perfect sunny spot to assembling the bed and preparing the soil, this tutorial ensures a seamless experience. With a list of materials, tools, and practical tips, you’ll be ready to build a thriving garden in your backyard. Optimize your gardening efforts and enjoy the fruits of your labor with a custom-made raised garden bed that simplifies planting and maintenance.
29. How to Build a Raised Garden Bed With Legs
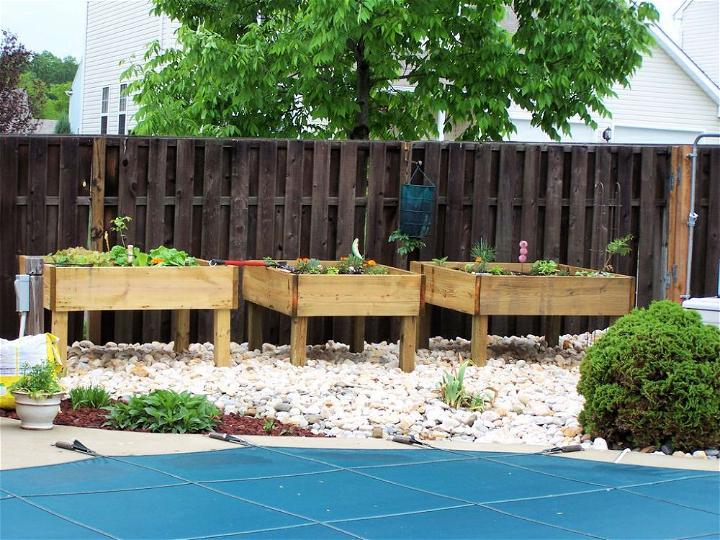
Discover the joy of gardening with ease using the Raised Garden Bed on Legs tutorial from Instructables. Ideal for those who wish to avoid the strain of bending and the hassle of keeping pets away from their plants, this guide offers a step-by-step approach to building your own elevated garden bed. With clear instructions and practical tips, you’ll learn how to build a sturdy and functional garden space that not only looks great but also promotes a more comfortable gardening experience. Embrace this solution for a back-friendly and pet-proof gardening adventure.
30. DIY Outdoor Raised Garden Bed
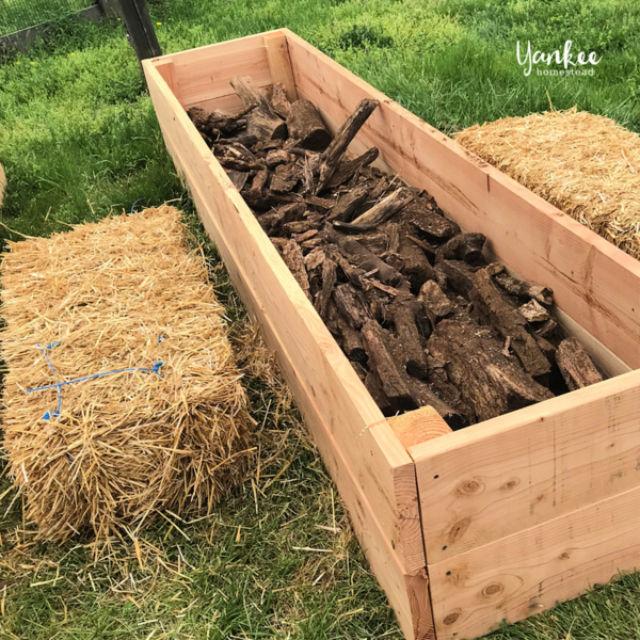
Discover how to build Hugelkultur raised garden beds with guidance from Roots & Boots. These eco-friendly beds use a base of logs, branches, and twigs, topped with organic materials like grass clippings, leaves, and compost, to mimic natural woodland decomposition. Benefit from water retention, improved soil, and extended growing seasons. Learn three construction methods—on the ground, in trenches, or in containers—and important tips like adding nitrogen to enrich the soil.
Whether you have a spacious farm or a small urban garden, Hugelkultur offers a sustainable gardening practice that recycles tree waste and maximizes your growing space. Join the green revolution and enhance your gardening with this efficient, organic method.
31. Mini Raised Garden Bed Design
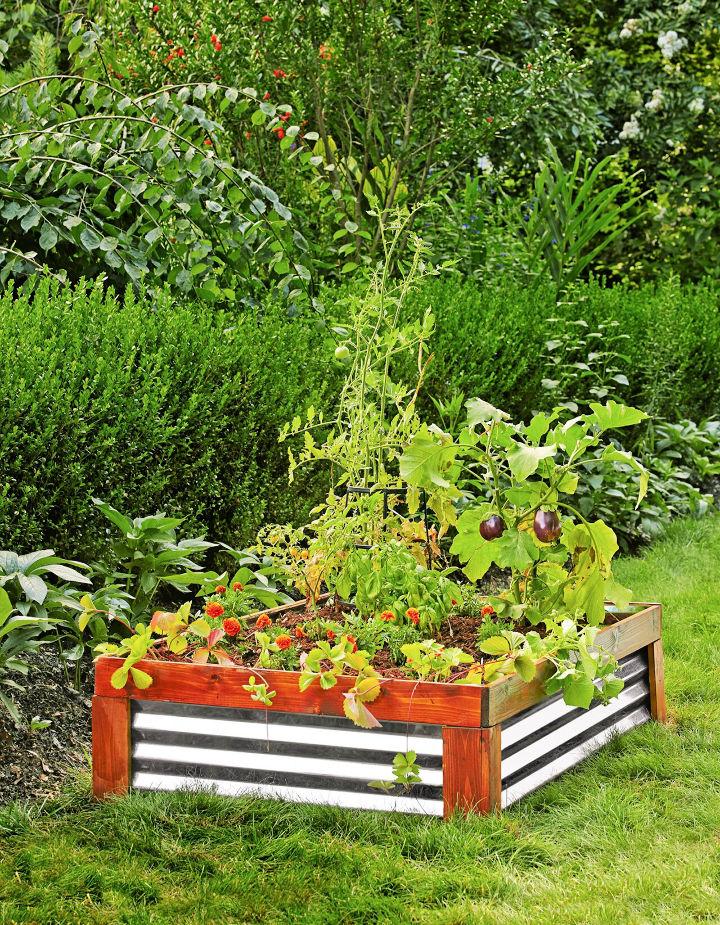
Raised garden beds are a game-changer for gardeners seeking efficiency and ease. Better Homes & Gardens lays out a straightforward guide to building your own 3×5-foot raised bed, ideal for enhancing soil drainage, extending the growing season, and simplifying maintenance. By elevating your plants, you also deter pesky critters and optimize your planting space. Follow this guide to build a durable, cedar-and-metal bed, complete with step-by-step instructions and a list of necessary supplies. Embrace the benefits of raised beds and elevate your gardening experience.
32. Building a Self-Watering Raised Bed
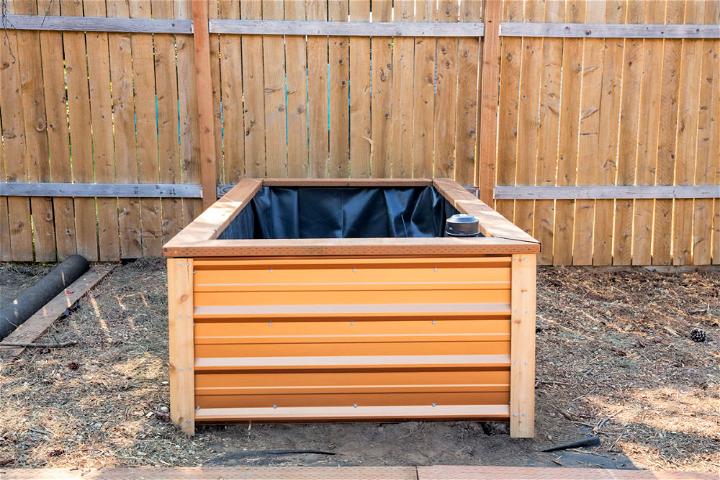
If you’re aiming to enhance your garden with a self-watering raised bed, Dunn DIY‘s guide offers a comprehensive step-by-step tutorial for constructing a sturdy frame. Ken Charm, leveraging his expertise in environmental science, demonstrates how to build a frame that not only supports plant growth but also simplifies watering. With his guidance, you can ensure your plants thrive even during your absence.
The tutorial covers selecting a sunny location, crafting end frames, attaching long boards, leveling the site, and adding protective liners and trim. The focus on practicality and efficiency makes this guide invaluable for gardeners eager to build a reliable, self-sustaining garden feature.
33. DIY Raised Planting Bed
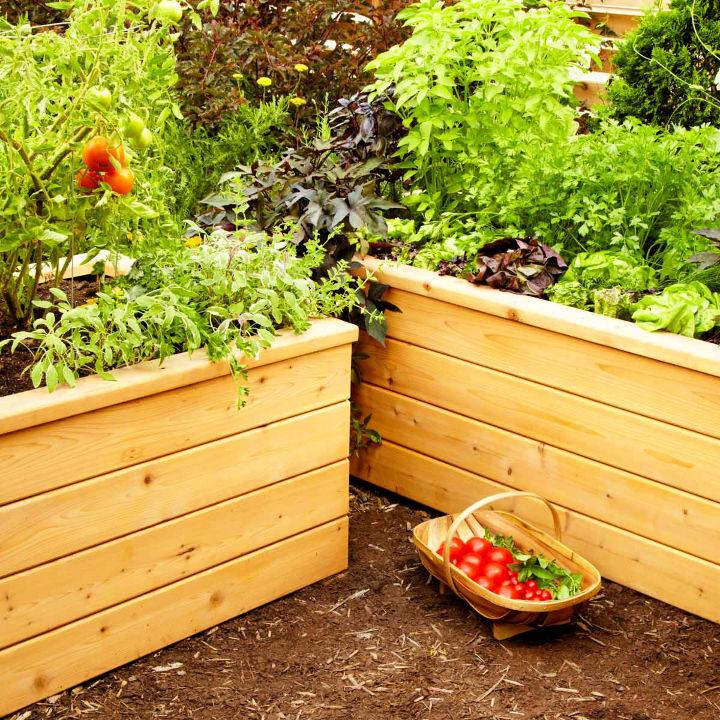
Build a lush garden right on your patio with a self-watering planter that’s perfect for keeping your vegetables and flowers thriving, even during hot summers. Family Handyman offers a comprehensive guide on crafting a raised planting bed with a built-in sub-irrigation system. This DIY project is not only cost-effective but also a stylish addition to your outdoor space. It reduces the need for frequent watering, cuts down on weeds, and protects your greens from critters. With straightforward instructions and simple tools, you’ll enjoy fresh salads right at your fingertips. Save water and time with this gardening innovation that’s ideal for busy or travel-loving gardeners.
34. Raised Bed Garden from Roofing Sheet Metal
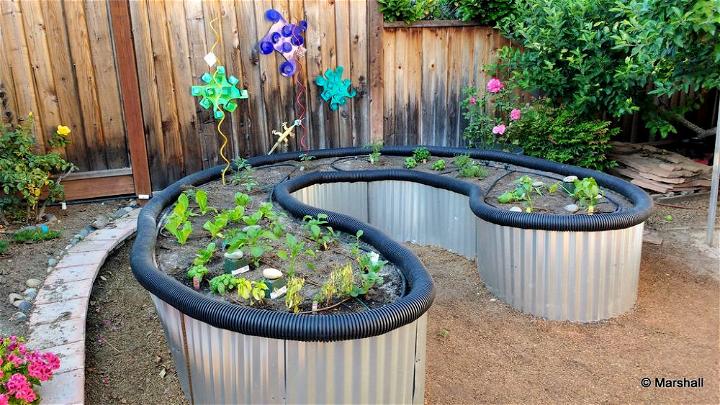
Making a raised bed garden from roofing sheet metal is a sustainable and efficient way to grow your own vegetables, especially in drought-prone areas like California. Instructables provides a step-by-step guide on how to build a durable garden bed using metal sheets, which offers advantages such as cost-effectiveness, longevity, and resistance to pests. Ideal for gardeners who want to repurpose materials and save water, this method is a clever alternative to traditional wooden beds. With clear instructions and practical tips, Instructables helps you set up a metal raised bed garden that can enhance your outdoor space and yield a bountiful harvest.
35. Making a Raised Garden Bed Out of Pallet
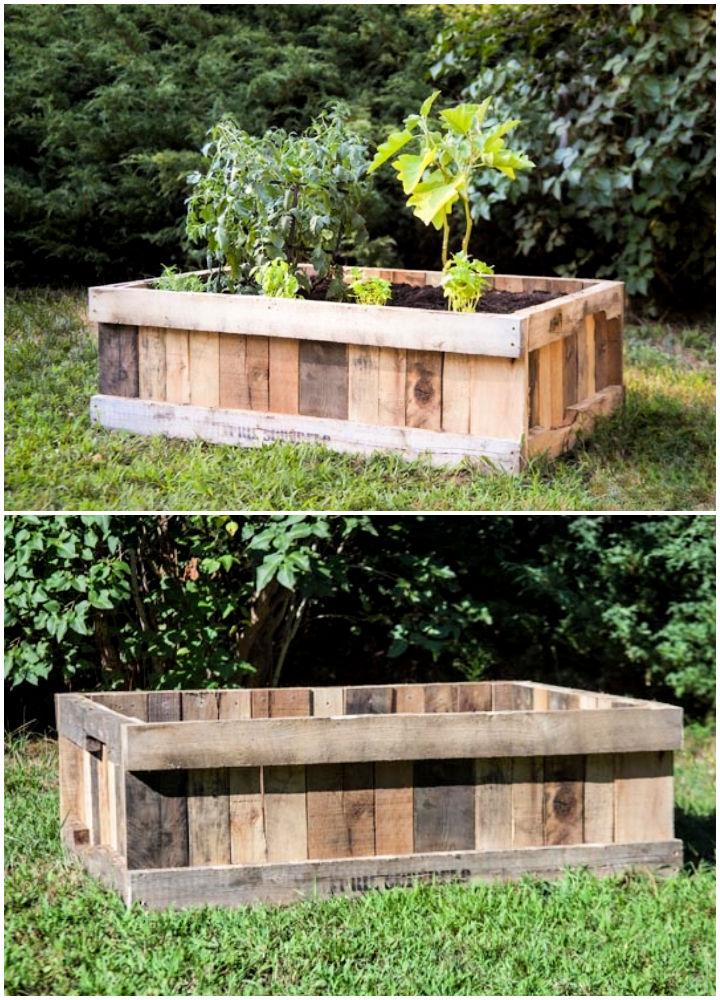
Transform your outdoor space into a green oasis with a DIY pallet raised garden bed. Black+decker guides you through a simple, step-by-step process to build a medium-sized, versatile pallet planter perfect for cultivating vegetables, herbs, flowers, or shrubs. Sourcing pallets is easy and often cost-free from local warehouses or grocers. Safety first—wear protective gear and inspect pallets to avoid contaminated materials.
36. Build Your Own Raised Garden Bed
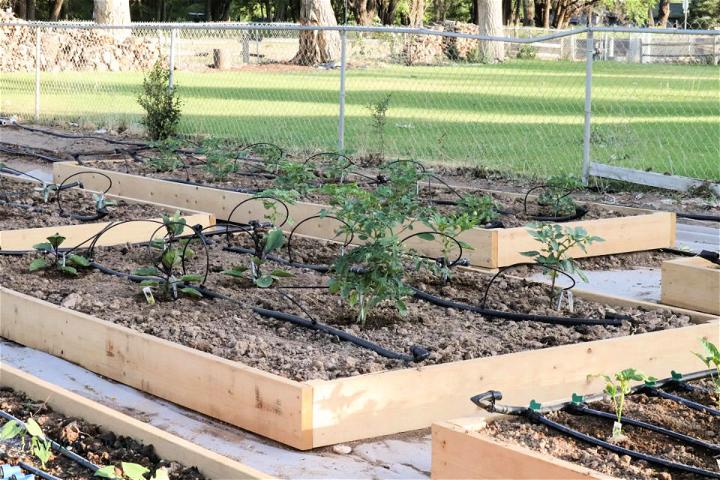
Making your own garden has never been easier, thanks to the straightforward DIY raised garden beds guide from The Wood Grain Cottage. Perfect for those with limited space or who want to tidy up their backyard, this tutorial provides a step-by-step process for building functional and cost-effective garden beds. From selecting the right lumber to installing drip irrigation, you’ll find all the necessary tips and tricks to cultivate a thriving garden. Say goodbye to endless weeding and hello to a bountiful harvest with these customizable raised beds, designed to make gardening a breeze and your green space more beautiful.
37. DIY Cedar Raised Garden Bed
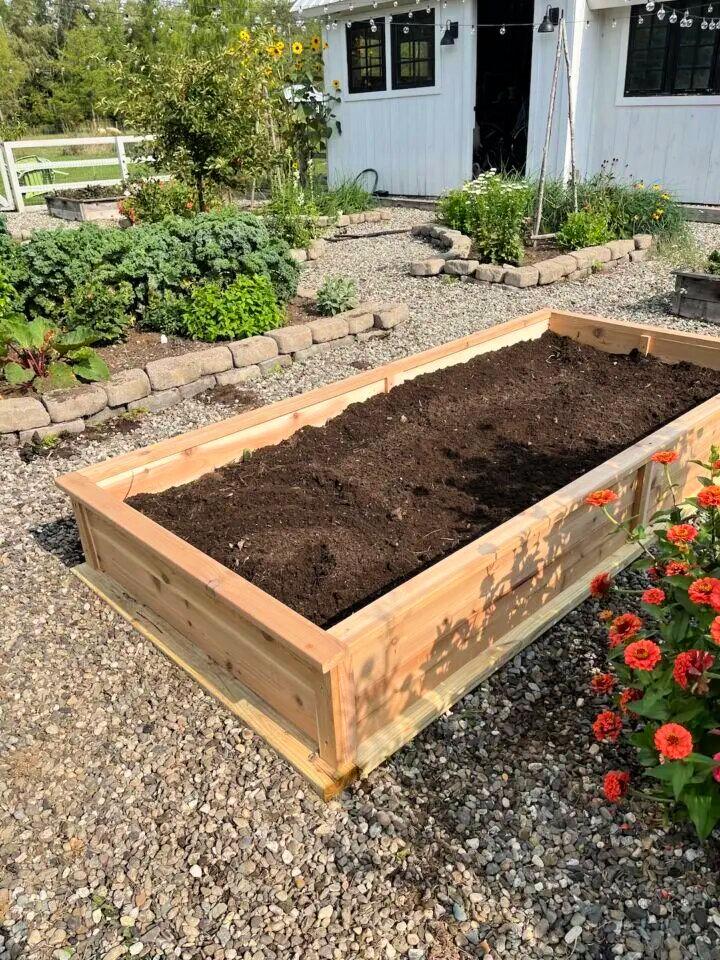
Making a cedar DIY raised garden bed is a rewarding project that can enhance any garden space. Tree Farm Design Co. offers a step-by-step guide on building a durable and aesthetically pleasing raised bed using cedar wood. Ideal for areas with challenging soil, such as clay, this raised bed design minimizes weed growth and soil dispersion.
With a comprehensive list of materials and tools, detailed cut dimensions, and assembly instructions, gardeners can construct a sturdy structure that elevates their gardening game. Caulking between the boards ensures longevity by keeping dirt and weeds at bay. Once assembled and filled with soil, the raised bed is ready to nurture a variety of plants, providing a structured and productive garden area for years to come.
38. Raised Vegetable Garden Bed Tutorial
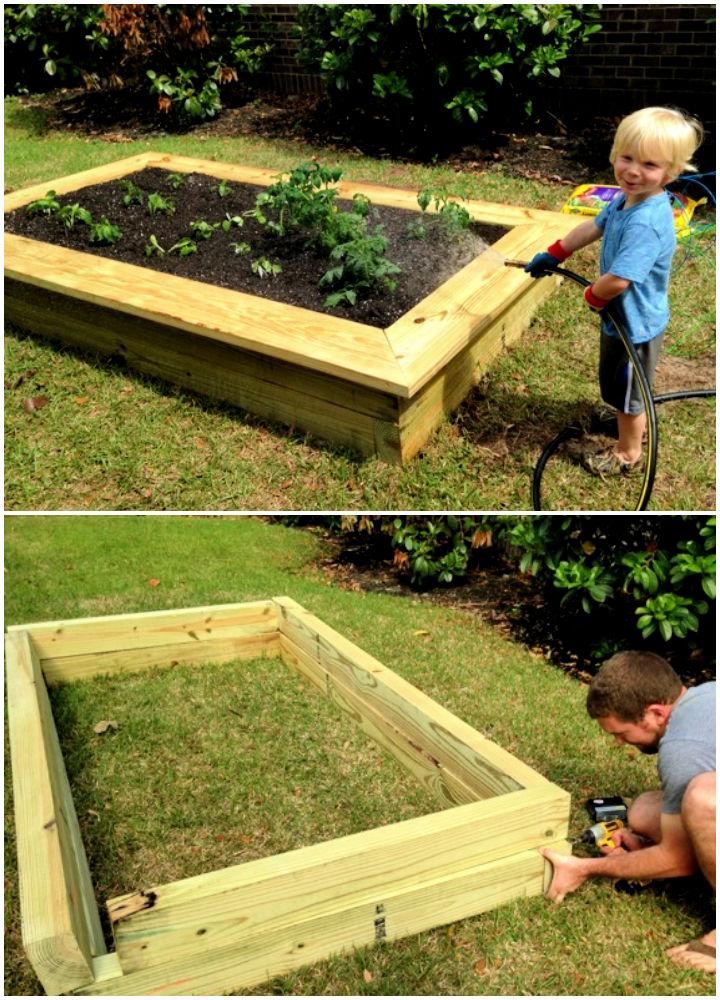
Discover how to construct a raised vegetable garden with Rogue Engineer‘s comprehensive guide. Jamison Rantz shares his personal experience building a family-friendly garden, complete with a bench top and a nearby sprinkler for easy maintenance. The tutorial includes a list of required tools and materials, a cut list, and step-by-step instructions for assembly, ensuring a level and sturdy structure. The guide also covers the installation of a weed barrier, the addition of soil, and the planting of veggies. Ideal for gardeners seeking a practical project, this resource makes building a productive and attractive garden space straightforward and enjoyable.
39. DIY Wooden Raised Garden Bed
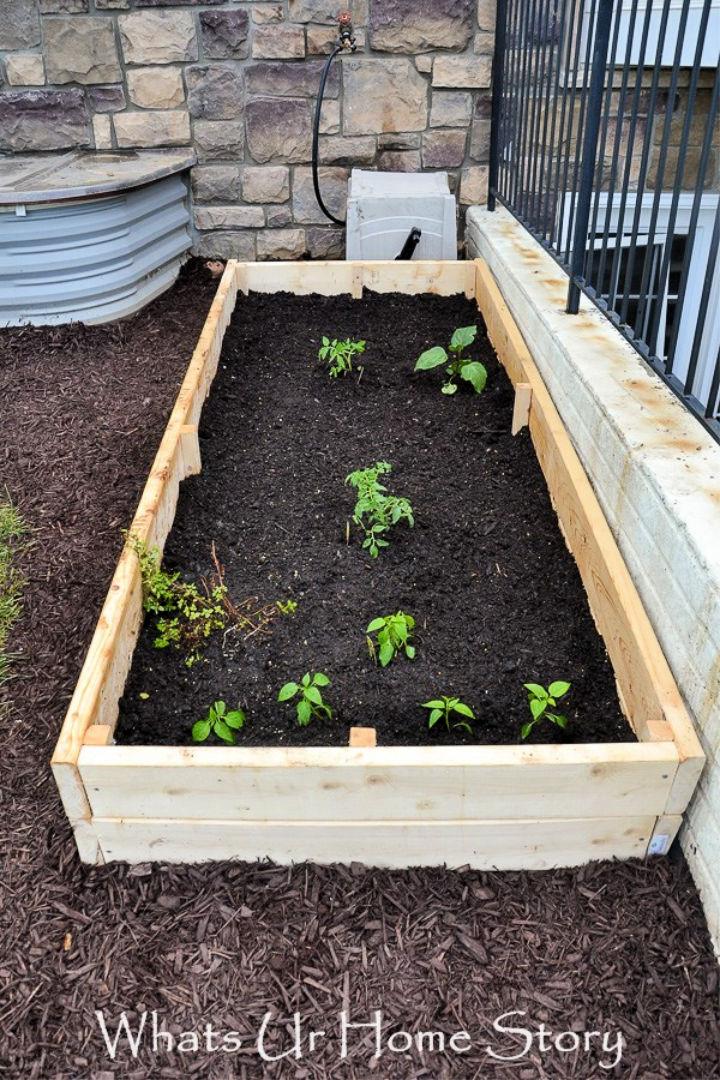
Building a raised garden bed is a rewarding project that enhances your outdoor space and supports your gardening hobby. Whats Ur Home Story provides a comprehensive guide on constructing an 8 x 3 ft raised garden bed using untreated wood, which is crucial for growing edible plants safely. The tutorial walks you through the selection of materials, including untreated lumber and exterior screws, and the layering of soils for optimal plant growth. With clear instructions and helpful tips, you’ll have your garden bed ready for planting in no time. Whether you aim to cultivate herbs, vegetables, or flowers, this DIY project is an excellent addition to any green space.
40. Make an Elevated Planter Raised Bed With Legs
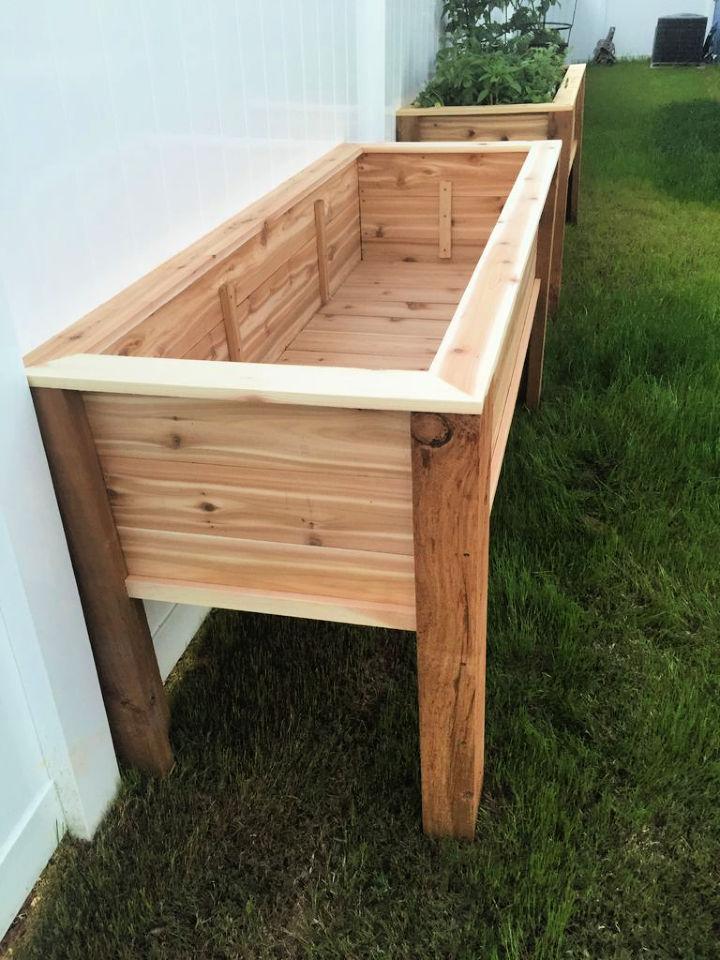
For gardening enthusiasts eager to enhance their outdoor space, an Elevated Planter Raised Bed offers a practical and stylish solution. Instructables provides a comprehensive guide for constructing a raised bed planter, perfect for those looking to grow their own herbs, vegetables, or flowers. This DIY project is tailored for ease of access and can be a rewarding addition to any garden, patio, or balcony. The tutorial is detailed and user-friendly, ensuring a successful build even for those new to woodworking. Elevate your gardening experience with a raised bed that not only optimizes plant health but also adds a charming element to your home’s exterior.
41. DIY Metal Raised Garden Bed
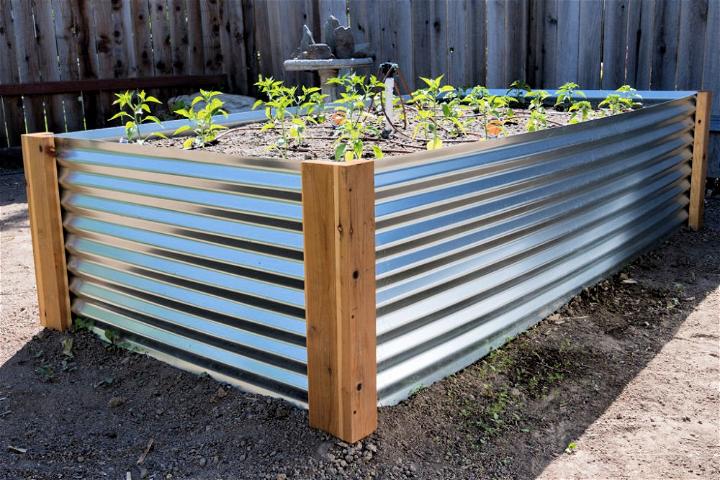
Ready to cultivate your own lush garden with a modern twist? MK Library‘s DIY guide on building a raised metal garden bed is your go-to resource for building a stylish and productive garden space. With clear, step-by-step instructions, you’ll learn how to construct a durable and attractive corrugated metal garden bed. This guide covers everything from material selection to assembly, and even includes tips on solving common issues. Perfect for gardeners aiming to enhance their outdoor area’s functionality and appeal, this tutorial ensures a seamless and enjoyable building experience. Get ready to transform any corner of your yard into a thriving sanctuary for homegrown vegetables and herbs.
42. DIY Round Raised Garden Bed
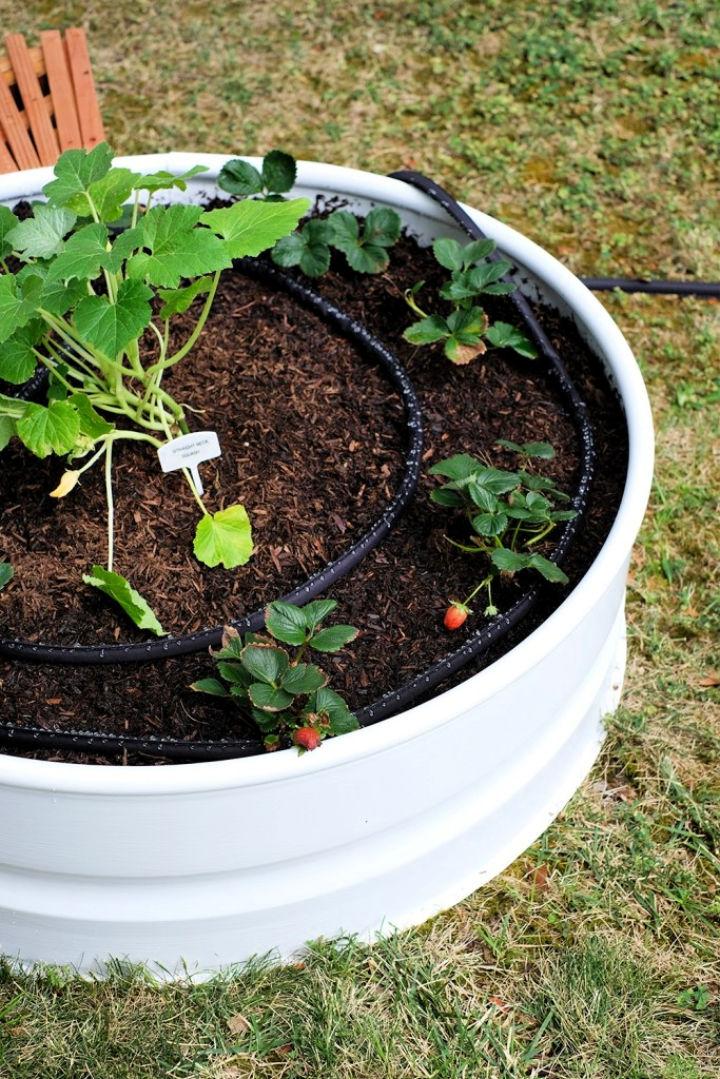
Discover how to build your own round raised garden beds with this informative guide. Learn the steps to construct an economical, modern garden space using galvanized fire rings. Get tips on preparing the metal, building a weed barrier, and choosing the right soil for a flourishing vegetable patch. Plus, find out how to make the area cozy with seating and ensure your plants stay hydrated with efficient watering tools. Perfect for gardeners who want to know exactly where their veggies come from, this DIY project is a blend of style and practicality for any size yard. Oleander And Palm
43. Building a Raised Garden Bed for Backyard
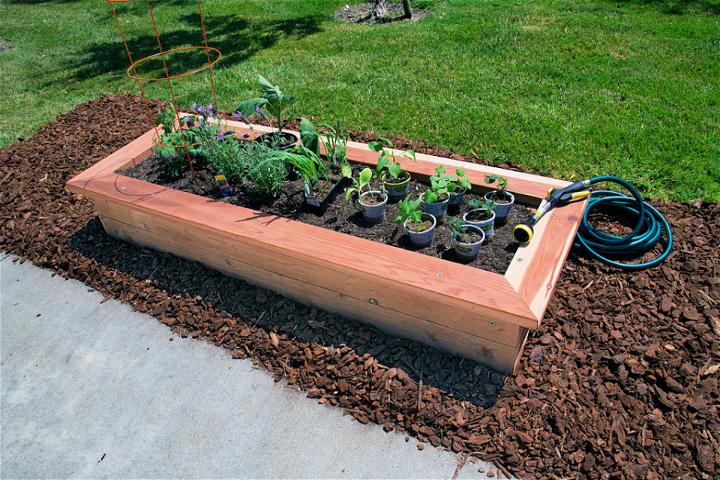
Building a raised garden bed is an excellent way to enhance your outdoor space, allowing for better soil management and easier plant care. The DIY guide from Building Strong provides a clear, step-by-step process to construct a durable and stylish garden bed using Simpson Strong-Tie® hardware. Perfect for growing a variety of plants, this project can be completed in a single day with common tools. The plans and instructive content make it easy for anyone to add a functional and beautiful element to their garden. Get your lumber and screws ready, and let’s build a space where your fruits, vegetables, or flowers can thrive.
44. DIY L-shaped Garden Bed
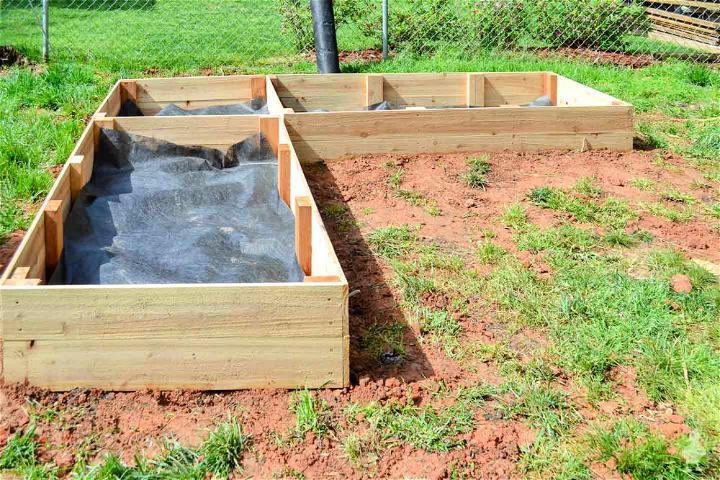
Ready to build your own L-shaped garden bed for a lush vegetable patch? Ugly Duckling House‘s guide offers an instructive and engaging step-by-step process to build a raised garden bed quickly and efficiently. Using cedar fence pickets and a few other materials, Sarah demonstrates how to construct a durable and budget-friendly garden space. From prepping the wood to layering organic material for optimal plant growth, this tutorial is perfect for DIY enthusiasts looking to cultivate their gardening skills. Get your gloves ready, it’s time to dig in and transform your backyard into a thriving garden oasis.
45. Making a Large Raised Bed
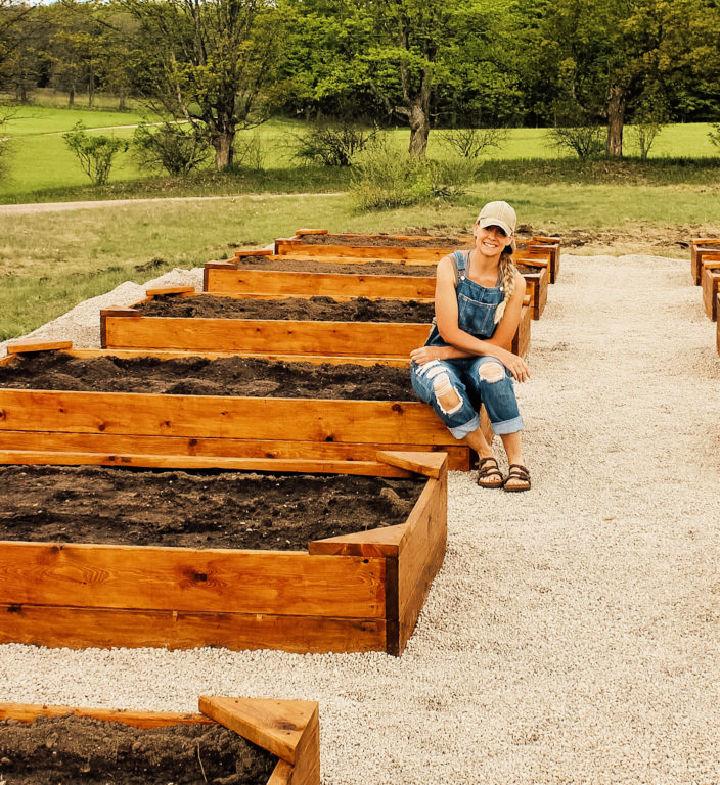
Transform your garden into a lush haven with Fletcher Creek Cottage‘s DIY guide to constructing budget-friendly raised garden beds. Discover how to build 12 large 4×8 ft beds with step-by-step instructions, from selecting the right materials to protecting your creations for longevity. Ideal for home gardeners seeking to enhance their outdoor space, this comprehensive tutorial offers practical tips and planting suggestions to ensure a bountiful harvest. Get ready to enjoy homegrown veggies and the joy of gardening with your family!
46. Cheap DIY Raised Bed
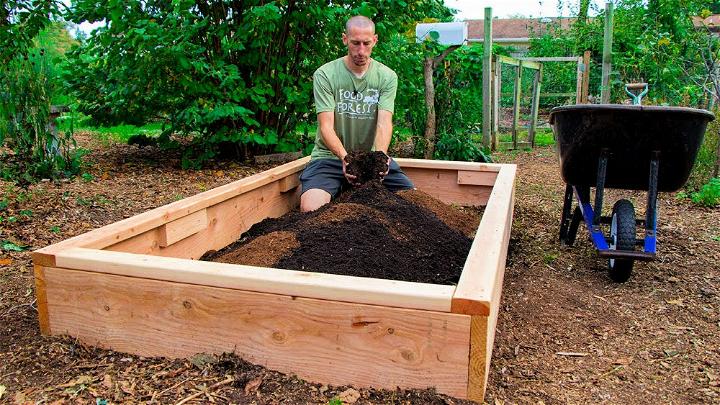
Elevate your backyard gardening game with an easy and budget-friendly DIY raised bed! This comprehensive guide outlines the process of constructing a durable 4×8 foot raised garden bed using readily available materials like 2×10 and 2×4 inch lumber. Ideal for spaces with challenging soil conditions or limited gardening areas, raised beds offer an efficient solution. The guide includes tips for selecting quality wood, ensuring structural integrity with deck screws, and adding a convenient top rail for comfortable gardening.
Fill your new bed with a mix of peat moss and free black leaf mulch for moisture retention, and top it off with homemade compost for nutrient-rich soil. Ideal for growing annuals such as tomatoes and peppers, this raised bed is a sustainable addition to any garden. It offers practicality and ease for gardening enthusiasts.
47. How to Make a Raised Garden Bed With Drawers
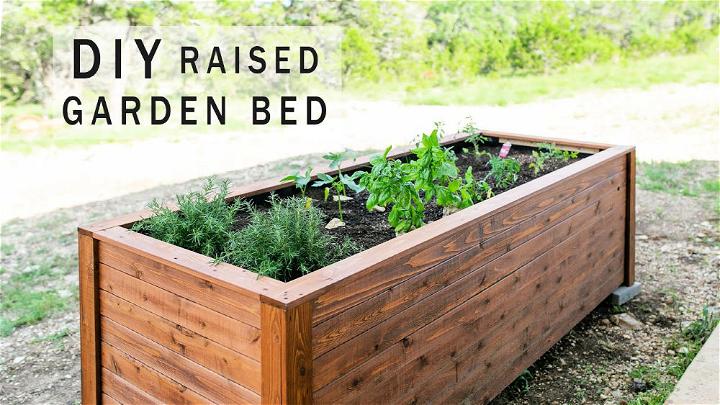
Elevate your gardening experience with a DIY Raised Garden Bed complete with convenient drawers! This innovative project, crafted from durable western red cedar, is perfect for space-saving and easy maintenance. It features a unique submergible self-watering irrigation system, ensuring your plants thrive with minimal effort. Ideal for those with rocky terrain or seeking to avoid strain on knees and back, this garden bed is both practical and aesthetically pleasing.
The detailed guide includes material selection (waterproof wood glue and cedar), frame construction, and irrigation system installation. Featuring tool storage drawers, this raised garden bed combines functionality and charm, making it a must-try project for gardening enthusiasts and DIY lovers.
48. DIY Raised Garden Bed in 3 Min
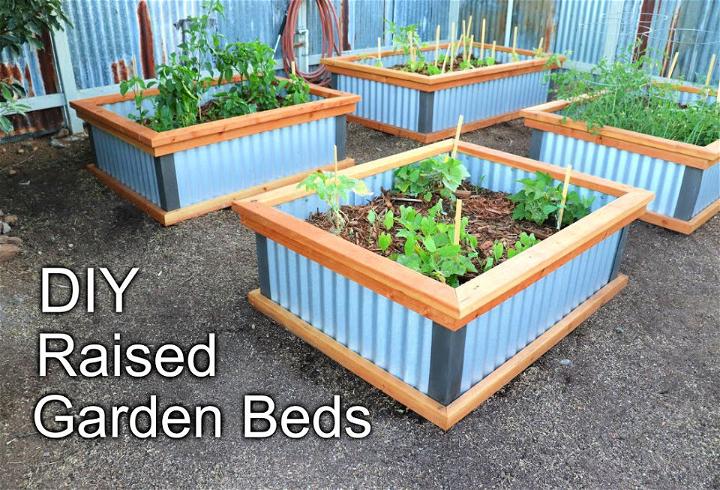
Elevate your gardening experience with a DIY Raised Garden Bed, crafted using corrugated metal roofing and basic lumber for durability and aesthetics. Ideal for various plants, this bed offers efficient space management in your garden. The construction involves building two identical lumber frames, attaching corner roof flashing, and adding a protective top cap. This method provides a safe and stylish edge, preventing cuts from the metal.
The beds, customizable in size, are perfect for both seasoned gardeners and those new to the craft. With a straightforward process and common tools, transform your garden into a thriving, visually appealing space. Ideal for various climates, these raised beds ensure plant health with minimal heat transfer to the soil for longevity.
49. Make Your Own Raised Garden Bed
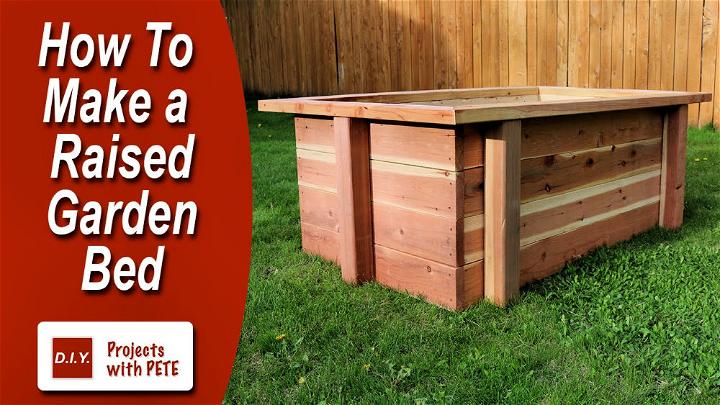
Embark on a journey to build your own raised garden bed with DIY Pete and Johnny of Sage Gardeners. This instructional video, set in the picturesque Gallatin County, Montana, offers a step-by-step guide on constructing a raised garden bed using easily accessible materials like 2×6 and 4×4 boards. Perfect for enhancing any outdoor space, this project not only adds aesthetic appeal but also serves a noble cause. By following the clear-cut measurements, miter cuts for corners, and assembly tips, you can build a sturdy, functional garden bed.
Ideal for growing vegetables or flowers, this DIY venture is more than just a gardening activity; it’s a way to connect with community and nature. Whether you’re crafting it for personal use or to support the elderly through gardening, this guide ensures a rewarding experience. Join the movement and contribute to a greener, more connected world.
50. Free Raised Garden Bed Plans
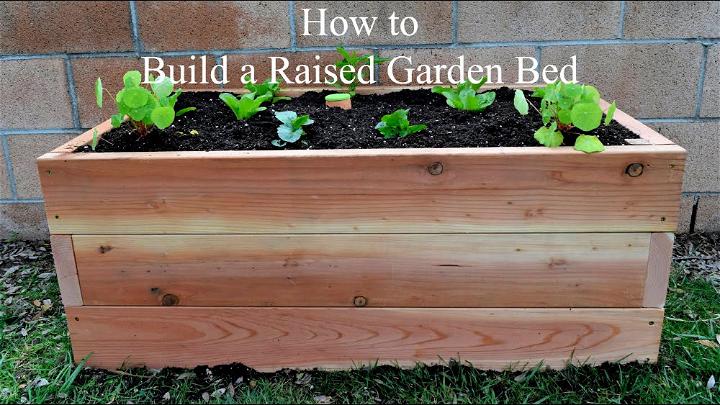
Embark on your gardening journey with our engaging tutorial on constructing a raised garden bed! This guide takes you step-by-step through the process, starting with the selection of durable redwood or cedar. Essential tools include a miter saw, a drill or impact driver, decking screws for secure assembly, and a tape measure for precise cuts. Learn to design your bed with optimal dimensions and height, ensuring comfort for your back and the health of your plants. Our video also covers adding support braces for larger beds, and offers tips for weed and pest control. Craft a sturdy, elegant raised bed and transform your garden space with this DIY project!
42 Hummingbird Flowers That Can Attract Hummingbirds Easily
50 Walkway Ideas To Install By Yourself Cheaply
50 DIY Outdoor Privacy Screen Ideas You Can Build By Yourself
Conclusion:
In conclusion, our comprehensive guide on 50 DIY raised garden bed plans equips you with all the necessary information to embark on your gardening journey. Whether you’re looking to enhance your outdoor space or optimize plant health, these plans provide a versatile and accessible solution.
We’ve covered the essentials from selecting the right location, choosing suitable materials, to building techniques and maintenance tips. By implementing these strategies, you’ll be well on your way to making a flourishing garden that not only looks great but also yields impressive results. We hope this guide inspires you to get started on your DIY raised garden bed project with confidence and enthusiasm. Happy gardening!
