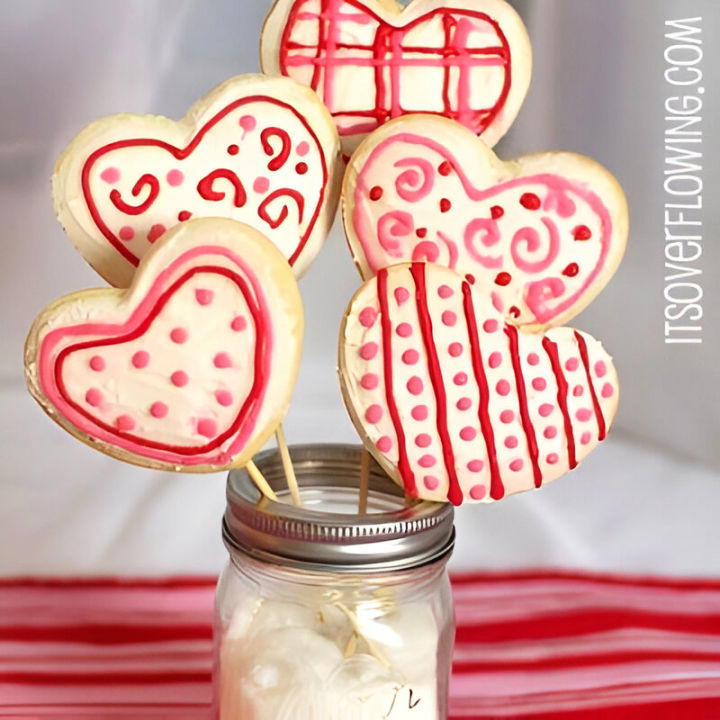
Valentine’s Day is always a wonderful time to show those around us how much we care. And what better way to express that love than with a homemade treat? This year, I decided to try my hand at making a Valentine’s Day cookie bouquet—an edible arrangement of sweet, beautifully decorated heart-shaped cookies. It’s a creative twist on the traditional gift of flowers, and I found it to be both fun and surprisingly simple to put together.
In this guide, I will share with you my step-by-step process for creating a charming cookie bouquet, starting with my favorite sugar cookie recipe. I’ll share the lessons I learned along the way, some tips and tricks that helped me, and a few stories that made this experience even more memorable. Whether you’re a seasoned baker or a beginner, I hope my insights help you create a beautiful, delicious bouquet for your loved ones.
Ingredients and Materials You’ll Need
Before we dive into the steps, let’s gather everything we need to make this cookie bouquet come to life. Here’s what you’ll need:
For the Sugar Cookie Cutouts
- 1/3 cup butter – Adds that classic rich flavor.
- 1/3 cup shortening – Helps achieve a softer, more tender cookie.
- 3/4 cup sugar – For sweetness and a slight crispness.
- 1 teaspoon baking powder – Gives the cookies just a bit of lift.
- 1 egg – Binds everything together.
- 1 teaspoon vanilla – A must for that sweet, fragrant aroma.
- 2 cups all-purpose flour – The base of our cookies.
For the Spreadable Frosting
- 1/4 cup soft butter – Gives the frosting a rich taste.
- 1/4 cup white Crisco – Helps stabilize the frosting for decoration.
- 1/2 teaspoon lemon juice – Adds a hint of tang to balance the sweetness.
- 2 cups powdered sugar – The key to a sweet, smooth frosting.
- 2-3 tablespoons milk – Adjusts the consistency.
- 1/4 cup of cream – Provides richness and helps with consistency.
Other Materials
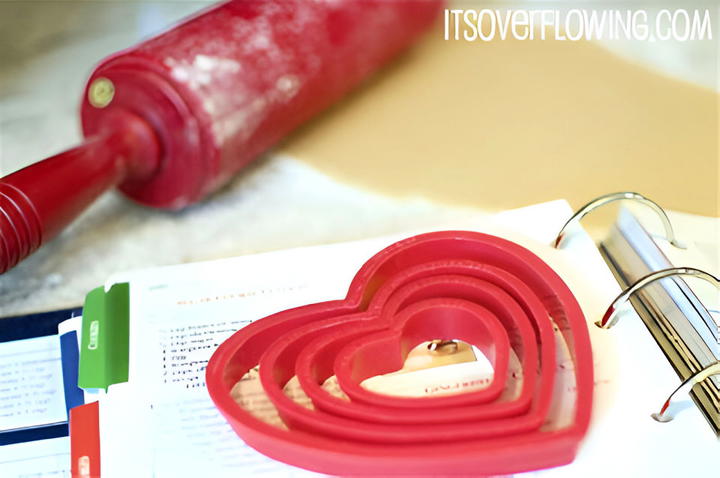
- Heart-shaped cookie cutters – For that classic Valentine’s look.
- Parchment paper – Keeps the cookies from sticking to the pan.
- Skewers – To turn our cookies into a bouquet.
- Mason jars – Acts as the vase for the bouquet.
- Styrofoam ball – Holds the skewers in place inside the jar.
- Decorative sugar and sprinkles – For that extra flair.
Step-by-Step Instructions to Create the Cookie Bouquet
Make a cookie bouquet with our step-by-step guide for a stunning edible arrangement perfect for any occasion. Easy instructions and tips are included!
Step 1: Preparing the Sugar Cookie Dough
My journey began with the classic sugar cookie dough. I love this recipe because it’s straightforward and results in cookies that hold their shape well when cut and baked—essential for a beautiful bouquet!
Start by preheating your oven to 375°F (190°C). In a large mixing bowl, beat the butter and shortening together for about 30 seconds on medium-high speed. This combination of fats helps give the cookies a perfect balance of flavor and texture. Slowly add in the sugar, baking powder, and a dash of salt, continuing to mix until everything is well combined.
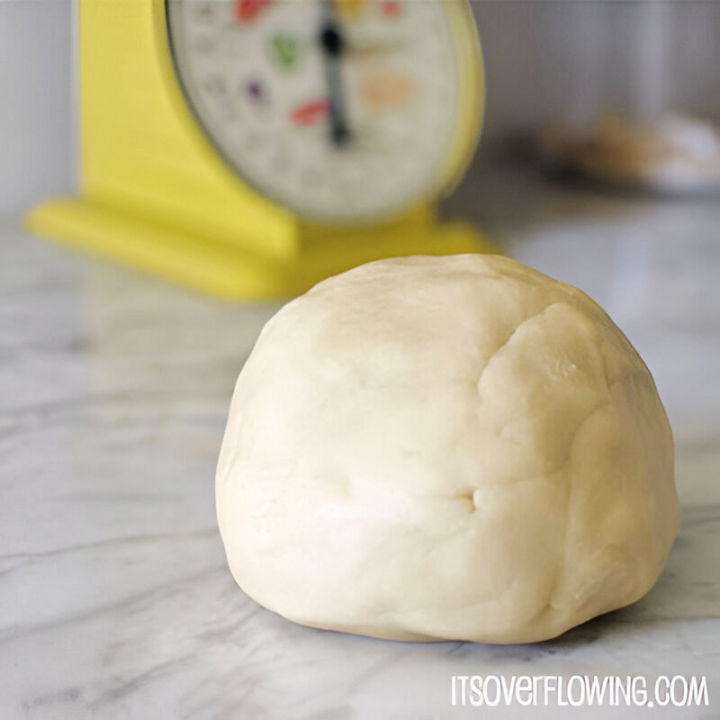
Next, add the egg and vanilla, mixing them in thoroughly. Gradually incorporate the flour, mixing until the dough is just combined. The dough will be soft but should hold together well. At this point, I noticed that my dough was a bit sticky, so I wrapped it in plastic wrap and refrigerated it for two hours. This chilling step is crucial; it makes the dough easier to handle and roll out later on.
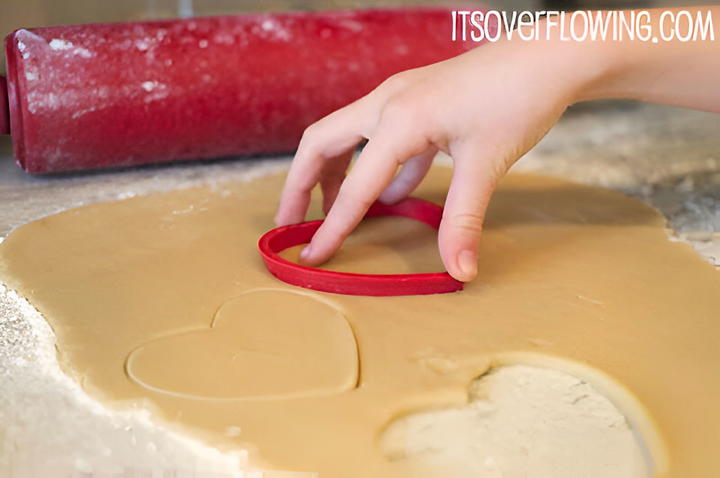
Step 2: Rolling Out and Cutting the Dough
Once the dough has chilled, it’s time to roll it out. Lightly flour your work surface to prevent sticking, and roll the dough to about 3/8 of an inch thick. This thickness is slightly more than the typical cutout cookie, but I found that it helped the cookies stay sturdy when adding the skewers later on.
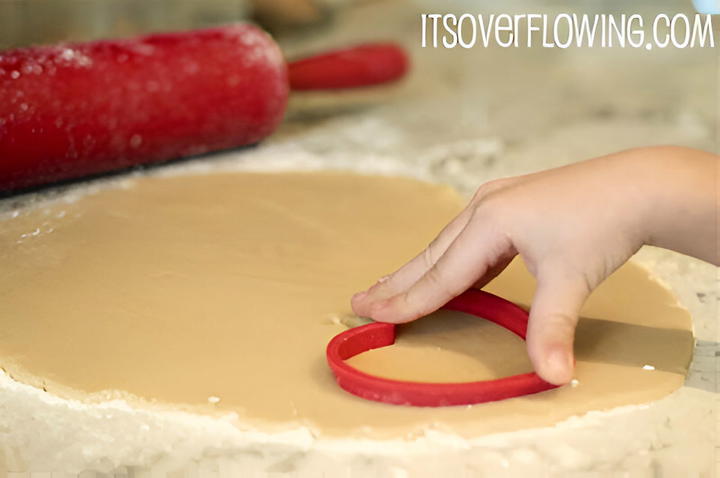
Cut out heart shapes using your cookie cutters. I let my little ones help with this part—they love getting involved, and it’s a great way to make some cherished holiday memories. There’s something special about watching them proudly display their handiwork in the form of these beautiful cookies.


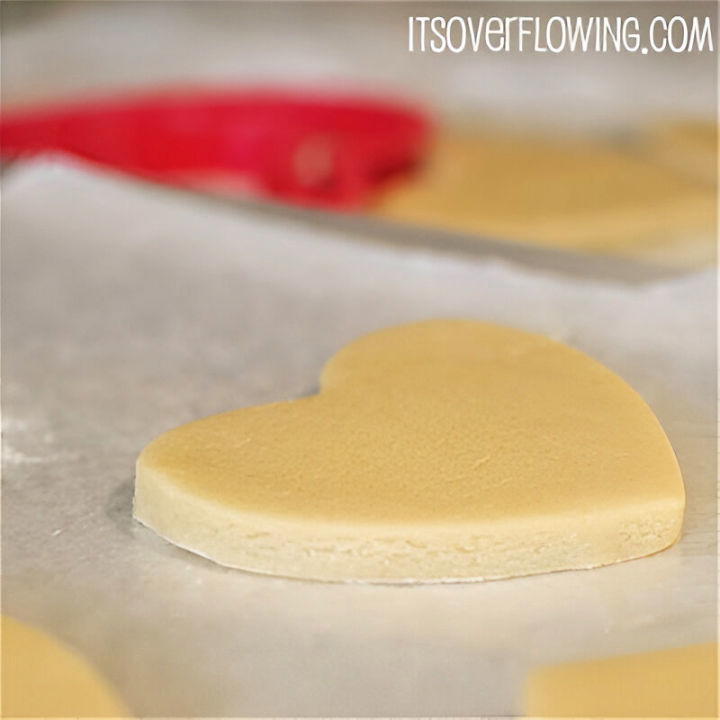
Step 3: Preparing for Baking
Place the cut-out cookies onto a baking sheet lined with parchment paper. Even though the recipe mentions using an ungreased pan, I decided to play it safe and use parchment paper. It worked perfectly, keeping the cookies from sticking and making cleanup a breeze.
Step 4: Baking the Cookies
Bake the cookies in your preheated oven for about 8 minutes or until they’re just starting to turn a light golden brown. Keep a close eye on them—every oven is a little different, and these cookies can go from perfect to overdone quickly. When they’re done, remove them from the oven and let them cool on a rack completely. This cooling step is essential; you don’t want the frosting to melt when you decorate!
Step 5: Making the Frosting
While the cookies were cooling, I started on the frosting. This frosting recipe is one of my favorites because it’s thick enough to hold its shape but still spreads easily. Begin by beating the butter, Crisco, and lemon juice together with an electric mixer. Slowly add half of the powdered sugar and mix until smooth. Add a bit of milk, then gradually add the remaining powdered sugar, beating continuously until well combined. You can adjust the consistency by adding more cream, a little at a time. For this cookie bouquet, I kept the frosting relatively thick so it would stay put and not drip off the cookies.
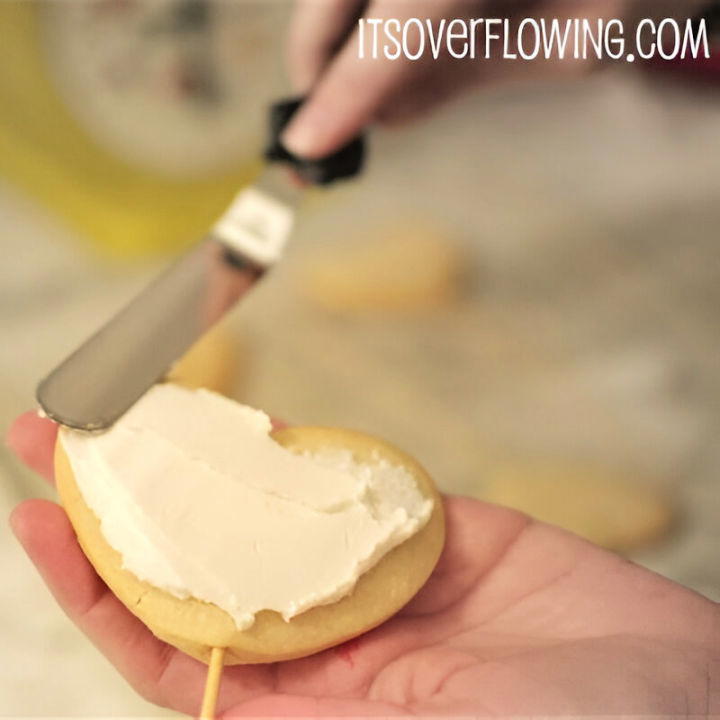
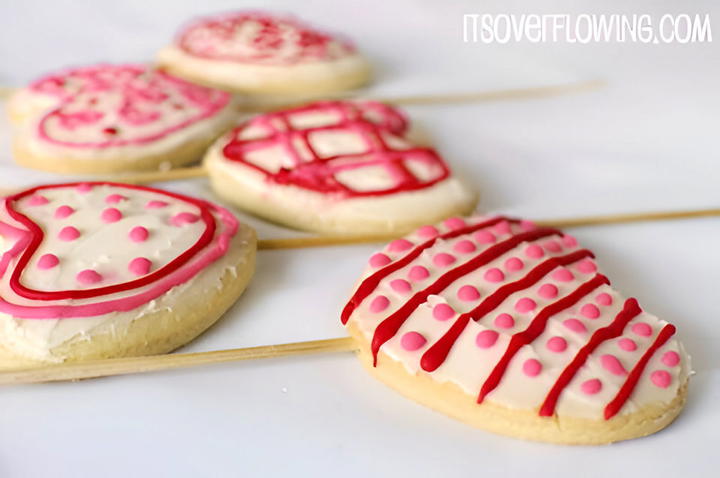
Step 6: Decorating the Cookies
Once the cookies are completely cooled, it’s time to decorate! This is where you can really let your creativity shine. Spread a thin layer of frosting on each cookie, and then go wild with sprinkles, colored sugars, and any other decorations you have on hand. I love thinking about the smiles these cookies will bring as I decorate them—each one is a little piece of love to share.
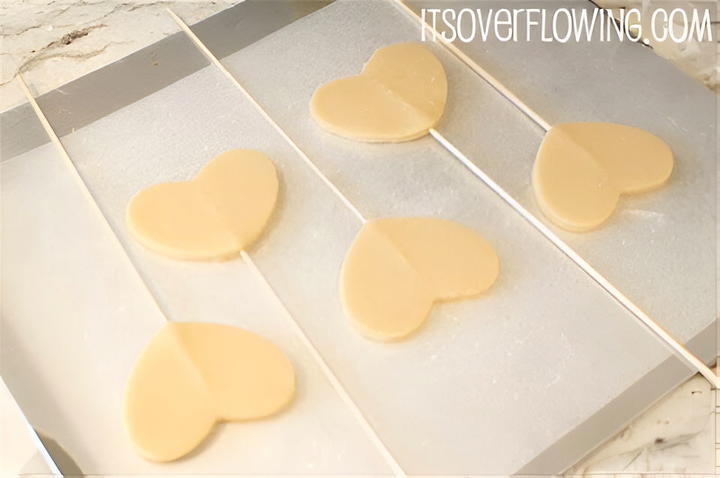
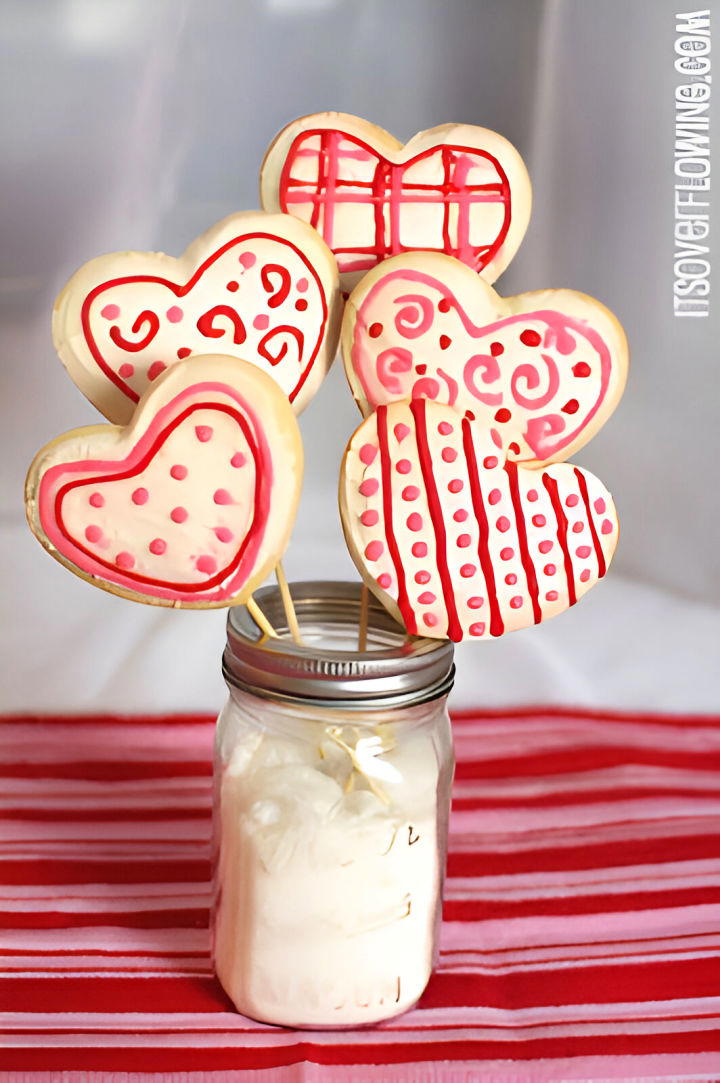
Step 7: Assembling the Cookie Bouquet
To assemble the bouquet, I started by placing a styrofoam ball at the bottom of a mason jar. This ball will hold the skewers in place and keep the cookies standing upright. Next, I filled the jar with sugar to give it a decorative look and provide additional support for the skewers.
Arranging the cookies was a bit of a puzzle. I experimented with the placement to ensure each cookie was visible and aesthetically pleasing. For some cookies, I had to trim the skewers to different lengths to achieve the desired effect. The result was a lovely, layered look that displayed the cookies beautifully.
Step 8: Presenting Your Gift
The final step is to share your cookie bouquet with someone special! This gift is perfect for teachers, grandparents, friends, neighbors, or anyone you want to surprise with a sweet treat. I only wish I could personally deliver these bouquets to all my loved ones and see the joy on their faces. But even without being there, I know these cookies will bring smiles and warmth.
Tips and Tricks for the Perfect Cookie Bouquet
- Chill the Dough Properly: Don’t skip the chilling step for the dough; it makes all the difference in handling and shaping the cookies.
- Watch the Oven: Since the thickness of these cookies is a bit more than usual, they can bake unevenly. Keep an eye on them, and rotate the pan halfway through if needed.
- Decorate with Love: The more personal and thoughtful the decorations, the more your gift will be appreciated.
- Use Fresh Ingredients: Fresh butter, vanilla, and high-quality flour can make a noticeable difference in flavor.
- Adjust Skewers for Depth: Cutting skewers to different lengths adds depth and makes for a more visually appealing bouquet.
Making a Valentine’s Day cookie bouquet is more than just baking; it’s about creating something beautiful and meaningful. I hope you enjoy this recipe and that it brings you as much joy as it brought me. Happy Valentine’s Day, and may your home be filled with love and sweetness!
Related posts:
 15 Quick Recipes for Salted Caramel Cookies
 15 Quick and Easy Homemade Donuts Recipe
 15 Best Homemade Cottage Cheese Recipes
 15 Homemade Chicken Soup Recipe
 15 Best Homemade Maple Syrup Recipes
 15 Quick and Easy Homemade Apple Cider Vinegar Recipes
 15 Quick and Easy Homemade Poultry Seasoning Recipe
 20 Easy Instant Pot Buffalo Chicken Recipes
 15 Best Orange Chicken Recipe With Orange Marmalade
 60 Easy 4th Of July Food Ideas / 4th Of July Recipes
 Baja Chicken Wraps Recipe
 Simple DIY Cupcake Toppers {Semi-Homemade}